-This post may contain affiliate links. If you click on one and make a purchase, I may earn a small commission at no extra cost to you.-
🚀 Introduction
So, you’re thinking about building your own PC.
Maybe you’re a student tired of slow laptops.
Maybe you’re a budget gamer who wants better frame rates.
Or maybe you’re a parent trying to gift your kid a computer they can be proud of.
Whatever your reason — building a custom PC isn’t just about saving money.
It’s about understanding what’s inside your system, tailoring it to your needs, and getting the satisfaction of pressing that power button and saying:
“I built this.”
The good news?
Even if you’ve never touched a screwdriver, this guide will walk you through the entire process — step by step.
From choosing the right components to assembling the hardware, installing Windows, and even testing performance, you’ll learn everything you need to build your first desktop confidently.
You’ll also get:
-
Clear explanations of each part and why it matters
-
Compatibility tips (Intel vs AMD, ATX vs Micro-ATX)
-
Use-case breakdowns for gamers, freelancers, and casual users
-
Mistakes to avoid & smart wiring tips
-
Read deeper guides like how to build a gaming PC from scratch and classic game system builds
Let’s open the case — literally.
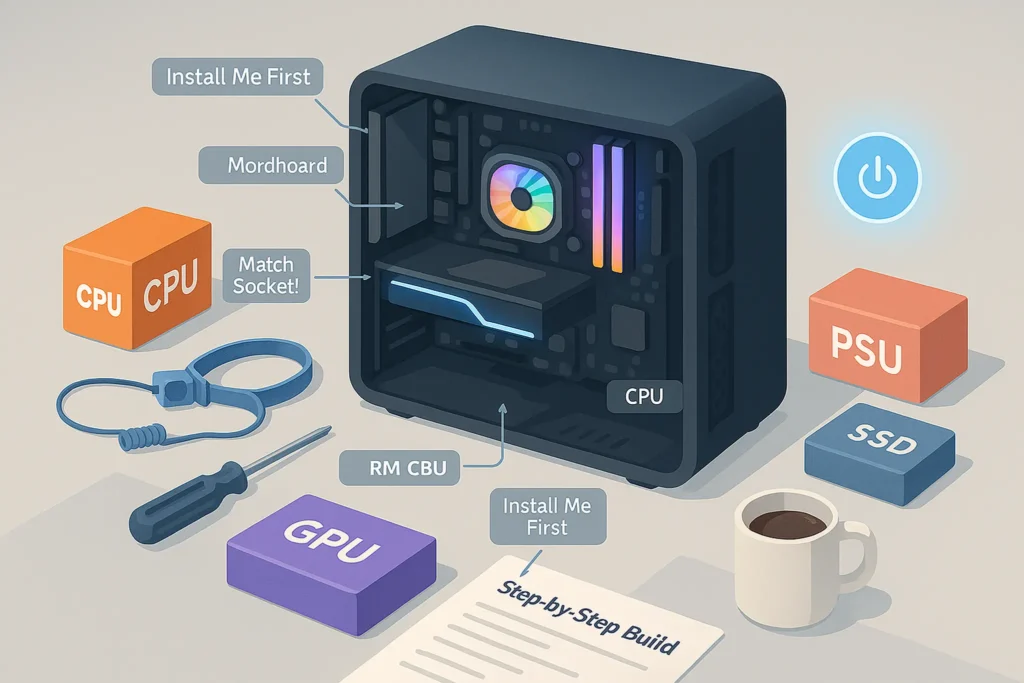
🧱 Step-by-Step Guide to Building a Custom PC
Building a PC is like putting together a puzzle — every piece has a place and a purpose. Here’s how to do it right, one step at a time.
🧠 Step 1: Understand the Core Components
Before you dive into buying parts, it’s essential to understand what each component does — and how it affects your system’s performance. Here’s a detailed look at the core building blocks of any custom PC:
🧩 CPU (Processor)
The CPU handles all the general instructions your computer processes. From opening apps to loading websites and rendering videos, it’s the central unit doing the thinking.
-
Intel CPUs are known for high single-core performance and excellent gaming results.
-
AMD Ryzen CPUs offer great multitasking, often with better price-to-core ratios — ideal for creators and streamers.
💡 Tip: For most users, a mid-tier CPU like Intel Core i5-13400F or AMD Ryzen 5 5600 offers a sweet spot between price and performance.
If you’re confused between Intel and AMD, check out our compatibility table below.
✅ Look for popular entry-level CPUs like Intel i5-13400F or Ryzen 5 5600 — powerful yet budget-friendly.
🧩 Motherboard (Mainboard)
Connects everything together. Choose one that matches your CPU socket (e.g., LGA1700 for Intel 13th Gen, AM4 for Ryzen), and your case size (ATX, Micro-ATX).
Think of the motherboard as the backbone of your PC. It determines what kind of CPU, RAM, storage, and expansion options you can use.
Key factors to consider:
-
Socket compatibility (e.g., LGA1700 for Intel 13th Gen, AM5 for latest Ryzen)
-
Form factor (ATX = full-size, Micro-ATX = compact)
-
Features like built-in Wi-Fi, M.2 slots, USB-C headers, RGB support
🛠️ Nerd Tip: If you’re new to PC building, go for a B-series motherboard (like B550 for AMD or B660 for Intel) — they offer stability without bloated features or high prices.
For retro-style system builds, you can explore our guide on how to build your own classic game system.
🧩 RAM (Memory)
RAM stores temporary data for apps and multitasking. The more you have, the smoother your system feels — especially when running multiple programs or browser tabs.
Temporary memory that helps your PC multitask.
-
16GB is the new baseline for gaming, browsing, and productivity
-
32GB+ is ideal for video editors, streamers, and designers
-
Choose between DDR4 (more compatible and cheaper) and DDR5 (faster, more future-proof)
📌 RAM speed (measured in MHz) and latency also affect performance — look for at least 3200MHz CL16 for DDR4 kits.
Minimum today is 16GB, but creative professionals may want 32GB or more.
🧩 GPU (Graphics Card)
Needed for gaming, rendering, or video editing.
If you’re building for high-end gaming or AI workloads, don’t miss our Nvidia GeForce RTX 5090 Review to see what next-gen performance looks like.
The GPU handles anything visual — from gaming to 3D modeling to video editing. It’s also crucial for AI tasks and real-time rendering.
-
NVIDIA RTX Series (e.g., 4060, 4070, 5090) are known for ray tracing and DLSS
-
AMD Radeon GPUs often offer better value in the mid-range
🧠 Note: If you’re not gaming or editing videos, integrated graphics (like on Ryzen G-series or Intel iGPUs) may be all you need.
🧩 Storage (SSD/HDD)
Storage is where your OS, games, files, and software live.
-
SSD (Solid State Drives) are fast, quiet, and have no moving parts. They come in two types:
-
SATA SSDs (cheaper, still fast)
-
NVMe SSDs (ultra-fast, direct-to-motherboard via M.2 slot)
-
-
HDDs (Hard Disk Drives) are cheaper per GB but slower. Still useful for large media libraries or backups.
🎯 Suggested combo:
-
500GB+ NVMe SSD (for Windows & programs)
-
1TB+ HDD (for videos, games, and storage)
Use an NVMe SSD for fast boot times and app loading.
For mass storage (games, videos), add a 1TB HDD or second SSD.
🧩 Power Supply Unit (PSU)
Provides electricity to all components. Make sure it’s certified (80+ Bronze or better) and has enough wattage for your GPU.
The PSU delivers stable power to all components. A bad PSU can cause crashes or even damage your hardware.
Important factors:
-
Wattage: Estimate total system draw and add ~20% headroom (e.g., 650W is solid for most mid-range builds)
-
Certification: Look for 80+ Bronze or better for efficiency
-
Modular cables: Make cable management easier
🧠 Warning: Never cheap out on PSUs. Stick to trusted brands like Corsair, EVGA, Seasonic, or be quiet!
🧩 Case (Tower)
Where everything lives. Choose one based on size (ATX/MATX), airflow, and aesthetics.
Tip: Look for a case with pre-installed fans and front USB-C.
Your case is more than just looks. It affects airflow, noise levels, and how easy the build process is.
Choose based on:
-
Form factor (ATX, Micro-ATX, Mini-ITX)
-
Front panel ports (USB-C, audio jacks)
-
Cable routing space
-
Pre-installed fans or airflow design
🎨 Some cases offer tempered glass panels and RGB setups, while others focus on silence and airflow. Pick what fits your vibe and your components.
❄️ CPU Cooler – Air vs Liquid Cooling
Most CPUs come with stock coolers — which work fine for basic users. But if you’re gaming, editing, or want a quieter system, investing in a better cooling solution is smart.
🌀 Air Coolers:
-
Cheaper
-
Easier to install
-
Great reliability
-
Example: Cooler Master Hyper 212 Black Edition
💧 AIO Liquid Coolers:
-
Better thermal performance
-
Quieter under load
-
Cleaner aesthetics (good for glass-panel cases)
-
Sizes: 120mm / 240mm / 360mm radiators
🧊 Nerd Insight: If you’re running a Ryzen 9 or Intel i9, consider at least a 240mm AIO to keep thermals in check during rendering or gaming.
🛒 Step 2: Buy Compatible Parts
Now that you know what each part does, it’s time to buy.
-
Use PCPartPicker.com to check compatibility
-
Set a realistic budget — e.g., $600 for a casual PC, $1200 for mid-range gaming, $2000+ for creative workstations
-
Look for deals and bundles
-
Consider supported parts via Amazon or Newegg for peace of mind and easy returns
🔧 Step 3: Assemble the PC
Now for the fun part — putting it all together.
1. Prep your workspace
Clean table, anti-static mat (or at least touch grounded metal before handling parts)
2. Install the CPU
Gently place the CPU into the socket on your motherboard. Align the triangle and don’t apply pressure.
3. Install RAM
Push the sticks into the RAM slots until they click.
Tip: Use slots 2 and 4 for dual-channel memory.
4. Mount the motherboard
Screw it into the case using the correct standoffs. Don’t overtighten.
5. Install storage
Mount your SSD or HDD. If using NVMe, install it directly onto the motherboard’s M.2 slot.
6. Install PSU
Secure the power supply into the case and route the main power cables.
7. Install GPU
Insert the graphics card into the PCIe slot, then connect its power cables from the PSU.
8. Connect all cables
Power (24-pin, 8-pin CPU), SATA, USB, front panel, fans — follow your case and motherboard manual carefully.
💽 Step 4: Install Windows and Drivers
-
Use another PC to create a Windows 11 bootable USB
-
Boot your new PC and enter BIOS (usually
DELorF2) -
Select USB as the boot drive
-
Follow installation steps
After Windows installs:
-
Install GPU drivers (NVIDIA/AMD)
-
Install chipset & LAN drivers (from motherboard’s site)
-
Run Windows Update
🧪 Step 5: Test Your Build
After boot-up, test performance:
-
Use Cinebench or UserBenchmark for CPU/GPU stress tests
-
Use HWMonitor to check temps
-
Make sure all fans spin, RGB lights (if any) work, and there are no error beeps
📊 Compatibility Table: Intel vs AMD | ATX vs MicroATX
Choosing the right parts is about more than specs — it’s about compatibility. Here’s a simplified overview to help you avoid mismatches:
| Component | Option A | Option B | What to Know |
|---|---|---|---|
| CPU Brand | Intel (e.g. i5-13400F) | AMD Ryzen (e.g. 5600X) | Choose based on performance, price, and use case |
| Socket Type | LGA1700 | AM4 / AM5 | Must match your motherboard socket |
| Motherboard Size | ATX | MicroATX | ATX = more ports, MicroATX = smaller cases |
| RAM Type | DDR4 | DDR5 | DDR5 is newer/faster, but DDR4 is still widely used |
| GPU Clearance | Full-size GPU | Compact GPU | Check your case’s max GPU length |
| Power Supply | 550–750W Bronze | 850W+ Gold | Depends on GPU wattage and future upgrades |
✅ Nerd Tip: Always double-check your case size and airflow support before finalizing your parts. A MicroATX board in a compact case may block airflow for larger GPUs.
🧑💻 Use-Case Layering: 3 Builds Based on Real-Life Scenarios
Not all PCs are built the same — and they shouldn’t be. Here’s how to approach your build based on who you are and what you need:
🧍♂️ Scenario 1: The Home User
Profile: Student, parent, casual web user
Goal: Fast browsing, video calls, office work, light media consumption
Recommended Build:
-
CPU: Intel i3 / Ryzen 5 5600G (with integrated graphics)
-
RAM: 16GB
-
Storage: 512GB NVMe SSD
-
GPU: Not needed
-
Case: MicroATX
Why this works: Quiet, affordable, and easy to build. No GPU means fewer complications and less power draw.
🎮 Scenario 2: The Budget Gamer
Profile: Casual to semi-serious gamer looking for 1080p performance
Goal: Run modern games smoothly without overspending
Recommended Build:
-
CPU: Intel i5-13400F or Ryzen 5 5600
-
GPU: RTX 4060 / RX 7600
-
RAM: 16GB
-
Storage: 1TB SSD
-
Case: ATX with good airflow
Why this works: You’ll get 60–120fps in most games without breaking $1000. Plus, the build is upgradable later — or you can go high-end right away with something like the RTX 5090 if budget allows.
🧑🎨 Scenario 3: The Creative Freelancer
Profile: Video editor, 3D designer, content creator
Goal: Max power for rendering, multitasking, and toolchains like Adobe/DaVinci
Recommended Build:
-
CPU: AMD Ryzen 9 / Intel i7
-
GPU: RTX 4070 / 4080
-
RAM: 32–64GB
-
Storage: 1TB NVMe + 2TB HDD
-
Case: ATX (quiet airflow, sound-dampening)
Why this works: You need raw horsepower. Speed saves time, and time = money. This build is built for heavy tasks and future expansion.
🎁 Bonus: Common Mistakes & Cable Management Tips
Even experienced builders slip up sometimes. Here are the most common rookie mistakes — and how to avoid them:
❌ Common Mistakes
-
Forgetting to plug in CPU power (EPS 8-pin)
-
Installing RAM in wrong slots (check your motherboard manual!)
-
Not removing case standoffs → short circuit risk
-
Not applying thermal paste (if not pre-applied)
-
Blocking airflow by stuffing cables anywhere
🔌 Cable Management Tips
-
Route cables behind the motherboard tray
-
Use Velcro straps or zip ties
-
Leave room for airflow — especially between GPU and front fans
-
Don’t stretch cables too tight — allow gentle curves
🧠 Bonus Nerd Tip: Build the system outside the case first (on the motherboard box) and test it — then transfer it into the case. This saves hours of troubleshooting later.
🧠 Nerd Verdict
Building your own PC isn’t just a fun project — it’s a rite of passage for anyone who loves tech, gaming, or wants to take control of their digital life.
You don’t need to be an engineer. You just need the right guide, the right parts, and the confidence to plug things in one step at a time.
For me, the first time I powered on my own build — and saw the fans light up and Windows boot without error — I felt like a total boss.
So here’s my advice:
-
Start simple, don’t overcomplicate
-
Plan before you buy, compatibility matters
-
Take your time, enjoy the process
-
And remember: You built this.
Now go claim your spot in the PC Master Race.
❓ FAQ: Nerds Ask, We Answer
How hard is it to build a PC for the first time?
It’s easier than you think — especially with guides like this one. If you can follow IKEA instructions, you can build a PC.
Is it cheaper to build your own PC?
Yes — often you’ll get better performance for the same price compared to prebuilt systems. Plus, you avoid bloatware and get to choose every component.
What tools do I need?
All you need is:
-
A Phillips screwdriver
-
A clean table
-
A bit of patience
Anti-static wrist straps are nice, but not mandatory if you’re careful.
Can I upgrade later?
Absolutely. One of the biggest advantages of building your own PC is modularity — you can swap out the GPU, add RAM, or upgrade storage anytime.
💬 Would You Bite?
What’s your biggest fear about building a PC for the first time?
Drop it in the comments — we’ll answer every question and maybe even build a full post around it 👇

