-This post may contain affiliate links. If you click on one and make a purchase, I may earn a small commission at no extra cost to you.-
🎮 Introduction
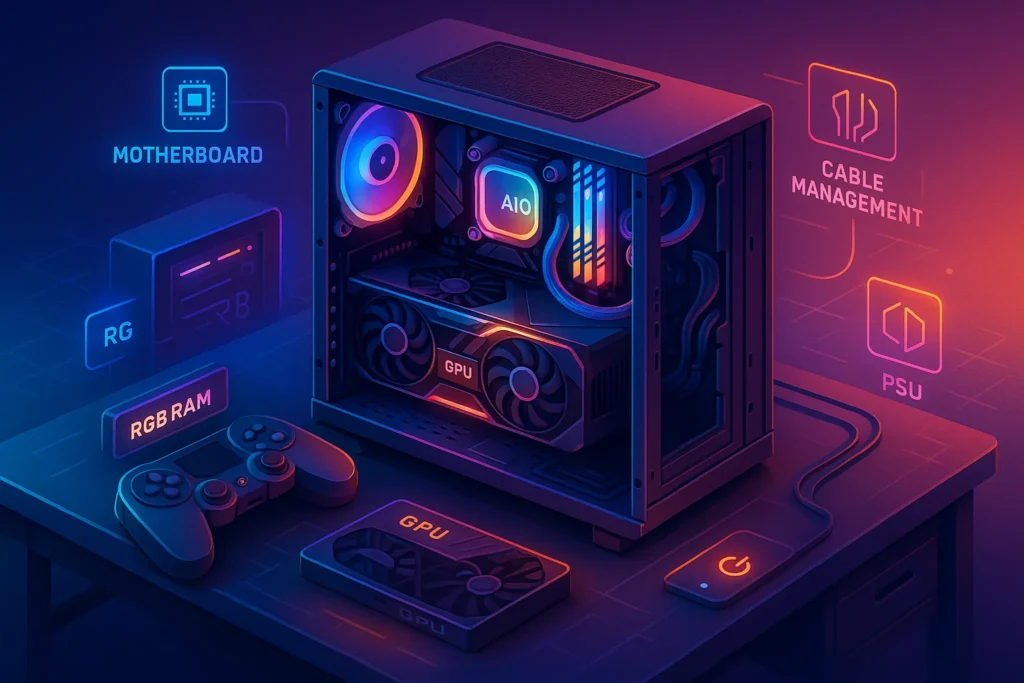
Building your own gaming PC is incredibly rewarding—and in 2025, it’s easier and more powerful than ever. With cutting-edge components like the RTX 5090 Super GPU, Ryzen 9000 CPUs, DDR5 RAM, and USB 4 motherboards, you can craft a system that outperforms many consoles and is fully customizable. This comprehensive guide walks you through selecting compatible parts, assembling everything, installing Windows or Linux, and solving common build issues—whether you’re aiming for 1080p ultra or 4K/144Hz setups.
🧩 Step 1: Choosing Your Components
Careful component selection ensures compatibility, performance, and longevity. Here’s what to consider in 2025.
1. CPU – Processor Powerhouse
-
Intel Core i5‑14600K – 14th-gen hybrid architecture for gaming and streaming
-
AMD Ryzen 5 9600X – 5nm gaming and content creation performance
-
Choose even higher-end (i7/i9, Ryzen 7/9) for heavy multitasking or workstation needs
2. GPU – Visual Brains
-
NVIDIA RTX 5090 Super – next-gen ray tracing, DLSS 3.0+, high-end 4K gaming
-
AMD Radeon RX 8900 XT – AMD’s flagship with RDNA 4 and FreeSync compatibility
-
For 1080p/1440p, consider mainstream GPUs like RTX 4070 Super or RX 7800 XT
3. Motherboard – System Backbone
-
Z790 / B760 (Intel) and X670E / B650E (AMD) supporting PCIe 5.0 and DDR5 are ideal
-
Look for features: NVMe M.2 slots, USB 4, BIOS Flashback, RGB lighting, integrated Wi-Fi 7
4. RAM – Memory Matters
-
Minimum: 16 GB DDR5‑6000 MHz
-
Recommended: 32 GB dual-channel kit—more for streaming or editing
5. Storage – Speed and Capacity
-
Primary NVMe SSD (1–2 TB PCIe 4.0 or Gen 5) for OS & popular titles
-
Secondary SSD or HDD (2–4 TB) for archives and backups
6. Power Supply – The Unsung Hero
-
80 Plus Gold/Platinum, fully modular
-
750 W for mainstream high-end builds, 850 W+ for extreme GPUs like RTX 5090 Super
7. Case – Show, Flow, Ease
-
Mid-tower ATX cases with PSU shroud, tempered glass, 2–4 RGB fans, dust filters
-
Popular 2025 picks: Lian Li Lancool 3 Echo, Fractal Pop Mini Wind, Corsair 5000D Airflow RGB
8. Cooling – Keeping It Chill
-
AIO Liquid Cooler (240 mm) or High-End Air Cooler for CPUs
-
RGB fans, fan controllers, optional GPU backplate cooling for undervolting
✅ Pro Tip: Component Picker Tools
Use PCPartPicker to verify compatibility, compare prices, and adjust builds to your budget.
🔧 Step 2: Assemble Your PC
🧠 Why the installation order matters:
-
Always install CPU, RAM, and M.2 SSD before placing the motherboard in the case. It gives you easier access and reduces the chance of bending pins or damaging components.
-
If you’re using an AIO cooler, install the backplate and bracket before mounting the motherboard.
⚠️ Pro Assembly Tips:
-
Never force components. If your RAM or CPU isn’t seating easily, double-check the notch alignment or CPU arrow position.
-
Double-check that the 24-pin motherboard and 8-pin CPU power cables are fully clicked in—loose power connections are a top cause of failed boot.
-
Mount your GPU in the top PCIe x16 slot for maximum bandwidth, and ensure the PCIe latch clicks into place.
Now comes the assembly—the heart of the build. Follow these steps carefully.
-
Prep Workspace: Clean workspace, adequate lighting, room on the desk. Use an anti-static wristband or discharge by touching case metal.
-
Install CPU: Open socket, align CPU notches, lock it in.
-
Fit RAM: Press RAM straight down into DDR5 slots until side clips snap into place.
-
Mount M.2 SSD: Slide into the motherboard M.2 slot, secure with a screw or thermal heatsink.
-
Attach Cooler: Follow cooler instructions—apply even pea-size thermal paste or use preapplied.
-
Insert Motherboard into Case: Align against I/O shield, screw in standoffs then mount screws snugly.
-
Install PSU: Mount fan facing out or up depending on case airflow; connect cables loosely routed.
-
Place GPU: Insert into PCIe x16 slot, lock it, and connect required power connectors securely.
-
Connect Case Cables: Front USB, power/reset buttons, RGB connectors, case fans.
-
Cable Management: Use zip ties and routing holes. Good airflow maximizes temperature control.
-
Double-Check Connections: Ensure CPU fan and cooler pump are connected to CPU_FAN/CPU_OPT, GPU power plugged in, and case front-panel headers matched.
⚙️ Step 3: BIOS & Initial Setup
⬆️ Why BIOS updates matter:
-
Updating your BIOS ensures compatibility with the newest CPUs, improves memory stability, and unlocks performance optimizations.
-
If your board supports BIOS Flashback, you can update without even installing the CPU or RAM—super helpful when using newly released CPUs.
Other Tweaks to Consider:
-
Enable Intel Turbo Boost or AMD PBO (Precision Boost Overdrive) for improved dynamic clocking during gaming.
-
Disable CSM (Compatibility Support Module) if you’re booting in full UEFI mode—this improves boot speed and Windows install performance.
-
Adjust fan curve profiles in BIOS for quieter or more aggressive cooling depending on your case airflow and GPU temp behavior.
Time to power on for the first time and configure.
-
First Boot & BIOS Flash:
-
Enter BIOS via Del/F2, update to latest firmware (via BIOS Flashback or USB).
-
-
Enable Performance Features:
-
Enable XMP/EXPO/DOCP profile for DDR5
-
Turn on Resizable BAR and GPU-specific performance options
-
Fan curves in BIOS if available
-
-
Set Boot Priority:
-
Set OS installer USB drive as primary
-
Disable Secure Boot if using Linux
-
-
Save & Exit BIOS.
💿 Step 4: Install Operating System
💡 Windows vs Linux for gaming:
-
Windows 11 offers seamless compatibility with all modern games, anti-cheat systems, ray tracing, and game launchers like Steam, Epic, and Battle.net.
-
Linux (e.g., Nobara, Pop!_OS, or SteamOS) is catching up fast thanks to Proton and Wine, but may still run into occasional issues with new titles or multiplayer games with strict anti-cheat.
Quick Tip After Install:
-
After Windows setup, enable Game Mode, Hardware-Accelerated GPU Scheduling, and Auto HDR for optimal frame rates and smoother performance.
Choose Windows 11 or Linux depending on your needs.
-
Prepare Installation USB:
-
Use Microsoft Media Creation Tool for Windows
-
Create a UEFI-bootable Linux USB with Rufus
-
-
Install OS:
-
Boot from USB, follow prompts, format NVMe SSD to NTFS (or ext4)
-
Create user, skip privacy bloatware, partition wisely (e.g., separate D: drive)
-
-
Update Drivers:
-
NVIDIA/AMD GPU drivers from official websites
-
Motherboard drivers (chipset, audio, networking)
-
Game-ready DirectX and Visual C++ redistributables
-
🧩 Step 5: Performance Tuning
🔧 BIOS-Level Tuning (if not done earlier):
-
Enable XMP (Intel) or EXPO (AMD) profiles in BIOS to run DDR5 RAM at full rated speeds (e.g., 6000 MHz).
-
Turn on Resizable BAR (Intel) or Smart Access Memory (AMD) for performance boosts in modern titles (especially at 1440p and 4K).
🕹️ OS-Level Optimizations:
-
In Windows:
-
Set power plan to High Performance or Ultimate Performance.
-
Disable unnecessary startup programs using Task Manager → Startup tab.
-
In Display Settings → Graphics, set high-performance GPU as default for all games.
-
-
In Linux:
-
Use
GamemodeandMangoHudfor real-time performance tuning -
Run
sudo powertop --auto-tunefor better CPU energy balance
-
🧪 Monitoring Tools (Recommended):
-
MSI Afterburner: Live GPU temp, FPS overlay, fan tuning, OC
-
HWiNFO64: Detailed CPU/GPU/VRM temp logs and power draw
-
OCCT or Cinebench: Stability and thermal stress testing
⚠️ Warning: Always stress test changes before heavy gaming. A 100 MHz GPU overclock might boost frames—or crash your session if unstable.
-
Set BIOS Power Plan:
-
Windows: Performance power profile
-
Linux: adjust
sudo powertopandsudo intel-microcodeas needed
-
-
GPU Settings:
-
Use Performance Mode in Nvidia Control Panel or AMD Radeon Settings
-
If overclocking, test stability in benchmarks (e.g., 3DMark)
-
-
Fan & Noise Management:
-
Use case software or BIOS curves to keep noise low while cooling well
-
-
Enable Resizable BAR / Smart Access Memory: Optimize CPU-GPU communication
-
Benchmark & Monitor Temps:
-
Use HWMonitor, MSI Afterburner, or HWiNFO
-
Adjust volting/clock to balance thermals and performance
-
🛠️ Step 6: Troubleshooting Common Issues
🚫 PC won’t turn on at all?
-
Ensure power supply switch is ON, and check wall outlet power
-
Reseat 24-pin and 8-pin CPU cables—even slightly loose cables will prevent POST
-
Try booting with only CPU, 1 stick of RAM, and motherboard outside the case (test bench style)
🖥️ No display but fans spin?
-
Reseat GPU and double-check HDMI/DisplayPort cable plugged into GPU, not motherboard
-
Swap monitor inputs or test a different cable
-
If you hear POST beeps (on boards with speakers), count them—error codes can tell you what’s wrong
🔁 Reboot loop or stuck at BIOS logo?
-
Try clearing CMOS using jumper or button on motherboard
-
Reinsert RAM, try one stick at a time, in different slots
-
Disconnect unnecessary drives/peripherals until stable boot occurs
🧊 High temperatures at idle?
-
Reapply thermal paste (especially if using custom coolers)
-
Ensure cooler is firmly mounted and fans are spinning
-
Check BIOS to see if CPU fan header is assigned properly (i.e., not set to “Disabled”)
-
No power: Check PSU switch, front panel connection, motherboard 24-pin + CPU 8-pin plugged.
-
No display / POST: Reseat GPU, check cable, test with integrated graphics or alternate GPU.
-
Boot loop: Clear CMOS via button/jumper and load BIOS defaults.
-
OS install errors: Use DiskPart (Windows) to clean partitions; ensure NVMe mode is enabled.
-
Overheating: Re-seat cooler, reapply quality thermal paste, adjust fan curves.
🧠 Step 7: Extras, Upgrades & Maintenance
🔼 Upgrade Paths to Plan For (2025–2027):
-
GPU: Most builds using RTX 4070–5090 or RX 7800+ can expect solid performance for 2–3 years. Future upgrades to RTX 5090 Ti or Radeon RX 9000 series will likely require just a PSU check.
-
RAM: Leave two DIMM slots open if possible to expand from 32 GB to 64 GB later.
-
Storage: Ensure your motherboard has extra PCIe Gen 4/5 M.2 slots for future SSDs—Gen 5 drives in 2025 can hit 12,000 MB/s.
-
Cooling: Add more case fans or swap to a 360 mm AIO as GPU/CPU demands increase.
🧼 Maintenance Routine (Every 3–4 Months):
-
Dust Filter Cleaning: Remove and rinse front/top filters with water. Let dry fully.
-
Internal Cleaning: Use a handheld air blower or canned air to clear GPU, CPU cooler, PSU intake.
-
Thermal Paste Reapplication: Replace every 12–18 months (or if temps spike suddenly).
-
Cable Check: Ensure nothing has loosened, especially SATA or fan cables.
-
Software Maintenance:
-
Remove unused startup apps
-
Run Windows Disk Cleanup or
bleachbitin Linux -
Check for firmware updates (motherboard, SSDs, GPU)
-
🧩 Extra Functional Upgrades to Consider:
-
PCIe Capture Card (Elgato or AverMedia): for streamers or YouTubers
-
ARGB Controller Hubs: for unified lighting control across fans, strips, RAM
-
2.5G / 10G Ethernet NICs: if your motherboard is limited to 1G and you have faster home networking
-
Vertical GPU Mounts or Anti-Sag Brackets: for heavy GPUs like RTX 5090
-
External USB DAC or Sound Cards: for better headphone/mic quality
-
Add Wi-Fi 7 PCIe or 2.5G Ethernet card
-
Install capture cards or Plush fan filters
-
Build a custom rainbow RGB loop via software
-
Maintain by dust cleaning every 3–4 months, event log review, and thermal checks
-
Upgrade path: GPU swap for new 5090 Ti next year, add a second NVMe
🧠 Nerd Verdict
Building a gaming PC in 2025 gives you unmatched control over gaming and visual fidelity. Each step, from selecting parts to optimizing performance, empowers you with tech know-how. You’re not just buying a rig—you’re crafting a machine that reflects you. Start small, grow it, and enjoy a system that’s uniquely yours.
❓ FAQ
Q1: How much does it cost to build a gaming PC in 2025?
A: A solid 1080p gaming build starts around $800–$1,000, while a powerful 1440p/4K setup with current-gen GPU (like RTX 5090 Super or RX 8900 XT) typically costs $1,500–$2,500+. Budget can be optimized by prioritizing GPU and SSD while saving on RGB or fancy cooling.
Q2: Is it cheaper to build a PC than buy a prebuilt in 2025?
A: In most cases—yes. Building your own PC gives you better component quality, upgradability, and fewer hidden costs. You avoid markup on OEM parts and can invest in a better PSU, cooler, or motherboard compared to typical prebuilt systems.
Q3: Can I use older components in a new 2025 build?
A: Partially. While GPUs from 2020–2022 may still perform well, newer motherboards (Z790, B650E) are optimized for DDR5 RAM and PCIe Gen 5 devices. Avoid mismatching old DDR4 RAM or SATA SSDs if you’re investing in a modern gaming-focused setup.
Q4: Do I need liquid cooling for a 2025 gaming PC?
A: Not necessarily. High-end air coolers (like Noctua NH-D15 or DeepCool AK620) still perform extremely well. However, liquid cooling helps with aesthetics, acoustics, and overclocking headroom—especially with high-TDP CPUs like Intel i9 or Ryzen 9 9950X.
Q5: What’s the lifespan of a gaming PC built in 2025?
A: With quality components and periodic upgrades (like GPU or SSD), a 2025-built PC can remain highly capable for 5–7 years, especially for 1080p or 1440p gaming. Regular software maintenance and dust cleaning will also extend its effective life.
💬 Would You Bite?
Thinking of building your own next-gen PC?
Share your dream specs or ask questions—you’re one comment away from leveling up! 👇


