📸 Introduction — Why Cloud Backup is Non-Negotiable in 2025
In an age where your phone doubles as your camera, photo album, and memory vault, losing your pictures can feel like losing part of your life. Whether it’s that once-in-a-lifetime travel moment or an important document snap, a stolen phone, hardware failure, or accidental deletion can wipe them out instantly.
That’s why cloud photo backup isn’t a luxury — it’s essential. With modern cloud services, you can:
-
Keep your images safe from device damage or theft
-
Access them anywhere, anytime
-
Easily share or organize them without manual transfers
In this guide, we’ll cover everything from choosing the right cloud service to automating your backups so you never have to worry again.
💬 Quick Note: If you already use tools from our guide on Google Tools That Are Free But Insanely Useful, you’ll find some of these backup options already built into your daily workflow.
☁️ Step 1: Understand the Benefits (and Risks) of Cloud Backup
Cloud backup is more than “storage in the sky”—it’s an always‑on safety net that decouples your memories from a single, fragile device. When you enable a reputable service, your photos typically live in redundant data centers with version history, so even if you delete something locally by accident, a cloud copy can still be recovered. The trade‑offs are privacy and cost: your photos traverse the internet and sit on servers you don’t control, and at scale you’ll likely outgrow free tiers. The right mindset is risk budgeting: decide which images are fine in a mainstream cloud and which (e.g., legal docs) deserve extra protection like end‑to‑end encryption or a separate vault.
-
Map your library: “everyday memories,” “sensitive,” “work assets”—protect each with appropriate controls.
-
Prefer services with versioning and bin/restore windows (accidental deletes happen).
-
Skim the provider’s transparency report and data retention policies once—five minutes well spent.
-
Add “Cloud privacy check” to your annual digital clean‑up (takes 15 minutes).
Before you jump in, it’s worth understanding what cloud storage offers:
The Benefits:
-
Security – Your photos are stored in secure, encrypted data centers.
-
Accessibility – Access your images from any device, anywhere.
-
Organization – Many services auto-sort by date, location, or even subject.
The Risks:
-
Privacy Concerns – You’re trusting a third party with your data.
-
Storage Limits – Free plans often cap at 5-15GB.
-
Internet Dependence – Backup speed depends on your connection.
🧠 Nerd Tip: You can reduce privacy risks by enabling two-factor authentication and reviewing permission settings regularly. We’ve covered similar data-protection strategies in our Pro Tips to Protect Against Cyber Threats guide.
📱 Step 2: Choose the Right Cloud Service for Your Needs
Pick by ecosystem fit first, then by search power and family features. iPhone users typically get the least friction with iCloud Photos (system‑level sync, shared libraries), while mixed‑device households often prefer Google Photos for its cross‑platform parity and exceptional AI search (people, places, objects). If you’re Office‑centric, OneDrive’s Camera Upload plus seamless Windows integration is underrated; Dropbox excels at predictable sync and sharing; Amazon Photos is compelling for Prime members with large still‑photo libraries. Think longer‑term: storage price per 100 GB, family plans, RAW/HEIC support, partner sharing, and export quality all matter once your library grows.
-
Shortlist criteria: ecosystem, family sharing, RAW/Live Photo handling, restore flow, price ladder.
-
If you shoot lots of video, check 4K upload limits and whether original quality is truly original.
-
For multi‑creator households, look for Shared Library/Partner Sharing so one person’s uploads don’t silo.
-
Commit to a 30‑day trial where you actually restore five photos—buy the tool you trust to restore.
The “best” cloud service depends on your storage needs, device ecosystem, and budget.
Popular Options for Android & iOS:
-
Google Photos – Great for AI-powered organization and search.
-
Apple iCloud Photos – Seamless for iPhone/iPad users.
-
Microsoft OneDrive – Excellent integration with Office tools.
-
Dropbox – Reliable, with strong sharing options.
-
Amazon Photos – Unlimited full-res photo storage for Prime members.
💬 Why this matters: If you’re a frequent traveler, combining your photo backup with other Travel Tech Essentials for Digital Nomads can help keep all your content organized on the go.
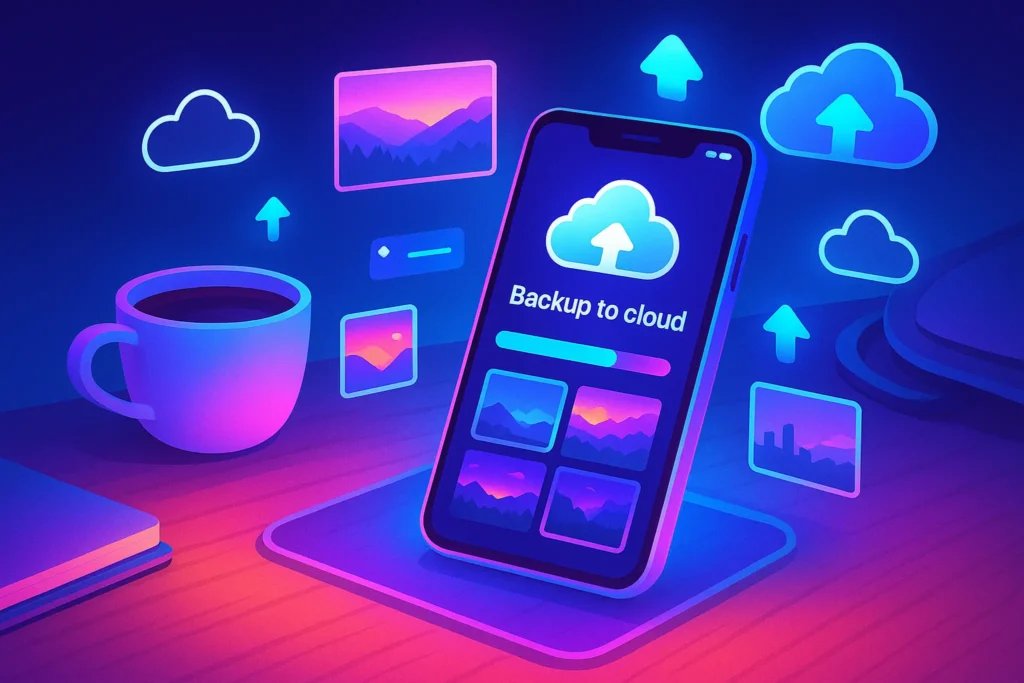
🔄 Step 3: Set Up Automatic Backups
Automation fails silently when background permissions aren’t right. On iOS, ensure Photos access is set to Full Access, Background App Refresh is on, and Low Power Mode isn’t permanently throttling uploads. On Android, disable aggressive battery optimization for the backup app and allow background data. Set uploads to Wi‑Fi only unless you’ve got a large data plan; if you roam, schedule uploads for when you hit reliable Wi‑Fi (e.g., hotel). Choose Original Quality for master files if you plan to print or edit later; choose “storage saver/optimized” only if you keep an offline master elsewhere.
-
First run: leave the app open and the screen unlocked for 10–20 minutes to “kickstart” indexing.
-
Toggle back up videos last if your connection is weak—get the photos safe first.
-
If you swap phones often, confirm the new device is set as a backup source (some apps treat it as a new library).
-
Add a homescreen shortcut “Backup status” to check progress in one tap.
Manual backups are easy to forget — automation makes it effortless.
For Google Photos (Android/iOS):
-
Install Google Photos app
-
Sign in with your Google account
-
Enable “Backup & Sync” in settings
-
Choose upload size (High Quality vs. Original)
For iCloud Photos (iOS):
-
Go to Settings > [Your Name] > iCloud > Photos
-
Turn on “iCloud Photos”
-
Select “Optimize iPhone Storage” for space efficiency
✅ Set it and forget it — the goal is to make photo safety a background process, not a manual chore.
🧩 Step 4: Manage and Organize Your Backups
Cloud search is great, but a light structure compounds over years. Create event‑based albums (Trip—Kyoto 2025), people albums (Family, Clients), and a To‑Process album for fresh imports awaiting curation. Cull duplicates and near‑duplicates monthly; promote the best shot, archive the rest. Use favorites as a cross‑platform “keepers” tag—most services sync that flag across devices. If you shoot RAW+JPEG, decide a policy now (e.g., keep RAW in cloud + SSD vault, share JPEG). Add basic captions for critical photos (receipts, serial numbers); future‑you will thank present‑you.
-
Quarterlies: one 30‑minute session to prune 200–300 shots—keep momentum, not perfection.
-
Standardize album names:
YYYY‑MM Event – Placefor effortless chronological sort. -
Consider a “Docs & IDs” album with extra sharing/security barriers.
-
After each trip, batch‑add a location tag; it supercharges later search.
Once your photos are in the cloud, organization matters — otherwise, you’ll trade one mess for another.
-
Use folders or albums for events, trips, or projects
-
Tag or label important images
-
Delete duplicates periodically
-
Sync across devices for consistency
💬 If you liked our workflow in How to Organize Your Digital Life, applying it to photo storage will save hours over time.
🛡 Step 5: Keep Your Cloud Account Secure
Your cloud account is a prime target. Use a password manager to set a unique, high‑entropy password and turn on two‑factor authentication (prefer authenticator apps or security keys over SMS). Generate backup codes and store them offline. Review connected devices and third‑party app access quarterly; revoke anything you don’t recognize. For shared libraries, use distinct roles: owners, contributors, viewers. If your provider supports it, add account recovery contacts to avoid lockouts.
-
Set up a Security Checkup reminder every 6 months (10 minutes).
-
For highly sensitive albums, consider a separate, encrypted vault (client work, legal docs).
-
If traveling, enable login alerts and keep a recovery method that does not rely on your main phone.
-
Name your devices logically (“iPhone 15 Pro – Main”) so rogue logins stand out.
Even the best backup is worthless if your account is compromised.
Security Essentials:
-
Use a strong, unique password
-
Enable two-factor authentication
-
Regularly check login history and connected devices
🔐 Nerd Insight: Cloud storage accounts are prime targets for hackers. Treat them like bank accounts — secure and monitored.
🧠 Step 6: Combine Cloud Backup with Local Backup for Maximum Safety
Cloud is your off‑site copy; pair it with an on‑site SSD or NAS to satisfy the 3‑2‑1 rule. A weekly “delta” backup from your phone (or desktop Photos folder) to an encrypted SSD keeps you resilient against account issues or long outages. If you’re serious about resilience, a small 2‑bay NAS with RAID1 plus cloud sync gives you device‑level redundancy and an off‑site mirror. Encrypt portable drives (BitLocker/FileVault/VeraCrypt) so a lost SSD isn’t a data breach.
-
Routine:
Cloud (continuous) + SSD (weekly) + NAS/2nd cloud (monthly)—simple and robust. -
Test restores quarterly: randomly recover 10 photos to verify everything actually works.
-
Keep one copy physically separate (work vs. home bag) to hedge against theft or fire.
-
Label drives with QR codes linking to a tiny “what’s on this drive” note in your vault app.
The smartest approach is hybrid backup — one copy in the cloud, one on a physical drive.
Why? If your cloud provider suffers downtime or you lose access, your data is still safe locally. A small SSD or encrypted USB drive is perfect for this.
We use the 3-2-1 Backup Rule:
-
3 total copies
-
2 different storage types
-
1 off-site (cloud)
📐 Step 7: Automate & Review Your Backup Process Regularly
Tech evolves, storage limits change, and new features roll out. Make it a habit to:
-
Check your backup settings every 3–6 months
-
Review storage limits and upgrade if needed
-
Test file restores occasionally to ensure reliability
💬 This mindset mirrors what we advise in Remote Work Essentials — systems should be reviewed and optimized, not set once and forgotten.
Want More Digital Safety & Cloud Tips?
Join our free weekly newsletter and get step-by-step guides, tool reviews, and security tips to protect your digital life — straight to your inbox.
100% privacy. No spam. Just high-value insights from NerdChips.
🛡️ Security & Privacy Considerations in Cloud Backups
Before you commit your entire photo library to any cloud service, take time to understand its privacy policies and security measures. Many services offer end-to-end encryption, but some only encrypt data during transfer — meaning your files might be readable on their servers. For sensitive images, consider enabling password-protected albums or using services that allow zero-knowledge encryption (like Proton Drive). Always enable two-factor authentication to prevent unauthorized access, especially if you frequently log in from multiple devices. This small step can save you from devastating data breaches.
⚡ Optimizing Upload Speed and Data Usage
Backing up thousands of photos can strain your data plan and slow your internet connection if not managed properly. Most backup apps allow you to choose Wi-Fi-only uploads, schedule backups during low-traffic hours, or set upload quality settings to balance speed and storage space. If you’re on the move often, pre-compressing images (without noticeable quality loss) before upload can drastically speed things up. For example, using tools like JPEGmini or built-in compression in Google Photos can cut file sizes by over 50% without visible degradation.
🔄 Hybrid Backup Strategy for Maximum Reliability
Relying solely on one cloud service is risky. What if your account gets locked or the service experiences an outage? The smartest approach is to combine cloud storage with local backups. This can be as simple as saving a copy on an external SSD or NAS device in addition to your cloud account. For travelers, a portable SSD like Samsung T7 can be a lifesaver, giving you instant offline access while still syncing to the cloud whenever you get a strong connection.
📶 Offline Access & Retrieval Planning
Cloud backups are only useful if you can access them when needed. Many services let you mark certain albums or folders for offline use, which is invaluable when traveling to areas with limited internet. Plan ahead by downloading important files before trips, and keep in mind the retrieval times for bulk downloads — some services throttle speeds or split large archives into multiple files, so having a retrieval plan will save you frustration later.
🤖 Advanced Automation for Photo Backups
If you want to take things a step further, you can fully automate your backup workflow. Tools like IFTTT or Zapier can be set to automatically copy every new image from your phone’s gallery to multiple cloud services simultaneously. This is especially useful if you’re also working with content automation for social media or creative projects, as it ensures every photo is instantly secured and ready for use without manual intervention.
🛠 Troubleshooting Cloud Backup Issues
Even with automation in place, cloud backups can sometimes fail — and you might not notice until it’s too late. Here’s how to spot problems early and fix them fast.
1️⃣ Slow or Stuck Uploads
-
Cause: Weak Wi-Fi, large file sizes, or service throttling.
-
Fix: Switch to a faster network, upload in smaller batches, or schedule backups during off-peak hours.
2️⃣ Missing or Incomplete Files
-
Cause: Sync interruptions, app bugs, or device storage issues.
-
Fix: Manually trigger a sync, clear cache, or reinstall the backup app. Always verify the missing files are still on your device before retrying.
3️⃣ Exceeded Storage Limit
-
Cause: Hitting the free tier cap.
-
Fix: Delete unnecessary files, compress large videos, or upgrade to a paid plan. This is where affiliate-recommended upgrades to Google One or Dropbox Plus come in handy.
4️⃣ Login or Authentication Errors
-
Cause: Expired password, 2FA issues, or suspicious activity lockout.
-
Fix: Reset your password, verify via secondary device, and check for unauthorized logins (covered in [Pro Tips to Protect Against Cyber Threats]).
5️⃣ Conflicts Between Multiple Backup Apps
-
Cause: Two apps trying to sync the same folders.
-
Fix: Decide on a single primary backup service for photos to avoid duplicate uploads and wasted storage.
💬 Make “Backup Health Checks” part of your monthly digital maintenance. It’s far easier to fix a small sync issue than to recover months of missing photos later.
🧠 Nerd Verdict
If your memories are priceless, treat their safety the same way. Cloud backup is the easiest, most reliable way to protect your photos — especially when automated and paired with local storage. The key is setting it up once, securing it well, and reviewing it periodically.
❓ FAQ: Nerds Ask, We Answer
💬 Would You Bite?
What’s your current photo backup method — cloud, local, or nothing at all?
Share your setup in the comments and help others find smarter solutions. 👇