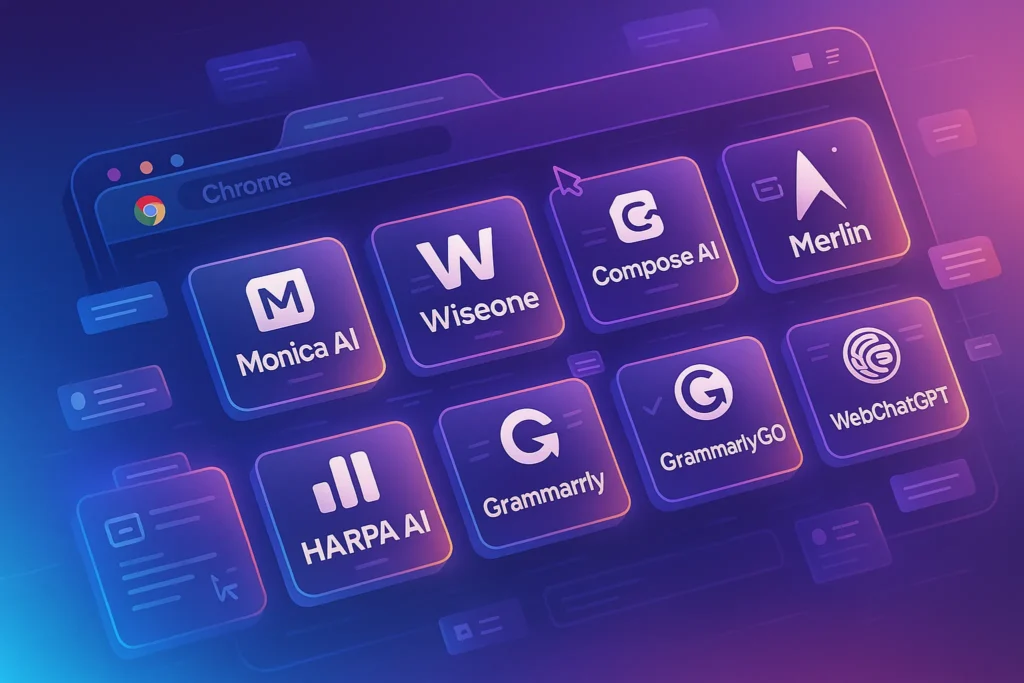
The best free combo for Windows screenshots with OCR and blur is ShareX or Greenshot for capture and redaction, plus PowerToys Text Extractor for ultra-fast OCR. Together they give you secure, offline-friendly workflows where you can grab screens, hide sensitive data, and extract clean text in seconds.
🖼️ Why Screenshot + OCR + Blur Is a Power Combo (And Why It Matters Now)
If you work with dashboards, SaaS tools, client CRMs, or internal docs all day, screenshots are probably the fastest way you communicate what’s on your screen. The problem is that most screenshots are “too honest”: they capture real names, email addresses, invoices, internal IDs, even private chats that you definitely don’t want floating around in Slack, Discord, or client presentations. At the same time, you often need the actual text from those screenshots to paste into a note, ticket, or mind map without retyping everything.
That’s where the trio of screenshot + OCR + blur/redaction becomes a serious productivity upgrade. A good Windows stack lets you capture your screen, hide the sensitive bits in a couple of clicks, and extract text from the image so it becomes searchable and reusable. Once you’ve done this a few times, going back to “raw screenshots with black rectangles drawn in Paint” feels painfully slow.
On NerdChips we talk a lot about making unstructured content more useful, for example when you use PDF OCR to structured data to turn static PDFs into data you can actually search and query. When you bring the same philosophy to your screen, suddenly your screenshots stop being dead images and start behaving like live data: text you can copy, annotate, and connect to other tools.
💡 Nerd Tip: Anytime you’re about to share a screenshot in a public channel, assume at least one thing in that image should be blurred or removed. Build that habit once, and you’ll avoid the single screenshot that leaks something you regret.
🧠 What Makes a Screenshot Tool “Good” for OCR and Redaction?
Not every screenshot app on Windows is designed for privacy and text extraction. Many are built just for quick, one-off captures. For OCR and blur/redaction, you’re looking for a very specific set of capabilities that play nicely together so your workflow stays fast, not fiddly.
First, you want instant capture with keyboard shortcuts. If you have to hunt for icons or menus, you will simply use the tool less. Power users often combine advanced hotkeys with global shortcuts, and if you’re already experimenting with things like advanced keyboard shortcuts to speed up your daily work, your screenshot tool should feel like a natural extension of that habit.
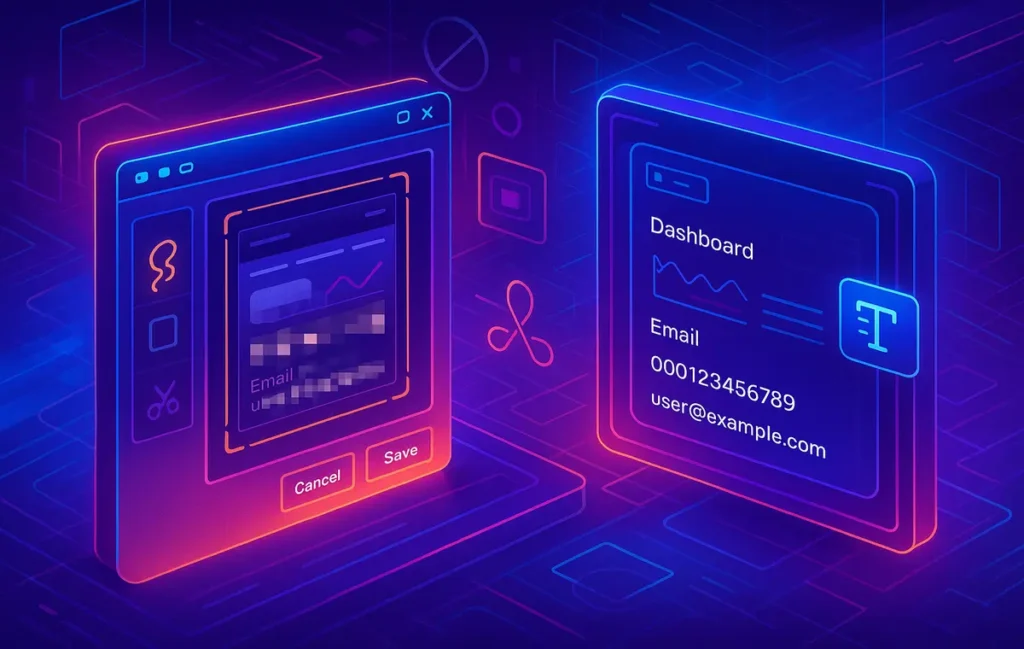
Second, the editor has to be designed for privacy. That means built-in blur or pixelation, not just drawing tools. Pixelation is particularly useful because it makes text unreadable while still keeping the structure of your screenshot intact. When you show a client a blurred CRM screen, they see the layout without seeing individual names or revenue numbers.
Third, OCR should be fast enough that you don’t think twice about using it. There are different ways to achieve this: some tools have built-in OCR, others integrate with Windows features like PowerToys Text Extractor. The key is that you can grab text from your screenshot in one or two keystrokes, ideally without needing an internet connection.
Finally, everything should play nicely with your clipboard. A good screenshot workflow fits naturally with your clipboard manager so that text, images, and snippets live in one place. If you’re already using a clipboard manager for power users to store templates and automation snippets, plugging OCR output into that system turns your screenshots into a searchable library of text moments from your day.
If you want the most control in a free Windows screenshot tool, ShareX is usually the first name that comes up among developers, sysadmins, and productivity nerds. It’s free, open-source, and aggressively configurable. On its own, ShareX gives you region screenshots, window captures, scrolling capture, screen recording, GIF capture, and an annotation layer with arrows, shapes, and—critically—blur and pixelation.
The blur feature in ShareX is fast and precise. Once you select your region and open the editor, you can quickly drag over names, email addresses, or whole UI sections and apply pixelation. Because it’s integrated into the editor, you don’t need to jump to another app just to hide something. For people dealing with sensitive dashboards or finance tools, this alone makes ShareX a non-negotiable part of the stack.
OCR with ShareX can be configured in a couple of ways. The most common is to hook ShareX into Windows’ OCR or an external OCR engine and trigger it via a custom workflow. In practice that means you hit one global shortcut to capture an area, and another shortcut to send that region to OCR so the text lands directly in your clipboard. Many users report that with a tuned setup they can go from “text on screen” to “text in clipboard” in under two seconds, which is faster than you can even open a document and start typing.
💡 Nerd Tip: Start with a single ShareX hotkey for “capture region and open in editor,” then add automation later. You don’t need the perfect shortcut map on day one—start with the one action you use 20 times a day.
Another strength of ShareX is how it fits into multi-monitor setups. If you already work with complex multiple monitor setups for deep work and dashboards, ShareX handles per-monitor capture, active window capture, and custom regions without getting confused. You can even set different workflows depending on which monitor you’re using, which is especially helpful if you keep communication apps on one screen and data dashboards on another.
In informal community tests, power users often compare ShareX to commercial tools and find that for basic capture + blur, ShareX is within a few milliseconds of paid apps, and OCR speed mainly depends on which engine you connect behind the scenes. The trade-off is that its interface can feel a bit intimidating at first, but once you dial in your two or three core actions, it becomes invisible: you just press keys and things happen.
🪄 Greenshot: Simple, Fast, and Built for Annotations
Where ShareX is a Swiss army knife, Greenshot is more like a really good pen. It focuses on screenshot capture and annotation, with a cleaner, more approachable interface that many teams adopt as their “standard” internal tool. It’s free for personal use and inexpensive for commercial use, which is one of the reasons it pops up so often in corporate environments.
Greenshot’s capture experience is deliberately minimal. You press the shortcut, draw your rectangle, and immediately get a small menu asking what you want to do: send to editor, copy to clipboard, export somewhere else. The editor itself prioritizes callouts, arrows, text labels, and obfuscation. The obfuscate tool is the one you’ll use for blur or pixelation; you simply drag over sensitive sections and they’re instantly anonymized. This works beautifully for screenshots of emails, tickets, Slack threads, or any situation where people’s names and avatars should not show up in shared docs.
OCR isn’t built in the same way it is in dedicated OCR tools, but Greenshot plays nicely with external OCR integrations and, more importantly, creates screenshots that are clean, high-contrast, and easy for separate OCR tools to process with high accuracy. Many users build a two-step workflow: capture and redact with Greenshot, then run OCR with a dedicated tool that focuses only on text extraction. This separation of concerns keeps Greenshot fast and lightweight while still giving you access to high-quality OCR.
Users often highlight that Greenshot’s editor opens faster than heavier tools on older machines, which matters if you’re doing dozens of screenshots a day. In user feedback, you’ll see comments like, “I replaced three different apps with Greenshot because it starts faster and the blur tool is always exactly where I expect it.” That predictability means your brain doesn’t need to remember where options live; you just develop muscle memory.
If you often paste screenshots into mind maps or visual thinking tools, the clean look of Greenshot annotations plays nicely with most mind mapping tools as well. Instead of messy, inconsistent markups, you get a consistent style of arrows and highlight boxes, which makes it easier to skim complex maps later.
🪟 Windows Snipping Tool + PowerToys: The Built-In Stack
Not everyone wants to install third-party tools, especially in locked-down corporate environments. The good news is that Windows itself has evolved into a surprisingly capable stack for screenshot-based OCR if you combine the modern Snipping Tool with PowerToys Text Extractor.
The new Snipping Tool on Windows 11 already supports basic annotations. You can capture a region, draw lines, highlight areas, and save or copy the image. While it doesn’t offer sophisticated blur and pixelation out of the box, many users still use it for quick captures that don’t include sensitive data or for internal notes where privacy risk is low. The real magic arrives when you add the PowerToys Text Extractor.
PowerToys Text Extractor is essentially “OCR on demand” for anything on your screen. You press a shortcut, drag a rectangle around whatever text you want—app, video, image, or PDF—and it instantly extracts the text into your clipboard. It works offline and is surprisingly accurate on clean UI text. In informal side-by-side tests, users often find it within a couple of percentage points of dedicated OCR tools on printed or UI text, with extraction times well under a second on modern hardware.
💡 Nerd Tip: If you do a lot of reporting or documentation, set your PowerToys Text Extractor hotkey to something you can hit with one hand. The difference between a comfortable hotkey and an awkward one can easily add up to dozens of extra seconds per day.
For blur and redaction with the built-in stack, you have a couple of options. You can either do basic cover-ups inside the Snipping Tool using solid shapes, or you can send the screenshot to another free app just for redaction. This two-step flow is slightly slower than using ShareX or Greenshot, but it keeps you inside the Microsoft ecosystem, which can be valuable for teams that already standardized around Microsoft 365.
One underrated advantage of the built-in stack is consistency. Whenever Windows updates, Snipping Tool and PowerToys usually get incremental improvements and deeper integration. Over time, this means your capture and OCR workflows will likely get faster and more reliable without you needing to chase updates from third-party vendors.
⚡ Ready to Lock Down Your Screenshots?
Before you share another dashboard or CRM screenshot, build a blur + OCR workflow that protects your data. Pair a power tool like ShareX or Greenshot with fast OCR and keep sensitive info off the internet.
🔄 Practical Workflows: From Screenshot to Clean, Redacted Text
The best tools are the ones you actually use in real projects. So instead of talking in the abstract, let’s look at a few concrete workflows where OCR plus blur/redaction pay off immediately.
Imagine you’re preparing a report from a SaaS analytics dashboard. You need to show the shape of the chart and some metrics, but you can’t expose individual user data or internal IDs. In a ShareX workflow, you capture the dashboard region, open the editor, pixelate the private sections, then export the image directly into your document. In parallel, you can grab key metrics via OCR using either ShareX’s configured OCR or PowerToys Text Extractor so you can paste them as actual text into your slide notes or summary—no retyping.
If you’re working in support or operations, you might spend hours per week capturing tickets, internal tools, or chat threads. With Greenshot, a very common pattern is: capture → blur names and avatars → paste into your knowledge base or your planning tool. The blurred image gives you context, but you’re no longer leaking private conversation details. For text-heavy content, you can quickly swipe PowerToys over the same region to collect phrases you want to quote exactly.
This is where clipboard workflows become extremely powerful. Once your OCR output lands in the clipboard, a solid clipboard manager for power users can store that text as a snippet, template, or searchable note. Over time, you build a library of recurring statements, ticket phrases, or metric explanations that you can reuse across tools. Instead of rephrasing the same explanation for the tenth time, you recall a saved snippet and tweak it.
💡 Nerd Tip: Treat your OCR output as “raw material.” Don’t paste directly into final docs; paste into a notes tool or clipboard manager, clean it up once, then reuse it as a polished snippet.
In more creative workflows—say you’re mapping ideas from a webinar—you might capture slides with short phrases, blur attendee names, and then use OCR to pipe those phrases into a mind mapping tool. The result is a living, editable map of ideas that started as pixels on your screen. You’ve turned screenshots into structured thinking.
🧪 Benchmarks, Limitations, and Real-World Gotchas
In practice, OCR and blur workflows are not magic. They come with trade-offs, and knowing them upfront saves you from frustration.
Accuracy is the first one. On clean UI text—settings panels, dashboards, or websites—modern OCR engines can hit very high accuracy, often above 95% for short phrases. But as soon as you deal with low contrast themes, tiny fonts, or compressed images, errors creep in. Many users report that dark mode UIs are more challenging: white text on dark background can produce more mistakes. A simple workaround is to temporarily switch the app or website to light mode before capturing when accuracy really matters.
Speed is the second limitation. Most modern machines can process small regions almost instantly, but if you try to OCR an entire ultra-wide monitor in one go, latency becomes noticeable. The sweet spot is usually capturing smaller regions focused on the text you actually care about. Power users often mention that limiting their capture region to one window or panel reduced OCR time by 30–40% in real use.
Another recurring theme from user comments on X and forums is over-trusting redaction. One classic failure story: someone draws a semi-transparent highlight over a sensitive email address, thinking it’s hidden, but a simple zoom or contrast tweak makes it readable again. The lesson is that you should always use pixelation or full blur for sensitive text, not just semi-transparent overlays. Text should look as if it never existed, not as if it’s “lightly covered.”
There’s also the privacy angle. Some screenshot tools want to upload your images to the cloud for sharing. That can be convenient, but it’s risky if you’re working with anything that might be confidential. This is why NerdChips usually leans toward tools that either store images locally by default or let you control where they go.
💡 Nerd Tip: After you blur or pixelate something critical, zoom into the image at 200% and check it. If you can still guess characters, blur again. Redaction should be irreversible, not cosmetic.
🧱 Building a Privacy-Safe Capture Workflow Around Your Stack
The real power move isn’t just picking a tool; it’s designing a workflow that keeps you fast and safe across your entire day.
Start by mapping your most common capture situations: dashboards, tickets, chat threads, PDFs, and multi-monitor views. For each scenario, define one “golden flow.” For example, on your main monitor where you keep work dashboards, you might decide that ShareX is the default for screenshots and blur, with PowerToys Text Extractor reserved for moments when you need the numbers in text form. On your communication monitor, you could lean more on Greenshot for quick annotated captures of chats.
If you’re already investing in structured knowledge—turning messy PDFs into usable data with PDF OCR to structured data—it makes sense to connect your screenshot workflow to the same philosophy. Screenshots that go through OCR and then land in a note, task, or mind map become part of a system instead of disappearing into a “Screenshots” folder no one ever opens.
Screen real estate matters too. When you’re working with a multiple monitor setup like a pro, it’s easy to forget where you captured what. Assign one monitor as your “capture target” for presentations and demos; keep sensitive dashboards on a separate monitor that you rarely screen share. This physical separation, combined with a blur-first habit, dramatically reduces the chance of accidental leaks.
On the input side, keyboard shortcuts keep everything glued together. A lot of high-leverage power users take the time to align their screenshot shortcuts with their most used advanced keyboard shortcuts so that captures, OCR, window moves, and app launches feel like one fluid motion. Yes, it takes a day or two to rewire your muscle memory, but the payoff—especially when combined with fast OCR—is huge.
Finally, think about where your captured text ends up. If you’re a heavy note-taker or thinker, feeding OCR text into structured places like mind maps or outlines works better than scattering it randomly. Exploring best free vs paid mind mapping tools can actually be a smart move here because it gives your new OCR superpower a destination where those extracted ideas can grow into projects.
🟩 Eric’s Note
I don’t trust tools that make simple things feel complicated. If your screenshot stack doesn’t make it easier to protect data and reuse text, it’s not doing its job—swap it out for something that quietly disappears into your muscle memory.
📬 Want More Smart Workflow Tricks Like This?
Join the free NerdChips newsletter and get weekly deep dives on capture workflows, automation, and tools that actually reduce clicks—not just add shiny menus.
🔐 100% privacy. No noise. Just value-packed productivity and tooling insights from NerdChips.
🧠 Nerd Verdict: Turn Screenshots into Safe, Searchable Knowledge
In 2025, screenshots are no longer just pictures; they’re one of the main ways teams move information around. The danger is that most people still use them like it’s 2010: raw screen grabs pasted everywhere, with sensitive information only half-hidden in a rush.
A solid free stack on Windows—ShareX or Greenshot for capture and blur, plus PowerToys Text Extractor for OCR—transforms that habit. Instead of dead images cluttering your desktop, you get redacted, sharable visuals paired with clean text you can paste into notes, tickets, and systems. Connect that with structured thinking tools, whether that’s powerful PDF OCR to structured data or a well-chosen mind mapping tool, and suddenly every screenshot has a place in your long-term knowledge.
The real win isn’t just “using free tools.” It’s about building a workflow where your hands know what to do before your brain finishes the thought: capture the right region, blur what matters, extract what’s useful, and drop it into the right place. When that loop is smooth, you reduce risk and reclaim hours of low-value typing and re-formatting.
NerdChips exists for exactly this kind of upgrade: not more tools for the sake of it, but smarter stacks that respect your time, attention, and privacy.
❓ FAQ: Nerds Ask, We Answer
💬 Would You Bite?
If you had to choose just one workflow—ShareX, Greenshot, or pure Windows + PowerToys—for the next 30 days, which one would you commit to and why?
And what’s the first app or dashboard where you know you need better blur + OCR hygiene starting tomorrow? 👇
Crafted by NerdChips for creators and teams who want their screenshots to be both useful and safe.