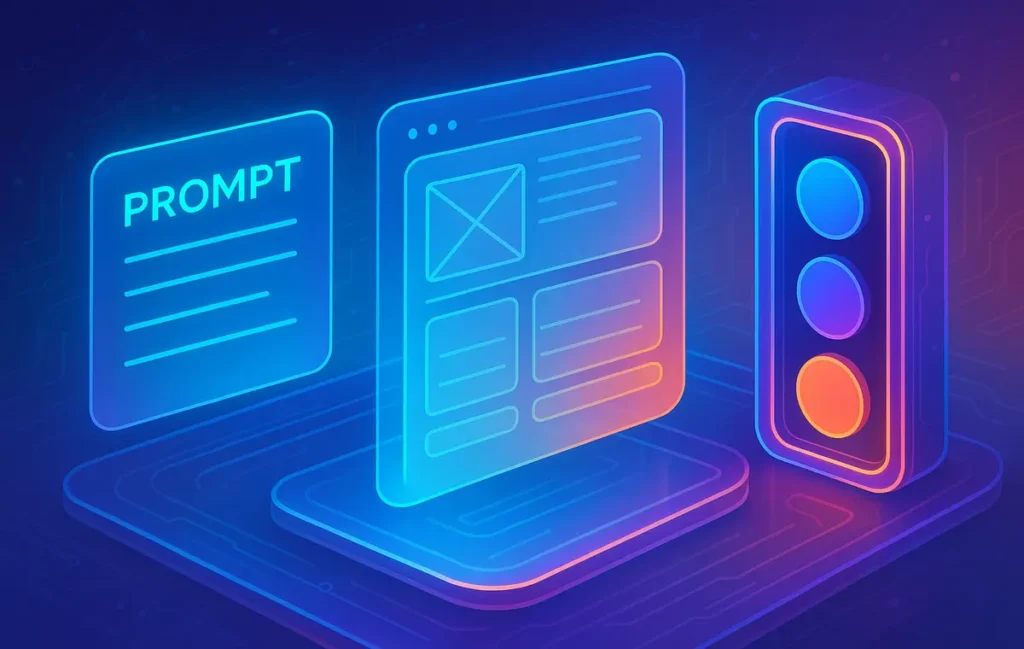
A solid AI image brief in 2025 connects three things: a clear prompt intent, a defined layout, and explicit brand colors. Instead of “hoping” for a good result, you hand the model a visual playbook, so every thumbnail, hero image, or ad feels consistent, on-brand, and easy to recreate.
🎯 Why You Need a Structured AI Image Brief (Not Just “Better Prompts”)
If you’re using AI to generate visuals in 2025, you’ve probably seen both extremes: one image looks like it came from a top design studio, and the next looks like a random meme template. The core problem isn’t that the model suddenly “got worse.” It’s that most creators rely on loose, vibe-based prompts instead of a repeatable creative brief.
Without a brief, every new prompt is a roll of the dice. You might describe the subject and mood, but the model is still guessing the layout, the brand colors, and how everything should work together. For a one-off experiment, that’s fine. For a brand, a YouTube channel, or a blog that needs a hundred consistent assets a month, it’s a nightmare.
That’s where a proper SOP comes in. Instead of thinking “prompt only,” you work with three connected layers:
-
Prompt intent: what you’re trying to achieve and where the image will live.
-
Layout structure: how the image is arranged in space.
-
Brand color encoding: how your visual identity shows up in the final output.
When you already have a system for AI visuals—maybe you’re using Midjourney for atmospheric scenes and also leaning on tools from your broader stack of AI graphic design tools—this SOP becomes the glue. It makes your experiments with models like Midjourney or other generators predictable instead of chaotic, and it keeps your blog heroes, infographics, and social posts visually connected.
💡 Nerd Tip: Think of the SOP as the “design system” for your AI images. Once it’s in place, changing topics or campaigns doesn’t break your visual identity anymore.
🧩 Layer 1 — Prompt Intent: Clarity Before Creativity
Most prompt tutorials start with inspiration: “Imagine a futuristic city…” or “Create a cinematic shot…” That’s fun, but if you’re designing for an actual brand or project, you can’t start with imagination alone. You start with intent.
Prompt intent answers a few straightforward questions before any creative language appears. What type of asset are you making? Where will it appear? What emotion should it push? If you say “YouTube thumbnail,” that’s a completely different visual battlefield compared to a quiet blog hero or a tall Pinterest pin.
Start by defining the asset type: is this a thumbnail, a hero image, a banner, an ad creative, or a carousel card? A YouTube thumbnail usually demands strong contrast, bold focal points and clear safe zones for text. A blog hero has more room for subtlety, especially when paired with a detailed article like your guide on how to create AI art with Midjourney. If the surface is an X post or a LinkedIn banner, you’re dealing with horizontal constraints and fast scrolling behavior.
Next, you set the emotional direction. Is the brand bold, friendly, minimal, techy, premium, playful, or serious? A “minimal tech” image for a SaaS landing page will lean toward clean grids, limited color palettes, and gentle gradients. A “bold creator” thumbnail may push saturated accent colors, strong lighting, and clear separation between subject and background. Each emotional direction nudges the model toward a different stylistic space, even when the subject is similar.
Inside the prompt, you want at least five elements to be written with intention:
-
Subject: what’s the core object, person, or symbol?
-
Action or mood: what’s happening or what feeling should dominate?
-
Environment or setting: where does your subject live visually?
-
Style and texture: is it 3D render, flat illustration, painterly, grainy, glossy?
-
Camera or rendering details: perspective, depth of field, focal length, or render engine hints.
When these five pieces are explicit, you stop asking the model to invent everything from scratch. For example, “A 3D-rendered digital notebook floating above a dark workspace, soft rim light, subtle particles, modern UI elements in the background” gives a much stronger foundation than “AI notebook glowing techy.”
A useful mental model: your prompt should describe the story of the image, while the layout and color layers decide how that story is framed and branded. If you already work with AI tools that craft scenes for social media and pair them with planners or schedulers from your stack of top content creation tools for social media, this level of clarity helps every channel stay consistent without more manual design work.
🎛️ Layer 2 — Layout Structure: The Missing Piece in Most AI Briefs
Here’s the part that 90% of users skip: layout. Models are good at textures, lighting, and overall style, but they still tend to guess the composition unless you spell it out. That’s why you get amazing details but weird visual weight—like a perfect subject overlapping the area where your text should live.
If you’re designing for content, layout is not optional. It’s the skeleton of the image. Once you accept that, you can start using layout types the same way you use prompt styles. Think of familiar patterns:
-
Grid layouts for multi-element visuals.
-
Center-focus layouts for iconic, single-subject images.
-
Side-title layouts where the subject sits on one side and text on the other.
-
Rule-of-thirds compositions that keep interest off dead center.
-
Split-screen layouts for comparisons or “before/after” messages.
-
Floating cards and overlay boxes for dashboards and UI-heavy designs.
You don’t need a degree in graphic design to use these. You just need to give the model layout-specific instructions. For example, instead of saying “a techy banner,” you say: “Main subject on the left third, large clean negative space on the right for headline text, subtle gradient background, no busy patterns.” Now the model knows where to leave breathing room.
This is especially important when you plan to build visuals like infographics or stat cards. When you later move into dedicated tools or tutorials like your guide on how to create infographics with free tools, you’ll notice that the same layout thinking applies. AI doesn’t replace layout decisions; it accelerates them when you’re specific.
💡 Nerd Tip: If you often add text manually, always call out “text safe zones” and “clean space” in your layout instructions. It drastically reduces the time you spend erasing clutter behind headlines.
🧭 Layout-Specific Instructions That Actually Work
To make layout usable inside your SOP, you can think in terms of constraints. You’re not asking the model to be infinitely creative; you’re asking it to be creative inside a frame.
Practical instructions might look like this:
-
“Text box zone on the right side with clean, low-detail area.”
-
“Main character placed center-left, never overlapping the bottom edge.”
-
“Background gradient with low contrast and no sharp patterns.”
-
“Borderless edges for a modern, screen-native feel.”
-
“Three floating cards at the bottom, evenly spaced, subtle shadow only.”
What you’re doing here is telling the model what to avoid as much as what to include. You’re preventing clutter in your text zones and keeping visual hierarchy under control. This is where a lot of AI attempts fail: they look impressive but are unusable because the message can’t be read or the brand feels cramped.
Some teams even use a simple macro—a reusable block of layout instructions—to keep things consistent. For example:
“Main subject on the left third, headline safe zone on the right third, CTA bar along the bottom 14% of the frame, at least 25% of total area reserved as negative space, no mid-frame clutter.”
This kind of layout macro works across formats: blog hero images, ad creatives, or infographic headers. And if you pair it with ideation workflows—for instance, when you brainstorm campaigns with AI content idea generators for niche bloggers—you’ll have both the message and visual structure ready in one shot.
| Approach | What You Tell the Model | Typical Result |
|---|---|---|
| Prompt-only | “Futuristic AI dashboard banner, glowing, high detail.” | Beautiful but busy image, no text-safe area, hard to reuse. |
| Prompt + Layout SOP | Same as above + “left-third subject, right-third clean space, CTA bar at bottom.” | Balanced visual, text fits without edits, reusable across platforms. |
On X, designers regularly complain that AI thumbnails “look great but kill CTR” because titles get lost in chaos. The issue isn’t that the model is “too creative,” it’s that we didn’t tell it where not to be creative.
💡 Nerd Tip: When a generation fails, don’t throw away the whole prompt. Fix the layout instructions first, then iterate. Layout mistakes are usually cheaper to solve than style mistakes.
🎨 Layer 3 — Brand Colors Encoding: Precision for On-Brand AI
Even with a clear subject and layout, AI models will still freestyle your color palette unless you tell them otherwise. That’s why a supposedly “on-brand” thumbnail sometimes shows up in teal and neon green, even though your product is built around dark blue and gold.
To avoid this, you define brand colors like a designer would and then translate that into prompt language. Start with your primary, secondary, and accent colors, usually as HEX values. You might also define gradient rules (for example, dark-to-light diagonals) and contrast constraints (so text is readable and accessible).
A minimal brand color spec could look like:
-
Primary: #4A6CFF (main brand blue).
-
Secondary: #0A0F1F (dark background).
-
Accent: #F2B441 (highlight or CTA color).
-
Contrast: maintain at least 4.5:1 for text vs background.
-
Exclusions: avoid neon greens and harsh reds.
Now, you encode that inside the prompt. Instead of: “cool blue gradient background,” you write something like: “background gradient using brand secondary color #0A0F1F, highlights and UI lines using primary #4A6CFF, micro-UI accents using #F2B441, avoid neon green or saturated red tones, maintain high contrast for text overlays.”
This moves color selection from guesswork to a simple rules engine the model can follow. When your visual work supports data-heavy pieces or tutorial-style content—like a guide that helps non-designers use AI in graphic design tools to create like pros—color consistency becomes a trust signal. People quickly recognize your cards and thumbnails in a noisy feed.
You can also add a “typography block” in your brief, even if the AI model doesn’t literally render perfect text. Mentioning fonts like “Inter, DM Sans, or Satoshi for overlays” helps you maintain a mental connection between the generated visual and the design system you’ll apply when adding real text in tools like Figma or your favorite editor.
💡 Nerd Tip: Build a tiny “brand color paragraph” you reuse in every AI image brief. Updating your palette later then becomes as simple as editing that one paragraph instead of rewriting dozens of prompts.
🟦 The Full SOP: Prompt → Layout → Colors (Combined Template)
On their own, these layers are useful. Combined, they become a powerful SOP. The goal is a brief you can copy, tweak, and re-run for each campaign, blog post, or video. Here’s a concrete example you can adapt immediately.
[GOAL]
Hero image for a blog post about AI note-taking. Modern, minimal, professional. Works for both blog hero and social card.
[SUBJECT]
A floating digital notebook with glowing, abstract AI glyphs around it, representing intelligent capture and organization.
[LAYOUT]
Main subject positioned on the left third of the frame. Headline safe zone on the right with clean, low-detail negative space. Gentle depth-of-field effects. No busy patterns in the background. Soft shadow around the notebook. No reflections or glassy artifacts. CTA bar area available along the bottom 14% of the frame.
[COLORS]
Brand primary #4A6CFF for highlight lines and glyph accents. Secondary #0A0F1F for the background gradient. Accent #F2B441 for small UI elements or buttons. Avoid neon greens and harsh reds. Maintain at least 4.5:1 contrast for any overlay text area. No multicolored neon glows.
[STYLE]
3D render, soft studio lighting, subtle rim light on notebook edges, crisp but not hyper-realistic details.
If you’ve ever built scenes in Midjourney following tutorials like how to create AI art with Midjourney, you’ll recognize all the components here. The difference is discipline. Instead of improvising for each new piece of content, you reuse the structure and swap the subject and emotional direction.
🟩 Eric’s Note
There’s no magic in this SOP—just fewer chances to break your own brand. Once I started treating AI images like real design assets instead of toys, my “this one actually works” folder stopped feeling like a lottery.
💡 Nerd Tip: Save one master prompt with [GOAL], [SUBJECT], [LAYOUT], [COLORS], and [STYLE] tags. Every time you start a new campaign, duplicate it and change just what’s necessary.
⚡ Ready to Turn Your Brief Into Automated Visuals?
Once your Prompt → Layout → Brand Colors SOP is in place, connecting it to AI-friendly design and scheduling tools is the next step. Start testing automated visual workflows that keep your brand consistent across blog, social, and ads.
📐 Multi-Asset Mode: Turning One Brief Into a Visual System
A single, clean hero image is great. But real-world content systems need multiple assets: an X card, a YouTube thumbnail, a blog hero, and maybe a Pinterest pin or LinkedIn banner. “Multi-Asset Mode” means turning your brief into a visual family instead of a one-off image.
You don’t need four completely different prompts. Instead, you keep the core brief and tweak format-specific details:
-
For X or LinkedIn cards, you emphasize horizontal composition and stronger contrast around the core message zone.
-
For YouTube thumbnails, you exaggerate subject size, clarity of facial expressions (if any), and free space for bold text.
-
For blog heroes, you give more breathing room so the visual doesn’t fight with the article layout.
-
For Pinterest or tall stories, you stretch the layout vertically and increase vertical alignment cues.
In your SOP, this translates to a “multi-asset” section like: “Generate variants for 16:9 (YouTube), 1200×628 (social card), and 2:3 (Pinterest-style) while keeping subject, color palette, and general style consistent.” The idea is to lock the identity but flex the frame.
Creators who already rely on platforms and stacks similar to those in top content creation tools for social media can use this section to pre-plan automation. You might, for example, set up a workflow where one approved hero image triggers size-specific crops and exports. The SOP makes it possible to do that without redesigning everything manually.
💡 Nerd Tip: In your prompt, explicitly mention “same subject and style across all variants” when you’re generating multiple formats. This reminds the model that format changes do not equal brand changes.
✅ QA Checklist: How to Know Your Brief Actually Worked
Even with a strong SOP, you need a quick way to evaluate whether the output is usable. Instead of going by gut feel, use a short QA checklist before you hit “download” or publish.
Start with the subject. Is it clearly visible and instantly understandable at a glance, even at small sizes? If not, the layout might be too complex or the focal point too weak. Next, check whether the layout actually followed the brief: is the text-safe area clean, or did the model sneak in extra details? Are CTAs separated from background clutter?
Then inspect colors. Do they respect the brand palette? Are your primary and accent colors present where you asked them to be, or did the model drift into random shades? Pay attention to contrast: if your future text overlays would require stroke effects just to be readable, the image needs another pass.
Lighting and mood should be consistent across your assets. If your hero image is dark and cinematic while your thumbnail is bright and pastel, you risk visual fragmentation. The goal is to make your audience feel like they’re seeing different “chapters” of the same story, not different universes.
Many teams report that once they adopt simple QA rules, they accept fewer but higher-quality generations. That tradeoff is a win: fewer choices, faster approvals, stronger brand recognition. If you’re combining these visuals with data-heavy explainers or tutorial-style posts—maybe an infographic built via free infographic creation tools—this consistency makes the entire content experience feel more intentional.
💡 Nerd Tip: Screenshot your favorite output and place it next to your brand style guide or logo sheet. If it feels like it naturally belongs there, your SOP is working. If it feels like a guest from a different brand, revise the brief before the next campaign.
📬 Stay Ahead of the AI Content Curve
If this SOP clicked, imagine having one for your content calendar, email engine, and offer stack. Subscribe to the NerdChips newsletter to get new systems, not just random tips.
🔐 We respect your focus. No spam, just frameworks and experiments tested for builders like you.
🧠 Nerd Verdict: From “Nice Images” to a Visual Operating System
The real upgrade here isn’t prettier images—it’s a new level of control. When you treat AI image generation as a visual operating system, you stop hoping for “luck” and start expecting consistency. A tight Prompt → Layout → Brand Colors SOP lets a solo creator behave like a small design team and lets a small team operate with big-brand discipline.
Brands and creators who pair this kind of structured brief with strong content pipelines—like a steady flow of posts powered by AI idea generators and smart graphic tools—will outpace those who still fire off random prompts and hope for viral magic. In other words: the edge isn’t just in the model you use, it’s in how you brief it.
💡 Nerd Tip: Save your best outputs, their prompts, and their briefs in one shared document. Over time, that document becomes your private “AI style guide”—a living asset you can onboard teammates into and scale across campaigns.
❓ FAQ — Nerds Ask, We Answer
💬 Would You Bite?
If you built this SOP once and refined it over a month, what’s the first content series you’d feed into it—blog heroes, YouTube thumbnails, or social campaign cards?
And once your visuals start to look “effortlessly on-brand,” what’s the next bottleneck in your content system you’d want NerdChips to help you solve? 👇
Crafted by NerdChips for creators and teams who want their best ideas to travel the world.