-This post may contain affiliate links. If you click on one and make a purchase, I may earn a small commission at no extra cost to you.-
Introduction
Smart homes aren’t just for the tech-obsessed or those with bottomless wallets anymore. With the right approach and tools, anyone—from students to renters to young families—can automate their living space affordably and effectively.
In this guide, we’ll show you exactly how to get started building your smart home without draining your bank account. Whether you’re after convenience, security, or a bit of futuristic flair, this setup is built for budget-conscious users ready to take the leap into home automation.
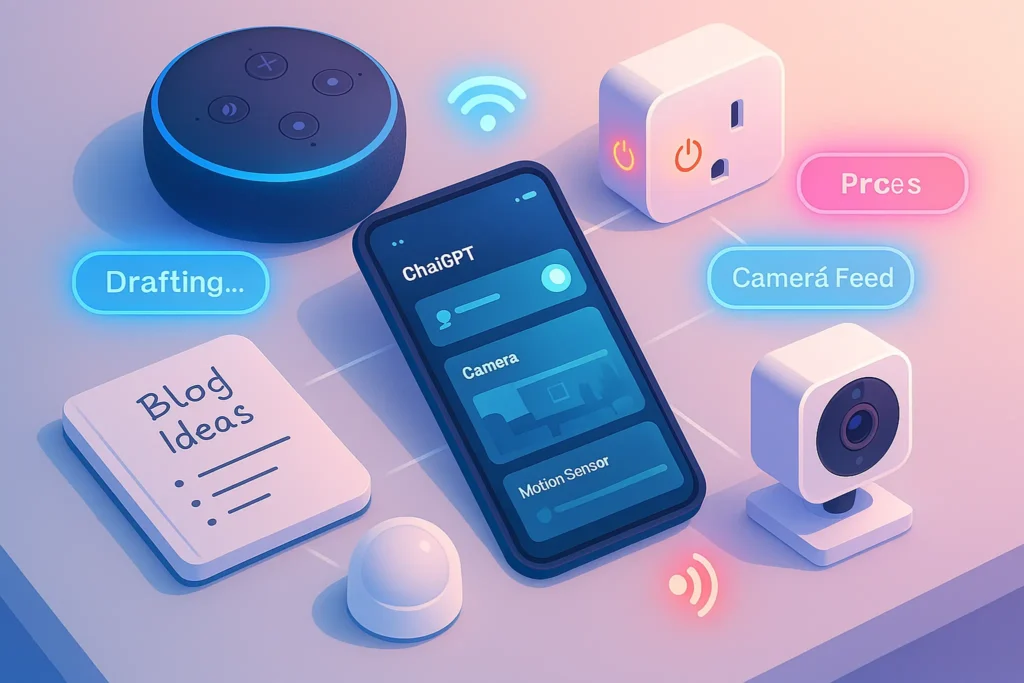
Step 1: Choose Your Smart Hub (It Sets the Foundation)
The smart hub is the brain of your smart home—it connects and controls all your devices. For budget-conscious users, the best picks are:
-
Amazon Echo Dot: Compact, affordable, and integrates with thousands of smart devices.
-
Google Nest Mini: Equally affordable with seamless Google Assistant integration.
🧠 Tip: Start with whichever voice assistant you already use on your phone. It makes the ecosystem setup smoother.
While you can build a smart home without a dedicated hub using standalone apps, having one unifying voice assistant simplifies automation and command control across all your devices.
Step 2: Add Smart Plugs to Control Everyday Devices
Smart plugs are often the gateway drug into home automation—and for good reason. These affordable gadgets let you control anything that plugs in: lamps, coffee makers, fans, or even your router.
We recommend starting with:
-
Kasa Smart Plug Mini (reliable, under $15)
-
Amazon Smart Plug (perfect if you already use Alexa)
They allow you to create schedules or turn devices on/off with your voice or phone, no matter where you are.
Curious how smart plugs can scale your automation? We covered them extensively in our Smart Home Gadgets Under $100 guide.
Step 3: Integrate Motion Sensors for Automation
Want your hallway lights to turn on automatically when you walk by at night? Motion sensors make it happen.
Top budget-friendly picks include:
-
Wyze Motion Sensor
-
Aqara Motion Sensor (works well with HomeKit)
Use them to trigger smart bulbs, security cams, or routines like turning on lights after sunset when movement is detected.
This is also where routines come into play…
Step 4: Build Simple Routines for Daily Convenience
Smart homes really shine when everything works together. Using free apps like Alexa Routines or Google Home’s automation rules, you can build sequences like:
-
“When I say ‘Good Night,’ turn off all lights and play white noise.”
-
“If motion is detected in the hallway after 10 PM, turn on dim night lights for 5 minutes.”
You don’t need programming skills—just a little imagination and trial-and-error.
Need inspiration? Check out our Ultimate Smart Home Setup Guide for practical real-life examples, even for tiny apartments or rented homes.
Step 5: Add Smart Lighting Without Rewiring
Smart bulbs are one of the easiest upgrades—and they’ve become surprisingly cheap.
Recommended options:
-
Wyze Bulbs (under $10 per bulb)
-
TP-Link Kasa Bulbs (work well with Alexa)
-
SwitchBot Bot for traditional switches (budget hack!)
You can schedule lighting, set the mood with warm/cool tones, and reduce energy waste. Many bulbs also offer vacation mode for simulating presence when you’re away—perfect for families.
Step 6: Add Affordable Smart Cameras and Security
Home security doesn’t have to be expensive. With budget-friendly smart cams, you can monitor your home, receive alerts, and even talk to visitors remotely.
Top budget picks:
-
Wyze Cam v3 (indoor/outdoor, under $35)
-
Blink Mini (works with Alexa, good for indoor use)
-
TP-Link Tapo C100 (budget cam with motion alerts)
These cameras let you record events, send real-time motion alerts to your phone, and even enable cloud or SD card storage without monthly fees in some cases.
If you’re serious about protecting your space without breaking the bank, also check out our guide to Smart Home Security Tips for deeper insights.
Step 7: Automate Gradually, Upgrade Over Time
Smart home automation doesn’t need to happen all at once. In fact, the best way to build a system that fits your life (and your wallet) is to grow it organically.
Here’s a suggested progression:
-
Start with a smart plug and voice assistant
-
Add a motion sensor and smart light
-
Install one camera for entryway security
-
Introduce routines to automate daily patterns
-
Expand to temperature sensors, leak detectors, or door sensors if needed
This step-by-step path keeps it manageable—especially for renters, students, or families with tight budgets.
🎯 Use-Case Snapshots
💼 The Freelancer
Works from a home office. Sets up smart lighting and music routines for productivity, plus a smart plug to power off electronics at night.
🏠 The Budget-Conscious Family
Uses motion-activated night lights in the kids’ room, voice control in the kitchen, and cameras to monitor entryways while away.
🎒 The Student Renter
Controls everything through a Google Home Mini, uses a smart plug to automate morning coffee, and sets timers for study-friendly lighting.
No matter your living situation or income level, there’s a smart home setup that can work for you.
⚖️ Micro-Comparison: Smart Home Devices Under $50
| Category | Budget Pick | Why It Works Great |
|---|---|---|
| Smart Plug | Kasa Smart Plug | Reliable, app-friendly, under $15 |
| Smart Bulb | Wyze Bulb | Cheap, easy to install, no hub needed |
| Smart Sensor | Aqara Motion Sensor | Compact, precise, long battery life |
| Smart Camera | Wyze Cam v3 | Night vision, indoor/outdoor, weatherproof |
| Voice Assistant | Echo Dot (5th Gen) | Solid ecosystem and affordable at $30–40 |
You don’t need to spend $500+ to start automating your home. These picks punch way above their price point.
🌐 Smart Home Without Internet? Here’s What Still Works
While most smart devices rely on cloud access, some features can work even when your internet goes down. For example, Zigbee or Z-Wave devices connected to a local hub (like SmartThings or Home Assistant) can still perform routines.
Even Alexa or Google Home can execute basic local commands—like turning off a smart plug—if the device supports LAN control.
So, if you’re worried about outages, prioritize brands that offer offline fallback or at least allow scenes and routines to run without cloud dependence.
🔒 How to Avoid Cloud Lock-in
Cheap doesn’t mean careless. One hidden risk in budget devices is vendor lock-in—where all automation and data live on the company’s servers.
To stay flexible and privacy-aware:
-
Choose products with local API access (like Shelly or Aqara with Home Assistant)
-
Flash open firmware like Tasmota on compatible plugs or bulbs
-
Read the terms—some platforms log more than they need to
You’ll thank yourself later when switching ecosystems or trying to automate across brands.
📱 Beginner-Friendly App Comparison
Smart hardware is only as good as its software. Here’s a quick breakdown of app experiences for popular budget brands:
-
Wyze App: Intuitive, but can feel cluttered as you add more devices. Cloud-based.
-
Kasa Smart (TP-Link): Clean interface, seamless Google/Alexa integrations.
-
SwitchBot App: Focused UI, easy automation, great documentation.
-
Alexa / Google Home: Strong ecosystem support, but routines can be clunky to manage.
If you’re not tech-savvy, go with brands whose apps have 4+ star ratings and active update histories.
⏰ A Day in the Life of a Budget Smart Home
7:00 AM – Your bedroom light gently fades on, triggered by a scheduled routine.
7:05 AM – The smart plug powers on your coffee machine.
7:15 AM – Motion sensor in the hallway turns on a soft light as you walk to the kitchen.
8:00 AM – Your camera sends a push alert: package at the door.
8:30 PM – Living room lamp dims and switches off at bedtime via routine.
With less than $150 in gear, you’ve added comfort, convenience, and control to your everyday.
⚠️ Real Mistakes New Users Make (and How to Avoid Them)
-
Buying Incompatible Devices
“I bought a cool plug… then realized it doesn’t work with Alexa.” Always confirm compatibility before you buy. -
Overautomating Everything
“I made the lights turn off every 30 seconds with no motion. My roommate hates me now.” Test routines before making them permanent. -
Ignoring Wi-Fi Weak Spots
A weak connection ruins even the best smart plug. Use mesh Wi-Fi or plug extenders if your home is large or multi-floor.
Avoiding these common traps makes a huge difference, even with low-cost devices.
🛡️ Is DIY Smart Home Actually Safe?
Yes—if you follow smart practices. Budget devices can be secure if:
-
You change default passwords
-
Disable unnecessary remote access
-
Use a guest Wi-Fi network for your devices
-
Regularly update firmware
You don’t need to be a network engineer. Just treat smart home setup like you would securing your laptop or smartphone.
🎁 Bonus: Best Smart Home Devices Under $20
Here are some surprisingly useful and affordable options to get started fast:
-
SwitchBot Bot – Tap your light switch or coffee maker automatically
-
Wyze Plug – Rock-solid, reliable plug for under $15
-
Govee Smart Light Strips – Add ambient lighting with app control
-
Aqara Temperature Sensor – Monitor room conditions and humidity
-
Tuya Smart PIR Sensor – Budget-friendly motion detection with app triggers
These mini-upgrades can dramatically improve your day-to-day without a big price tag.
🔍 What to Avoid: Common Mistakes in Budget Smart Homes
Even on a tight budget, poor choices can waste money and frustrate you. Here are common pitfalls to dodge:
-
Buying incompatible devices – Always check if your chosen device works with Alexa, Google Assistant, or your existing ecosystem.
-
Overbuying early – It’s tempting to grab every “deal,” but start small. Build based on real needs.
-
Skipping the app experience – A poor app ruins the smart experience. Check reviews before buying.
-
Ignoring privacy settings – Cheap cameras often default to public cloud storage. Learn how to secure them.
-
Forgetting about Wi-Fi coverage – No smart device works well without a solid connection. Consider adding a mesh extender if needed.
🧠 Nerd Verdict
As someone who has helped dozens of friends and family set up smart homes, I can confidently say: You don’t need fancy gear or deep pockets to feel like you live in the future.
In fact, some of the best setups I’ve seen came from creative constraint—using $15 gadgets in clever ways, automating what matters most, and gradually scaling up.
If you’re just getting started, start small. One plug, one bulb, and one voice assistant can transform your day-to-day in unexpected ways.
❓ FAQ: Nerds Ask, We Answer
Q: Can I build a smart home without a hub?
A: Absolutely. Most smart plugs, bulbs, and sensors work directly with apps or Alexa/Google without a hub.
Q: Is it safe to use cheap smart cameras?
A: Stick to brands like Wyze or Blink. Avoid no-name brands with shady privacy policies or bad firmware update history.
Q: What if I move out or rent?
A: All the devices mentioned here are plug-and-play. You can unplug and take them with you—no drilling or rewiring needed.
Q: Can I use automation without coding?
A: 100%. Apps like Alexa Routines and Google Home make automation drag-and-drop easy.
💬 Would You Bite?
What’s the first thing you’d automate in your home if budget wasn’t an issue?
Lights that follow your movement? A coffee machine that starts when your alarm goes off? Tell us your dream setup — or share your current budget hack — in the comments! 👇

