🎯 Introduction — Why Zoom Is Still a Solid Podcasting Option
Zoom wasn’t built as a studio recorder; it was built for reliable calls. That reliability is exactly why many creators default to it: your guests already know how to join, it works on almost any device, and scheduling is painless. The catch is that great audio on Zoom doesn’t happen by accident. You need to make a few strategic choices about gear, room treatment, and Zoom’s settings to capture clean, editable tracks—ideally one file per speaker—and run a backup so no story gets lost. If you’re new to the medium, pair this how-to with your high-level launch plan in How to Start a Successful Podcast from Scratch so your recording workflow ties into publishing, distribution, and audience growth.
💬 Promise: By the end of this guide you’ll have a repeatable Zoom podcast OS—from pre-call prep to multitrack capture, backups, editing, and transcripts—so every episode ships on time and sounds intentionally made.
💡 Decide your audio goal now: “quiet, intimate interview” or “lively remote roundtable.” This informs mic choice, room prep, and Zoom settings.
🧠 What Zoom Can (and Can’t) Do for Podcasts
Zoom can give you multitrack recordings, respectable audio when set correctly, and frictionless guest onboarding. It can’t fix bad mic technique, noisy rooms, or Wi-Fi hiccups. It will also apply processing unless you tell it not to. That’s fine—we’ll take control.
Start by aligning expectations with your show format. For a two-person interview, Zoom shines if each person uses a USB mic + headphones in a quiet room. For a panel of four with mixed devices, Zoom’s reliability is a lifesaver, but you’ll prioritize good meeting etiquette (mute discipline, push-to-talk, hand-raise) to keep crosstalk editable. If you plan to release video too, remember that Zoom’s camera grid is functional, not cinematic; you’ll polish framing, light, and post-cut in your editor—grab practical finishing ideas from Video Editing Pro Tips for YouTube Creators.
💡 Zoom is your transport, not the studio. We’ll make it behave like one.
🎤 Gear That Matters (and What You Can Skip)
Expensive microphones can’t save a reflective kitchen. Room first, then mic, then monitoring. A soft room (carpet, curtains, bookshelves) removes harshness more than most plug-ins ever will. For solo and interview shows, a dynamic USB mic at 6–10 inches from your mouth beats a condenser several feet away. And yes, closed-back headphones are non-negotiable to prevent echo and to hear issues before they ruin takes. If you want a curated list with budget tiers, see Best Microphones for Podcasting and Video Creators .
Once your core is set, everything else is optional. Pop filter? Helpful. Boom arm? Comfort win. Interface? Only if you’re using XLR mics. Acoustic panels? Great, but throws and pillows now are better than panels someday.
💡 Spend where your audience can hear it: mic + room + monitoring.
🧩 Account & Recording Strategy — Local, Cloud, or Both?
Before karate-chopping buttons, decide where the recordings will live.
Local recording on the host’s machine is simple and high-quality, and Zoom can save a separate audio file per participant when you enable the right setting. Cloud recording is convenient for teams, offloads storage, and is easy to share—but always run a local backup in case internet gremlins visit. For interview-heavy shows, the ideal is local multitrack + cloud single mix as a safety net.
If you want studio-level quality without babysitting guests’ tech, you might eventually explore double-ender workflows or browser studios. For now, Zoom is your reliable backbone; when you graduate to a full at-home chain, fold in the acoustic and mic positioning techniques from How to Create Studio-Quality Podcast Episodes at Home.
💡 Two copies or it didn’t happen. Local + cloud buys peace of mind.
✅ Zoom Settings That Actually Matter (Set Once, Reuse Forever)
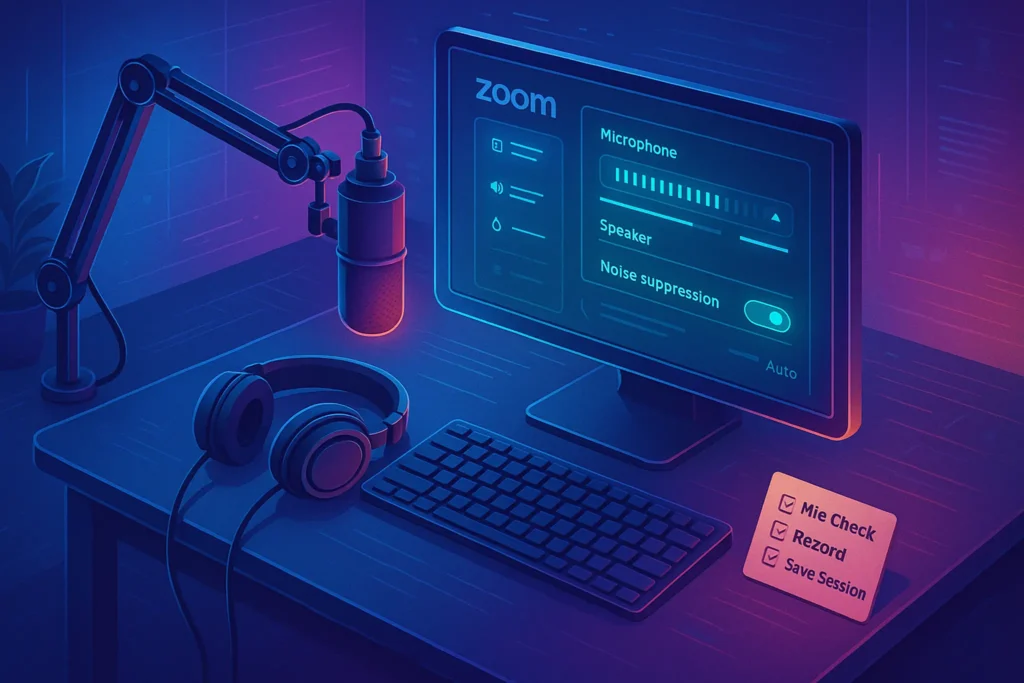
Great recordings start before you hit Record. Open Zoom’s settings and build a Podcast profile you’ll reuse each time. The exact labels can vary slightly across versions, but the principles hold.
First, optimize Audio:
-
Select your external USB/XLR mic as the input; set headphones as output.
-
Disable auto volume levelling if your guests are stable; leave it on only for non-tech guests who drift from the mic.
-
Enable Original sound so Zoom doesn’t over-compress voices; consider the enhanced/high-fidelity option if bandwidth is solid.
-
Set noise suppression to Low when all participants wear headphones (to preserve tone).
-
Turn on Stereo only if every participant records in stereo and you intend to mix that way; otherwise mono keeps editing simple.
Next, under Recording:
-
Check “Record a separate audio file for each participant.”
-
Choose Record locally and set a folder you back up (e.g.,
/Podcasts/Zoom/2025/EP-###). -
If using Cloud recording, also enable separate audio tracks there.
-
Toggle Display participant names in video if you’re posting clips—handy for lower-thirds timing.
Finally, in Video (if you’ll publish video):
-
Use 16:9, disable mirror unless you prefer it, and lock your preferred resolution.
-
Add Touch up my appearance lightly if you must; never rely on it to fix poor lighting.
💡 Build a preset checklist card and tape it near your screen. You’ll never forget a toggle again.
🗓️ Pre-Call Prep — The Host’s 24-Hour and 15-Minute Playbooks
Preparation prevents “we’ll fix it in post.” Create a two-part ritual: the day before and just before.
A day before the call, send a Guest Brief. Keep it friendly and short. Remind them to use headphones, sit close to the mic (a fist away), pick a quiet room, and quit noisy apps. Ask them to disable notifications and, if possible, connect via Ethernet or sit near the router. Include a one-page image showing how to position the mic and a link to a test meeting. If guests are nervous, link to your starter doc in How to Start a Successful Podcast from Scratch —it builds confidence.
Fifteen minutes before recording, run a soundcheck ritual: verify the right mic is selected, levels peak around -12 to -6 dB, headphones are on, and backgrounds are quiet. Do a 10-second test recording with normal speaking and a laugh—laughter reveals clipping.
💡 Script your first 60 seconds (“Welcome, thanks for joining…”) so the call feels calm and professional from the jump.
🎛️ Live Session Flow — Structure That Produces Clean Takes
A clean session has a predictable arc. Open Zoom, greet your guest, and before diving into the interview, explain recording etiquette: speak close to the mic, pause a beat after jokes, and if the internet blips, keep talking—you’ll fix it in post. Then:
-
Roll a Room Tone capture (10 seconds of silence). It’s your best friend for noise profiles.
-
Count-in and clap once. Even with multitrack, a manual sync spike is a lifesaver.
-
Record two short intros: one for the episode itself, one for social promos.
-
Keep segment markers: say “marker” out loud before big topic shifts so you can spot them in waveforms later.
-
If crosstalk builds, switch to a hand-raise cue for the final section to land clean soundbites.
When you wrap, stop recording and confirm files are writing (local) and that cloud processing has started. Summarize next steps and delivery dates so guests know what happens next—this reduces follow-up emails and lets you focus on editing.
💡 Put sticky notes for your three must-ask questions on the monitor edge. It keeps the conversation anchored.
📬 Zoom Podcast Weekly — Presets, Checklists, & Fast Fixes
Get one concise email each week with Zoom recording presets, guest micro-scripts,
multitrack/backup workflows, and editing templates—so your episodes ship on time and sound pro.
🔐 100% privacy • Unsubscribe anytime • Curated by NerdChips
🔁 Backups & Double-Enders — Belt and Suspenders
Even pros get stung by flaky Wi-Fi. In addition to Zoom’s recording, ask each participant to record locally in any simple app (QuickTime, Voice Memos, Audacity). That’s a double-ender: each person captures their own pristine track; you sync them later using the clap spike. If a guest can’t do that, consider recording a secondary device on your end (e.g., portable recorder plugged into the computer’s output for a low-fi backup). It won’t sound pretty, but it will save the interview if Zoom corrupts.
Label files immediately after the call with ISO date + guest name + take. Good naming and folder discipline are the difference between “I’ll find it later” and shipping on time.
💡 Back up before you chat. Files don’t exist until they’re in at least two places.
✍️ Post-Production: From Raw Tracks to Polished Episode
Editing is where podcasts become stories. Import your separate tracks into your DAW (or video editor if you’re publishing video). Start by lining up the clap, then trim false starts and long drops. Normalize lightly and set consistent loudness (e.g., around -16 LUFS for stereo or -19 LUFS for mono), apply subtle compression to control dynamics, and use gentle noise reduction only after listening for artifacts. Keep breaths human; over-gating creates robotic voices. If you’re building repeatable polish, create a session template with track order, intro/outro music, and presets.
As soon as you have a clean edit, generate an accurate transcript. Transcripts are great for accessibility, search, and repurposing into social clips or blog posts. For tools and accuracy tradeoffs, check Best AI Podcast Transcription Tools. If your episode includes video, apply the pacing, cutaway, and flow techniques in Video Editing Pro Tips for YouTube Creators .
💡 Edit for energy, not perfection. Tight beats and clear takeaways beat sterile audio.
🆚 Mini-Comparison — Zoom vs Browser Studios vs Local DAWs
It’s helpful to know why you picked Zoom and when you might switch.
-
Zoom: unmatched familiarity, easy scheduling, multitrack available, good enough video. Needs attention to settings to avoid over-processing; internet affects quality.
-
Browser studios: studio-quality local tracks automatically uploaded from each guest, often with built-in AI cleanup and speaker labeling. Costs more; onboarding is slightly heavier for non-tech guests.
-
Local DAWs with remote links: maximum control and fidelity if all parties are comfortable with software and file handling. Highest complexity, best for recurring co-hosts.
💡 Use Zoom while your show finds its voice. Upgrade the stack when your pains are consistent and worth paying to remove.
🧰 Troubleshooting Like a Pro (Without Derailing the Vibe)
When something goes wrong mid-call, your job is to contain and continue. Frame issues as quick experiments. “Let’s try switching your input to the USB mic… now try turning off noise suppression… okay, can you sit closer to the mic—about a fist away?” Most problems fall into a few buckets:
-
Echo: Someone isn’t wearing headphones or a laptop mic is engaged. Force headphones, confirm inputs.
-
Clipping: Input gain too high; lower at the source until loud laughs don’t distort.
-
Hollow/roomy tone: Guest is too far from mic or in a reflective room; move closer, add soft surfaces.
-
Choppy audio: Wi-Fi congestion; ask others in the home to pause streaming, or switch to phone hotspot temporarily.
-
Desync: If recordings drift, you can time-stretch one track in post; the clap and room tone help.
For a deeper, methodical mindset across your creative pipeline, skim the home-recording discipline in How to Create Studio-Quality Podcast Episodes at Home.
💡 Change one thing at a time so you know what fixed it.
🧱 Workflow OS — Naming, Versioning, and Handoffs
A strong workflow makes future editing painless. Use a consistent folder schema:
-
EP-###_YYYY-MM-DD_Guest-
/Zoom_Local(raw multitracks) -
/Cloud_Backup(Zoom cloud mix + chat) -
/DoubleEnders(local guest WAV/AIFF) -
/Edits(DAW sessions, exports) -
/Assets(intro/outro, music, cover art) -
/Transcripts(raw + edited)
-
Version exported audio with v1, v2 and label Master only when distribution-ready. If you’re working with an editor, drop edit notes (timecodes + intent) into the folder so revisions aren’t guesswork. When your pipeline grows, revisit this OS alongside the production planning tips in How to Start a Successful Podcast from Scratch.
💡 Name files so a stranger knows what’s inside. That stranger is future-you.
🔒 Consent, Music, and Guest Experience
Always get consent to record at the start of the call, then again in writing when sending the calendar invite. If you’re using music, ensure you own or license it; keep stems handy for flexible mixing. Close the session by thanking the guest and confirming promo assets you’ll share (pull-quotes, 60-second teaser). A smooth guest journey improves your booking rate and word-of-mouth. You’ll find a concise outreach and follow-up cadence inside How to Start a Successful Podcast from Scratch.
💡 Treat guests like partners, not content sources. Reciprocity builds your pipeline.
✅ Day-Of Recording Checklists (Copy, Paste, Use)
A checklist turns chaos into calm. After reading this paragraph, copy the relevant list into your notes app and run it every time.
Host — 15-Minute Checklist:
-
Quiet room, phone on DND, notifications off.
-
USB/XLR mic selected; input peaks around -12 to -6 dB; headphones on.
-
Zoom Original sound enabled; noise suppression low; separate tracks on.
-
Recording location set; local and cloud ready.
-
10-second room tone; clap sync; brief intro take for promos.
Guest — 24-Hour Checklist:
-
Headphones ready; quiet space with soft surfaces.
-
Mic close (a fist away), speaking straight on.
-
Ethernet or router-adjacent; close streaming apps.
-
Practice join link; confirm mic selected in Zoom.
-
Water nearby; windows closed; pets/kids managed.
💡 Checklists are creativity’s best friend—they free your brain to focus on the conversation.
✍️ Repurposing & Growth — Stretch One Recording into Many Assets
A single episode can feed your newsletter, blog, and social clips if you plan for it. Use your transcript to pull five quotable moments; export one 60-second vertical clip with hard subtitles; write a summary newsletter that links to the full episode; and compile show notes with resources, guest links, and timestamps. AI can help outline and summarize, but human editors spot the best hooks. For tools and accuracy, revisit Best AI Podcast Transcription Tools .
💡 Plan repurposing before you hit Record—ask one question designed to be a great clip.
🧠 Zoom Audio Profiles That Don’t Wreck Your Tone
Zoom can sound clean if you tell it what not to do. Build a “Podcast” profile: enable Original sound and set Noise suppression = Low whenever everyone wears headphones; that preserves consonants and low-level details you’ll need in post. Keep auto volume off for coached guests (on for civilians). Record mono unless you truly mix in stereo; mono keeps edits simpler and avoids pan drift when tracks are combined. For video pods, lock camera to 16:9 and kill aggressive “touch up” filters; they hide lighting mistakes you should fix physically. If room tone is still boxy, use the quick soft-room hacks from How to Create Studio-Quality Podcast Episodes at Home before reaching for plug-ins.
💡 Save a one-page “Zoom Podcast Preset” screenshot and share it with every guest before call time.
🎙️ Guest Coaching Micro-Script (Use on Every Call)
Guests don’t need tech lectures; they need one minute of confidence. Use this script in the green room:
“Thanks for joining! Headphones on, mic a fist from your mouth, speak straight into it. If you laugh or get excited, don’t lean into the mic—lean past it. We’ve enabled Original sound, so Zoom won’t over-process you. If audio glitches, keep talking; we’re recording separate tracks and I’ll fix it in post. Quick 10-second room tone… clap on three. Good to go.”
Send the same points 24 hours earlier with your briefing checklist from How to Start a Successful Podcast from Scratch so they arrive ready.
💡 Put the script on a sticky note on your monitor. Muscle memory beats nerves.
🔁 Redundancy Stack: Zoom + Local + Safety Net
Treat recordings like airplanes: two engines minimum. Run Zoom local multitrack + cloud single mix and ask each speaker to run a simple local recorder (QuickTime/Audacity/Voice Memos) for a double-ender. On your side, open OBS for a secondary camera+system audio capture at 720p—ugly but lifesaving if a file corrupts. Name files immediately: YYYY-MM-DD_EP###_GuestName_HOST/REMOTE_take.wav. Store everything in EP/Zoom_Local, EP/Cloud, EP/DoubleEnders. This mirrors the workflow OS you sketched earlier and makes hand-offs trivial.
💡 Files don’t exist until they live in two places—host SSD + cloud.
🌐 Network Hygiene (Low Jitter = Fewer Dropouts)
Zoom tolerates bad networks but your edits won’t. Prefer Ethernet; if you must use Wi-Fi, lock to 5 GHz, sit close to the router, and pause cloud sync tools for the hour. On Windows, set your connection as Metered so auto-updates don’t steal bandwidth mid-interview. Ask housemates to pause 4K streaming. If a guest is struggling, have them toggle Video off during long answers; audio fidelity jumps immediately. Keep a phone hotspot as emergency fallback and re-invite with the same meeting ID.
💡 Add “Router reboot 60 min before record” to your calendar description—free stability.
🎛️ DAW Chain Template (Polish Without Overprocessing)
Build a reusable track stack so every episode sounds like your show:
-
Subtractive EQ: gentle cut around 200–300 Hz (mud) and surgical cut for harshness in 2–4 kHz if needed.
-
High-pass filter: start at 70–90 Hz to remove rumble.
-
Compression: light 3:1, slow attack/medium release to keep voices natural.
-
De-esser: target 5–7 kHz; subtle is better.
-
Limiter/Loudness: land at -16 LUFS stereo (or -19 LUFS mono), ceiling -1 dBTP.
Template once, reuse forever. When you export, generate a transcript right away with a tool from Best AI Podcast Transcription Tools so show notes and captions move fast.
💡 Save the chain as “NC_Podcast_Default” in your DAW and never start from zero again.
💡 Video Polish for Podcasters (Look Good on Zoom)
Even if audio is king, watchability matters. Frame eyes on the top third, keep one hand of headroom, and angle your key light 45° off-axis at eye height. A cheap LED at ~5600K with diffuser beats ceiling cans every time. Drop contrasty virtual backgrounds; they flicker and produce ugly edges—curtains or a bookshelf are timeless. Record at 1080p if bandwidth allows, then punch-in for vertical shorts. For edit rhythm and B-roll cutaway ideas, crib from Video Editing Pro Tips for YouTube Creators.
💡 Clean one square meter behind you; your background is part of your brand.
🗂️ Show Notes, Chapters & SEO (Using Your Transcript)
Transcripts aren’t just accessibility—they’re your repurposing engine. After you get the transcript (see Best AI Podcast Transcription Tools), mark chapter timestamps every 5–10 minutes with a keyword and a promise (“07:42 — The moment she almost quit”). Pull three quotable lines for social cards, list resources mentioned, and add internal links to skill-building pieces where relevant—e.g., mic upgrades to Best Microphones for Podcasting and Video Creators.
💡 Write show notes like a landing page: promise, highlights, chapters, resources, and a single CTA.
🧰 Producer’s Run of Show (Keeps Interviews Tight)
A simple Run of Show keeps you from meandering:
-
Cold open clip (20–30s),
-
Host intro (who/why),
-
Guest welcome + credentials (one sentence),
-
Three core beats (story → insight → application),
-
Lightning round (2–3 quick Qs designed for shorts),
-
Wrap (ask, CTA, next episode tease).
Share it in the calendar invite so your guest sees the arc. This template dovetails with your planning doc in How to Start a Successful Podcast from Scratch.
💡 Bold the one question you must get answered. Everything else is optional.
🔒 Consent, Music, and Ad Markers (Protect the Tape)
Open with a verbal consent on-tape: “We’re recording; do we have your permission to use this conversation for the NerdChips podcast and its promotions?” Use cleared music only; keep license receipts in your EP/Assets folder. If you run ads, insert clean ad markers (“[AD BREAK] at 18:32”) on a separate marker track so you (or your editor) can version the episode quickly. This practice also plays nicely with your export workflows in How to Create Studio-Quality Podcast Episodes at Home .
💡 If it’s not written down, it didn’t happen—keep a one-page rights log per episode.
🧯 Fast Fix Playbook (When Things Go Sideways)
When audio goes bad mid-call, don’t freeze. Try this three-step ladder, one change at a time:
-
Input sanity: confirm the right mic, drop input gain 20%, move closer.
-
Network triage: kill video, pause cloud sync, switch to Ethernet/hotspot.
-
Recording safety: keep Zoom rolling, start guest’s phone voice memo as local backup.
After the call, note what failed and update your checklist. For a calmer troubleshooting mindset, steal from your own How to Create Studio-Quality Podcast Episodes at Home habits: isolate, test, confirm.
💡 Change one variable, listen, then proceed—chaos hates method.
📨 Zoom Podcast Tips — Weekly
Presets, guest scripts, and edit chains—ship cleaner episodes faster.
🔐 100% privacy • Unsubscribe anytime
🧠 Nerd Verdict
Zoom is a reliable backbone for remote interviews when you treat it like a tool—not magic. A quiet room, dynamic mic + headphones, “Original sound” enabled, separate tracks, and a double-ender backup will get you 90% of the way. The last 10% comes from editing with taste and presenting your show like it deserves listeners.
❓ FAQ — Straight Answers, No Mystique
💬 Would You Bite?
What’s your biggest Zoom recording headache—guest audio, room noise, or syncing?
Tell me your show format and I’ll map a 30-minute fix you can ship this week. 👇

