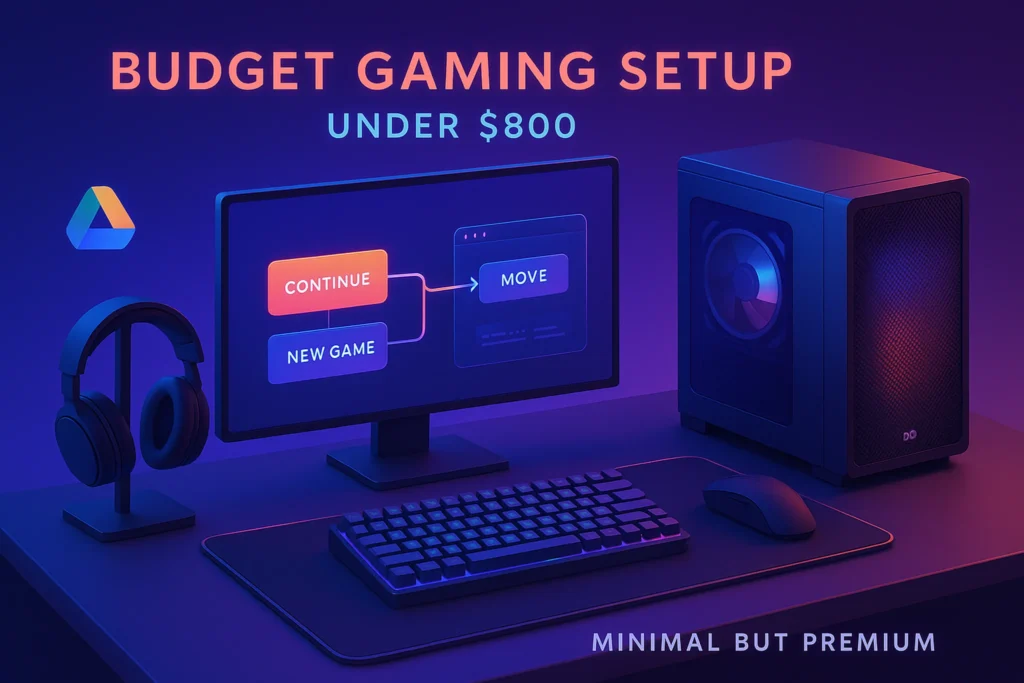
🎯 Introduction — “Under $800” Without Regret
“Budget” shouldn’t mean frustration. With a clear plan and a few smart trade-offs, you can build a quiet, reliable 1080p gaming setup that hits 60–120 FPS in the right titles, looks clean on your desk, and leaves room to upgrade later. This guide focuses on value per frame, not spec-chasing. You’ll see how to allocate the budget, when a used part is smart, and how to avoid common pitfalls (PSU roulette, airflow mistakes, mismatched RAM). For step-by-step assembly photos and safety basics, keep our companion How to Build a Gaming PC from Scratch open in a second tab.
💬 Promise: You’ll walk away with a parts map, an upgrade path, and a setup flow that feels great on day one—and even better six months from now.
💡 Decide your target: 1080p/60 locked (story games) or 1080p/100+ (competitive). Your target drives everything else.
🧠 Scope & Strategy — What “Setup” Includes (and What It Doesn’t)
“Setup” can mean a lot. We’ll define two practical bundles:
-
Tower-First: Spend ~$650–$700 on the PC, ~$100–$150 on essentials (mouse/keyboard/headset). Use a TV you already own or a basic 1080p monitor you can borrow for a short while.
-
All-In Starter: Aim ~$600–$650 on the tower, ~$150–$200 on a 1080p monitor + essentials. Accept slightly lower graphics presets on day one, upgrade GPU later.
If you’re building in a tight space or moving between rooms, a compact display helps—see Portable Monitors and Other Underrated Productivity Gadgets for portable panels that double as travel screens.
💡 Pick one lane now. Changing lanes halfway is how budgets get blown.
🧩 Budget Split That Works (and Why)
A sensible baseline split for an under-$800 PC-first setup:
-
GPU: ~35–40% of budget
-
CPU: ~20–22%
-
Motherboard: ~10–12%
-
RAM (16–32 GB): ~10%
-
Storage (1 TB NVMe): ~8–10%
-
PSU (550–650 W 80+ Bronze/Gold): ~6–8%
-
Case + fans: ~6–8%
-
Peripherals (basic set): what’s left
Why this works: at 1080p, the GPU is king for FPS, but a weak CPU creates stutters; 16 GB RAM still clears most games, but 32 GB is a terrific lifetime upgrade if the price delta is small. NVMe SSD makes the entire system feel snappy—worth the tiny premium over SATA.
💡 Never “save” on the PSU. Cheap power turns wins into RMA tickets.
🆚 PC vs Prebuilt vs Console (Mini-Comparison)
-
DIY PC (this guide): Best value per part, full control, easy to upgrade. Requires 2–3 hours assembly and calm troubleshooting. Pair with DIY Tech Troubleshooting: Pro Tips to Fix Common Issues to keep headaches small.
-
Prebuilt: Faster to desk; often weaker PSU/motherboard and noisier cases. Good if time is your absolute constraint—still check airflow and RAM speed.
-
Console + Monitor: The simplest path if you only play a few titles and don’t need mods; limited to the console ecosystem. For 4K curiosity, enjoy the tech tour in Nvidia GeForce RTX 5090 Review: 4K Gaming Beyond Limits —then come back to earth and remember we’re optimizing 1080p joy today.
💡 Time, money, flexibility—pick two. DIY gives you money + flexibility if you can invest a weekend.
🔧 The Parts Blueprint — What to Look For (Not Just Brand Names)
We’ll keep this brand-agnostic so you can shop deals. Match the class and capabilities below.
CPU (Value Tier)
For 1080p gaming, you want 6 strong cores (with threads) minimum, ideally boost clocks above 4 GHz. A modern 6-core or midrange 8-core gives smooth frame pacing and headroom for background tasks. Stock coolers are fine at this budget; just ensure your case gets decent airflow.
GPU (Where FPS Lives)
You’re hunting a 1080p high/ultra card with modern codec support (AV1 is nice for streaming/recording). Aim for GPUs that comfortably push esports titles >120 FPS and story games 60–80 FPS at high. Prioritize VRAM (8 GB baseline) for future-proofing in texture-heavy titles.
Motherboard (Don’t Cheap Out Too Far)
Pick a board with:
-
VRM adequate for your CPU class (reviews help).
-
Two M.2 slots (one now, one later).
-
Four DIMM slots if you start at 16 GB and plan for 32 GB later (on compact boards, two DIMMs are fine if you buy 2×16 right away).
-
Back-panel USB mix that matches your devices.
RAM
16 GB (2×8) is passable; 32 GB (2×16) is ideal if the price gap is small, especially for creators who game. Check speed and timings: match the sweet spot your platform likes (e.g., DDR4 3200–3600 or DDR5 in a sensible range).
Storage
A 1 TB NVMe SSD keeps you sane. Many games are 50–100 GB; the usability difference over a 500 GB drive is huge. Add a cheap SATA SSD later for archival titles.
PSU
A quality 550–650 W 80+ Bronze/Gold unit with the right PCIe connectors covers mainstream GPUs. Look for reputable OEMs and 10-year warranties when possible. Modular helps with airflow.
Case & Cooling
Pick a case with mesh front, space for two intake + one exhaust fan, and room for your GPU length. Skip the glass-box sauna aesthetic. Airflow is free performance.
💡 Build a one-line parts filter before shopping: “6-core CPU + 8 GB VRAM GPU + 1 TB NVMe + mesh case + 550 W Gold PSU.” It’s amazing how much this prevents impulse buys.
♻️ Where to Save (Used/Refurb) vs Where to Buy New
Buy new: PSU, primary NVMe SSD (warranty matters), and often the motherboard (BIOS/support).
Safe used/refurb bets: CPU (non-overclocked, with proof), GPU (ask for thermals/bench proof), case (local pickup).
Sometimes used: RAM (from trusted sellers), secondary SSDs for less critical libraries.
Inspection checklist after you read:
-
GPU: Ask for a quick stress test clip and temps (under load ≤ 80–85°C in a normal case).
-
CPU: Confirm pins/pads are immaculate.
-
PSU: If used, check age/line; many budget lines from years ago aren’t worth the risk.
-
Case: Check front panel clips, all standoffs, and included fans.
💡 Refurb from a reputable seller > random used. Returns are part of the budget.
🧪 Real-World Targets — What You Can Expect at 1080p
With the right value-tier CPU/GPU and sensible presets:
-
Esports (Valorant/CS/LoL/Fortnite low-to-medium): 150–240+ FPS is realistic with tuned settings.
-
Story/AAA (medium–high): 60–80 FPS typical at 1080p with a blend of medium/high, sometimes using FSR/DLSS balanced.
-
Indie/AA: Often 100+ FPS even at high.
-
Creators who game: GPU encoders (AV1/HEVC) let you capture gameplay without murdering frames.
💡 Cap at 60/90/120 depending on your monitor. Frame-time stability > “max FPS” brags.
🧠 Build Smarter on a Budget — Weekly Tips
Join our free newsletter for parts-class guides, 60-minute build checklists,
and upgrade calendars tailored to sub-$1k rigs. Practical, tested, and easy to apply.
🔐 We respect your inbox. One email/week. Unsubscribe anytime.
🔧 Assembly Flow — Fewer Surprises, Faster First Boot
If this is your first build, follow the calm, photo-driven walkthrough in How to Build a Gaming PC from Scratch. The short version:
-
Bench test on the motherboard box (CPU, cooler, one RAM stick, GPU if needed, PSU jump).
-
Mount the board, install RAM (A2/B2), NVMe, and case standoffs.
-
Seat the GPU carefully; route the PCIe power cleanly.
-
Connect front-panel headers with the manual in view (no guessing).
-
Two intake front, one exhaust rear; check fan arrows.
-
First boot → BIOS update → enable XMP/EXPO (RAM profile) → install OS.
If something blinks or beeps, breathe, then consult DIY Tech Troubleshooting: Pro Tips to Fix Common Issues. Most “dead” builds are a cable or RAM seating issue.
💡 Take photos of cable runs before closing the side panel. Future-you will applaud.
🖥️ Displays: Where to Start (and When to Splurge)
For under-$800 all-in, 1080p/60–75 Hz is fine for narrative games. For esports, stretch to 1080p/144 Hz when you can—your aim and feel improve instantly. If desk space is tight, a 15–18″ portable monitor with a single USB-C cable is a clever stopgap; we shortlist solid picks in Portable Monitors and Other Underrated Productivity Gadgets. If you already own a 4K TV, run 1080p render scale for performance; don’t chase native 4K on a budget GPU.
💡 Set Windows’ Game Mode on, enable V-sync off + frame cap per game to reduce input lag while keeping noise down.
🖱️ Peripherals: Spend Here, Save There
-
Mouse: A comfortable, mid-weight sensor-reliable mouse (wired is fine). Shape > RGB.
-
Keyboard: Any dependable mechanical or membrane board with anti-ghosting; full numpad is optional.
-
Headset: Prioritize mic clarity and comfort over 7.1 marketing.
-
Controller: A modern Bluetooth/USB controller for racing/action hybrids.
For reliable, budget-friendly gear, skim Best Gaming Accessories for Hardcore Gamers. Even if you’re “not hardcore,” the same durable picks save money long term.
💡 Buy a large mouse pad before you buy RGB. Control beats glow.
🧼 Software & Settings That Give You Free Performance
-
GPU drivers: Clean install; enable image upscalers per game (FSR/DLSS/XeSS) when available.
-
Windows hygiene: Background apps off, startup trimmed, HAGS/Game Mode as appropriate.
-
In-game: Turn down shadows and ambient occlusion first; they cost a lot and hurt little.
-
Thermals/noise: Set case fans to a gentle curve; cap FPS to your monitor to keep temps steady.
-
Storage sanity: Keep ≥15% SSD free; move seldom-played games to a secondary drive later.
💡 One hour of settings curiosity saves hundreds of dollars of unnecessary upgrades.
🔄 Upgrade Paths — Make Today’s Dollars Work Tomorrow
-
Quick wins (cheap): Add another 16 GB RAM (if you started at 16), drop a second NVMe, add two quality fans.
-
Medium ticket: Replace GPU with next-tier model once prices dip, keep PSU headroom in mind.
-
Quality of life: Step up to a 1080p/144–165 Hz monitor later—your games will feel new again.
When you finally dream of 4K ultra and path tracing, enjoy the fantasy in Nvidia GeForce RTX 5090 Review: 4K Gaming Beyond Limits then decide if that goal is worth chasing for your library.
💡 Schedule upgrades—not impulses. Pick one improvement per quarter.
🎨 Two Sample Builds (Concept, Not SKU-Locked)
Build A: Tower-First Velocity (PC ~$700, Peripherals you already own)
Aim a stronger GPU, stick to a competent 6-core CPU, 16 GB RAM you can grow, 1 TB NVMe, airflow case, 550–650 W PSU. You’ll cruise at 1080p high today and drop a new monitor later.
Build B: All-In Starter (PC ~$620, Monitor + peripherals ~$160–$180)
Dial the GPU one notch down, still 6-core CPU, 1 TB NVMe, clean case airflow, 550 W PSU. Pair with a 1080p/75 Hz budget monitor now; upgrade GPU + monitor in 6–9 months.
💡 Don’t SKU-hunt; class-hunt. Let prices guide the brand, not the other way around.
🧯 Common Pitfalls (and Quick Fixes)
-
No display on first boot: Reseat RAM (A2/B2), check GPU power, try motherboard HDMI if your CPU has iGPU for BIOS update.
-
Thermal throttling: Flip case fans (arrows show airflow), remove front glass filter, tidy cables.
-
Random shutdowns: PSU protection tripping (cables, power strip), or CPU cooler seating.
-
Stutters despite high FPS: Enable Resizable BAR (if supported), check background apps, cap FPS to monitor.
-
Noisy system: Reduce unnecessary fan RPM, add one intake, cap FPS at 90–120 to cut GPU heat.
For deeper fixes, lean on DIY Tech Troubleshooting: Pro Tips to Fix Common Issues.
💡 Troubleshoot like a scientist—change one variable at a time.
✅ Day-1 Setup Checklist (Paste-and-Do)
After assembly and OS:
-
Update BIOS → load XMP/EXPO → set boot drive.
-
GPU driver clean install → enable per-game upscaler.
-
Install a launcher manager; keep only what you use.
-
Create a Games folder on the SSD; keep the desktop clean.
-
Cap FPS to monitor; set a quiet fan curve.
-
Install one aim trainer or benchmark to sanity-check performance.
-
Back up a clean OS image once everything feels right.
💡 A clean day-1 image saves you from ever reinstalling from scratch.
💸 Price-Tracking & Timing Playbook (Stretch $800 Further)
The fastest way to “find” 10–15% extra budget is timing. Prices swing weekly, and bundles (CPU+board, GPU+game) quietly improve value. Pick a 2–3 week window and track just your parts class (e.g., “6-core CPU + 8GB VRAM GPU + 1TB NVMe”). Don’t chase brands; chase total build cost. If a single part spikes, pause that one, buy the rest. For peripherals, check our curation in Best Gaming Accessories for Hardcore Gamers even if you’re not “hardcore,” the same durable picks keep you from rebuying.
Your trigger list (after reading):
-
“Buy now” when the GPU dips below your target by ≥8%.
-
Green-light 32 GB RAM when it’s within 20–25% of 16 GB.
-
Accept refurb on cases/CPUs from reputable outlets; new for PSU/NVMe.
-
Stop tracking once cart total hits target—build beats waiting.
💡 Time-box deals: 72 hours max. Decision speed saves money.
🧪 Used GPU/CPU Sanity Test (60-Minute Buyer’s Checklist)
Used parts can unlock real frames-per-dollar—if you verify the basics. Ask for a quick screen recording: card info window + 5 minutes of a stress/game run with overlayed temps (target <80–85°C in a normal case). Inspect the PCB for corrosion or bent fins; confirm fan ramp sounds normal. On CPUs, check pads/pins and avoid delidded curiosities unless you know what you’re buying. After install, do a calm first-boot routine from How to Build a Gaming PC from Scratch and lean on DIY Tech Troubleshooting: Pro Tips to Fix Common Issues if you hit snags.
Quick checks:
-
Run a 10-minute stress + a real game; log avg FPS + 1% lows.
-
Listen for coil whine at capped vs uncapped FPS.
-
Check connectors/cables for heat discoloration.
-
Reset drivers (clean install) before judging performance.
💡 Trust numbers, not vibes—ask sellers for proof clips.
🔇 Quiet & Cool Mode (Free Performance via Thermals)
Thermals = sustained FPS. A mesh case with two front intakes and one rear exhaust is your baseline, but curves and caps finish the job. Start by capping FPS to your display (60/90/120) to cut GPU wattage; set a gentle system fan curve that ramps smoothly through 50–70°C. Most GPUs allow mild undervolting with vendor tools; a 5–10% wattage drop often costs 0–3% FPS—worth it on small budgets. If temps still climb, re-seat your front dust filter or flip a fan that’s fighting airflow. The airflow fundamentals in How to Build a Gaming PC from Scratch apply here exactly.
Action order:
-
Cap FPS → tune curve → (optional) undervolt → retest.
-
Lower shadows/AO first; high impact, low visual cost.
-
Add one more intake before buying louder CPU/GPU coolers.
💡 A quiet rig gets played more. Lower noise = longer sessions.
🌐 Latency Hygiene (Network & Input That Feel Snappy)
Frames are half the story; latency is the other half. Use Ethernet when you can; if not, lock to 5 GHz Wi-Fi with a short channel width to reduce interference. On the PC, kill high-jitter background tasks and set your launcher to “don’t auto-update while playing.” For inputs, a reliable wired or low-latency wireless mouse matters more than RGB—see the durable picks in Best Gaming Accessories for Hardcore Gamers. If you move between rooms, a USB-C portable monitor can reduce adapter hops and input lag on the go- examples live in Portable Monitors and Other Underrated Productivity Gadgets.
Quick wins:
-
Prefer fullscreen + in-game frame cap over external limiters.
-
Set router QoS for your PC; avoid busy Wi-Fi channels.
-
Test mouse polling rate (not always max = best on low-end CPUs).
💡 Measure once with an aim trainer before/after tweaks; keep what feels better.
🗂️ Storage Strategy (Make 1TB Feel Bigger)
A tidy library keeps your $800 rig fast. Create a dedicated Games folder on your NVMe and avoid installing launchers on the Windows partition root. Move captures/clips to a secondary folder and prune weekly. For huge titles you only revisit sometimes, zip or offload to a secondary SSD later. The day-one file layout habits in How to Build a Gaming PC from Scratch double as your anti-clutter policy here.
Do this next:
-
Keep ≥15% free space; SSDs slow when stuffed.
-
Uninstall “once-and-done” single-players after credits—re-download is free.
-
Pin three active games; hide the rest from the launcher home.
💡 A small library you actually play beats a huge one you scroll.
🧯 Recovery & Reinstall Insurance (One Evening, Years of Calm)
Budget rigs deserve enterprise habits. After your system feels stable, create a clean image snapshot: OS + drivers + launchers (no games). Store it on an external drive. Keep a tiny folder with GPU driver, LAN driver, and motherboard utilities so you’re never stuck offline after a reinstall. Jot your overclock/undervolt and fan curve notes in a text file. If things go sideways, you’ll be back to “ready to install games” in under an hour. For methodical troubleshooting, the mindset in DIY Tech Troubleshooting: Pro Tips to Fix Common Issues keeps panic at bay.
Snapshot pack checklist:
-
OS image + bootable USB.
-
Drivers folder (GPU/LAN/chipset).
-
Settings.txt (XMP/EXPO, fan curves, frame caps).
💡 Treat your clean image like a save point. You earned it.
🎮 Settings Presets by Genre (Copy, Then Tweak)
Don’t re-discover settings per game. Use genre presets and tweak edges. For esports, drop post-processing, keep textures medium, cap at 120 or your monitor’s ceiling, and lock low input lag modes. For AAA story, run high textures, medium shadows/volumetrics, and enable FSR/DLSS on Balanced; cap at 60–90 for quiet fans. For battle royale, prioritize view distance and foliage clarity; accept medium everything else. For indie/cozy, turn on V-sync and enjoy silence. This approach stretches today’s hardware while feeling premium.
Preset snap:
-
Esports: low PP, med textures, cap 120, no V-sync.
-
AAA: high textures, med shadows/AO, FSR/DLSS Balanced, cap 60–90.
-
BR: view distance ↑, foliage clarity ↑, rest medium, cap 90–120.
-
Indie: V-sync on, cap 60, everything high (why not).
💡 Save per-game profiles; never set the same slider twice.
🧳 Apartment/Dorm Setup (Small Footprint, Big Fun)
If desk space is tight, go Mini tower + portable monitor + large mouse pad. A 15–18″ USB-C portable screen and a foldable stand create a legit station on a small table; when you’re done, everything packs into a drawer. Keep cables short to avoid spaghetti. The portable panel ideas in Portable Monitors and Other Underrated Productivity Gadgets pair well with this approach. For late-night sessions, TDP caps and frame caps keep temps and roommate relations healthy.
Packable kit:
-
Mini case, portable monitor + stand, short USB-C/HDMI, compact headset hook.
-
One cable bag labeled Power / Display / USB.
-
A microfiber + canned air for weekly dust.
💡 If teardown takes >2 minutes, simplify. Convenience keeps you gaming.
📅 Upgrade Calendar & Resale Math (Plan, Don’t Gamble)
Write your next 12 months like a product roadmap. Q1: add two case fans and bump to 32 GB RAM if you started at 16. Q2: monitor upgrade to 1080p/144–165 Hz. Q3/Q4: GPU step-up when deals land—sell your old card while demand is healthy. Watching extreme tech is fun (peek at Nvidia GeForce RTX 5090 Review: 4K Gaming Beyond Limits), but your 1080p value stack wins on joy per dollar. Track purchase dates and keep boxes; clean resale photos add real money.
Rule of thumb:
-
Upgrade when a part nets ~35–50% performance for ≤ the cost difference after resale.
-
Never upgrade more than one major component per quarter—it keeps bugs traceable.
💡 Put upgrade dates on the calendar now. Future-you won’t impulse-buy.
📨 Budget Gaming Weekly
Parts classes, airflow fixes, and upgrade timing—delivered in 5 minutes.
🔐 No spam. Just practical wins.
🧠 Nerd Verdict
Under $800 can deliver a legit 1080p experience if you shop by class, not hype: 6-core CPU, 8 GB VRAM GPU, 1 TB NVMe, mesh airflow, reliable PSU. Build quietly, set smart caps, and plan one upgrade at a time. That rhythm beats “save forever, play never.”
❓ FAQ — Straight Answers For Budget Builders
💬 Would You Bite?
What’s your lane—Tower-First or All-In Starter—and which game are you optimizing for?
Drop your budget split and target FPS; I’ll suggest the first two upgrades to plan. 👇