💡 Why Lighting Matters in Video
Lighting is one of the most overlooked elements by beginner creators—and yet, it’s one of the most powerful tools in your setup. Great lighting doesn’t just help you look good on camera—it sets the mood, improves perceived quality, and makes editing far easier later.
In fact, poor lighting is often what separates amateur-looking videos from professional ones—even more than the camera itself. A well-lit shot adds clarity to your face, makes colors pop, and builds viewer trust. When your lighting is flat or too dark, people subconsciously associate it with low-effort production. That’s a problem—especially when you’re trying to grow your personal brand or YouTube channel.
Whether you’re a solo YouTuber, remote teacher, TikTok creator, or streamer, understanding how to control light will elevate your content without breaking the bank.
🔧 Budget-Friendly Lighting Gear
If you’re just starting out or working with a limited budget, there are a few pieces of affordable gear that can instantly improve your setup. These aren’t $300 studio panels—these are creator-approved tools under $100:
✅ Ring Lights
-
Why: Perfect for frontal, balanced lighting—especially for talking head videos or livestreams.
-
Example: Neewer 10” Ring Light Kit (~$30) with adjustable brightness and tripod mount.
✅ Softbox Kits
-
Why: Softboxes diffuse light, making your face look more natural and reducing harsh shadows.
-
Example: Mountdog Softbox Lighting Kit (~$60) – ideal for home studios.
✅ RGB LED Panels
-
Why: Add color, atmosphere, or fill light. Many are battery-powered and highly portable.
-
Example: Ulanzi VL49 RGB or Neewer 660 LED Panel – both great under $50.
💡 Pair any of these with a tripod or desktop stand and you’ll instantly create a more cinematic feel.
For creators focused on engagement, How to Script Your Videos for Maximum Engagement will take your delivery to the next level.
🪄 Creative DIY Hacks at Home
You don’t need to buy anything to start improving your lighting. Here are some clever, zero-cost hacks using everyday items:
-
Use window light: Face the window, not away from it. Natural daylight is one of the best soft lights.
-
Bounce light off a wall: Point a lamp at a nearby white wall for indirect, diffused light.
-
DIY diffuser: Place a sheet of baking parchment (greaseproof paper) in front of a desk lamp for a softer glow.
-
Reflector alternatives: Use a white T-shirt, large sheet of paper, or even aluminum foil to reflect light onto your face.
-
Warm up the tone: If your lights feel too cold or blue, cover them with a thin yellow envelope or colored plastic to simulate warmer light.
🧠 These simple adjustments can dramatically improve the lighting quality in your videos—even with your smartphone or webcam.
Pair your lighting with smart tools from Video Equipment on a Budget and learn how to get started even with just your phone.
🧠 Lighting Setup Tips for Different Scenarios
Lighting isn’t one-size-fits-all. Each video format benefits from a different lighting strategy. For YouTube talking head videos, your goal is clarity, warmth, and consistency. A soft key light positioned slightly off-center—above eye level—can create depth and eliminate harsh shadows. Pair it with a fill light or a white wall to reflect light back onto the darker side of your face. The result? A well-lit, engaging shot that looks professional even with budget gear.
For smartphone reels or TikToks, mobility and speed are everything. Use portable lighting like a mini ring light or even a small desk lamp with a DIY diffuser (baking paper, a shower curtain, or a t-shirt). Frame your face well and avoid backlight from windows unless you’re intentionally using natural light as a key source. Remember, viewers on mobile scroll fast—clean lighting helps stop the scroll.
Live streaming, on the other hand, requires stable, continuous lighting with minimal flicker. A strong front-facing key light will make your face pop, but don’t forget ambient or backlighting to add depth and separate you from the background. RGB strip lights, a lamp behind you, or an LED fill can soften your environment and reduce harsh contrast—especially if you stream in a darker room.
Different content formats require different lighting approaches. Here are quick, effective setups for each:
🎥 YouTube Talking Head Video
-
Setup: One key light (ring light or softbox) at a 45° angle, fill light on the other side or a reflector, and a small background light for separation.
📱 Smartphone Reels or TikToks
-
Setup: Natural light near a window + small ring light for fill. Use portrait orientation and keep shadows minimal.
💻 Live Streaming
-
Setup: Ring light above or behind monitor, RGB light on background or wall for color pop, softbox off to the side to eliminate harsh shadows.
💡 Even with just one light, you can create depth by adjusting angles and brightness. Experiment with shadows for dramatic looks.
You can also improve your sound with our in-depth list of Best Microphones for Podcasting and Video Creators.
📸 Before & After Examples (Descriptive)
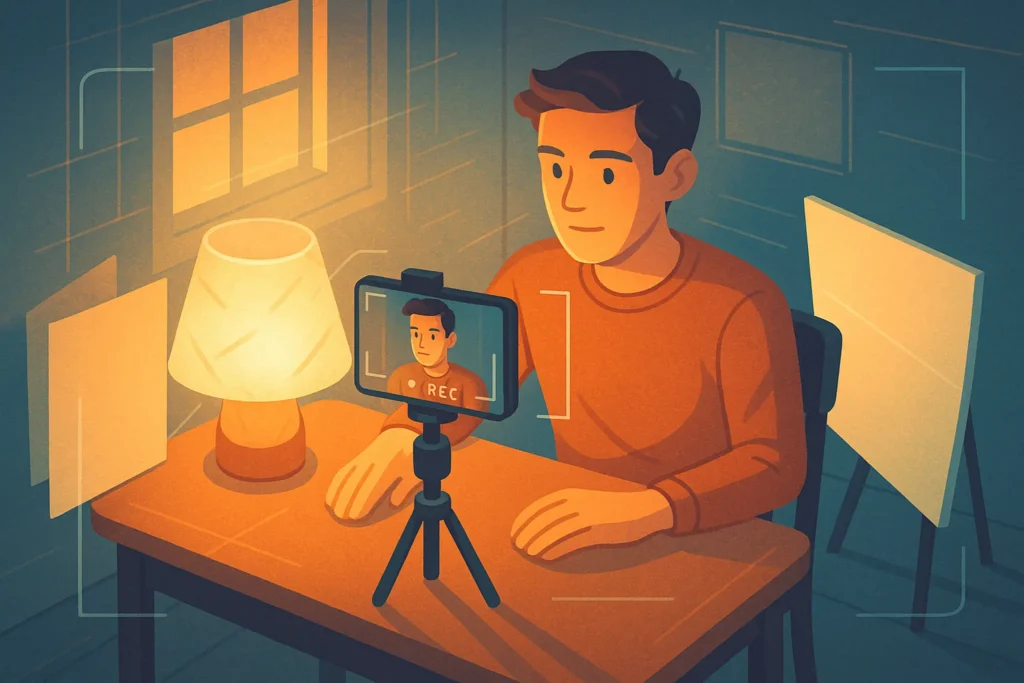
Let’s say you’re recording a YouTube intro on your webcam at night.
-
Before: Overhead room light only. Harsh shadows under your eyes, washed-out colors, background looks flat and dull.
-
After: Add a cheap ring light facing your face, and place a warm lamp behind you off-center. Suddenly, your eyes sparkle, skin tones look balanced, and the background glows with depth.
The difference is striking—and you didn’t even need to spend $100.
Once you’ve nailed your lighting, consider upgrading your gear with Top Gadgets for Content Creators.
🧪 Color Temperature & White Balance Explained
Color temperature affects the entire mood and professional feel of your video—even if your lighting is bright and consistent. Measured in Kelvins (K), warmer lights (3000K) tend to cast orange tones, while cooler lights (6500K) lean toward blue. The sweet spot for video is around 5500K—known as “daylight balanced.” It renders skin tones accurately and matches well with natural light.
Using mixed light sources—like warm indoor bulbs alongside daylight LED panels—can lead to color mismatches and unnatural skin tones. That’s where white balance comes in. Most phones and cameras allow you to set white balance manually or lock it. Use presets like “Daylight” or dial it in manually to match your main light source. A locked white balance means your video won’t constantly shift in color tone when lighting conditions change.
Most beginner creators overlook one crucial factor: color temperature. Light sources vary in tone, measured in Kelvins (K). For example:
-
🔵 Cool light (6500K): Bluish tone, often from LED bulbs or cloudy daylight
-
🟡 Warm light (3000K): Yellow/orange hue from tungsten or indoor lighting
-
⚪ Daylight-balanced (5500K): Neutral white — ideal for video lighting
If your lights don’t match in color temperature, your video might have weird skin tones or be hard to color-correct.
🎯 Nerd Tip: Set your camera or phone’s white balance to “Daylight” if using natural light, or manually match it to your gear’s color temp. Apps like Filmic Pro allow manual white balance locking.
📱 Lighting with Your Phone: Apps + Settings
Filming with your phone? Great—but phone cameras are built to auto-adjust, and that’s a problem in video. When light levels change, your exposure and white balance might shift mid-shot, creating a distracting flicker or tone shift.
To fix this, lock your exposure and white balance before recording. On iPhones, tap and hold on your subject to activate AE/AF Lock. On Android, pro camera apps like Filmic Pro or ProShot give you full manual control—letting you adjust ISO, shutter speed, and Kelvin white balance with precision.
These apps help you match your light setup and prevent your footage from looking inconsistent. With just a little setup, you can go from “smartphone amateur” to “mobile creator pro.”
If you’re filming on a smartphone, lighting control becomes even more critical. Modern phones adjust exposure automatically—but that can be a problem mid-shot.
✅ Lock your exposure using apps like:
-
Filmic Pro (iOS/Android)
-
ProShot
-
Native Camera App (tap & hold to lock on iPhone)
These apps also let you fine-tune white balance and ISO, reducing flickering or sudden shifts in brightness. Add a soft light, tweak a few settings—and your phone video instantly looks pro.
🎬 3-Point Lighting Setup (DIY Edition)
Want to achieve that cinematic glow? The 3-point lighting technique is the gold standard—even if you DIY it:
-
Key Light – Your main light source (e.g., ring light or bright desk lamp)
-
Fill Light – A secondary light to soften shadows (e.g., bounce light from a white wall or second lamp with a diffuser)
-
Back Light (or Rim Light) – Adds depth and separates you from the background (e.g., an RGB strip behind you)
Even with just two light sources and smart positioning, you can emulate this pro setup.
🔌 Powering Your Lights Efficiently
Lighting isn’t just about how bright or soft it is—it’s also about how you power your gear. Especially with budget setups that rely on USB or wall power, tangled cords and limited outlets can slow you down and clutter your space.
For mobile creators, USB-powered lights paired with high-capacity power banks are a game changer. You can shoot outdoors, switch locations, or set up anywhere without needing wall outlets. In more permanent setups, multi-device charging hubs (like UGREEN or Anker 100W GaN chargers) let you organize and power all your lights and gear from one central unit.
Want extra convenience? Smart plugs connected to your phone or voice assistant can control lights with a tap or command. This isn’t just luxury—it saves setup time and streamlines your entire production process. One click, and your studio is lit, powered, and ready.
Cable chaos? Budget lights often lack built-in batteries, so efficient powering is key:
-
🧲 Use USB-powered lights with a power bank to stay flexible
-
🔌 Opt for a multi-device hub to manage everything from one wall socket
-
📴 Consider smart plugs (like TP-Link Kasa or Meross) to turn on/off lights with your phone or voice
These tweaks save you time—and keep your creative space clutter-free.
🧠 Nerd Verdict
Lighting doesn’t have to be expensive to be effective. With a bit of creativity and a few affordable tools, any content creator can achieve professional-looking results. Whether you’re filming product reviews, tutorials, or live streaming from your bedroom, smart lighting decisions instantly upgrade your brand’s visual credibility.
❓ FAQ: Nerds Ask, We Answer
💬 Would You Bite?
🎬 What’s your biggest lighting challenge when filming at home?
Tell us in the comments 💬— we might feature your question in a future lighting hacks post!


