🧠 Why This Guide (and Who It’s For)
Elden Ring’s DLC raises the stakes in the best possible way—more secrets, nastier bosses, and a design that rewards explorers who plan. If you’re a returning Tarnished wondering “what’s new, what’s required, and how ready should I be?”, this is your compact prep-and-play field manual. It focuses on practical decisions: how to unlock the DLC entrance, where to start, the right level window, and why the Scadutree/Spirit Ash blessing system quietly changes difficulty (and how you can make it work for you). We’ll also layer in micro-tactics (route choices, gear swaps, co-op etiquette) so you hit the ground running.
Curious how game tech is evolving in parallel? Our explainer on The AI Revolution in Gaming pairs nicely with this guide, and if you’re tracking broader 2025 releases, peek at Top 10 Most Anticipated Video Games of 2025 for what else to queue up next.
💡 Set a 15-minute calendar block labeled “DLC Entry Prep”—you’ll be surprised how much friction disappears when you front-load the right steps.
✅ What’s In the DLC (High-Level Expectations)
FromSoftware’s expansion opens a new region with its own progression rules, a roster of fresh bosses (including marquee fights), and multiple new weapon categories that change build diversity—think Backhand Blades, Great Katanas, Light Greatswords, Perfume Bottles, Throwing Blades, Hand-to-Hand Arts, Beast Claws, and more. Expect a sprawling map with dense side paths and optional dungeons, and plan around a separate power curve inside the DLC (you’ll boost your effectiveness through collectibles tied to the Land of Shadow rather than just your base character level). The DLC released in June 2024 and is available on PlayStation, Xbox, and PC.
💬 Micro-quote: “Treat the DLC as a parallel build—your rune level matters less than your Scadutree progression. Explore first, conquer second.”
If you’re into how design philosophies evolve, drop into How AI is Changing Video Game Design for context on encounter pacing and enemy behavior trends that make content like this tick.
🗝️ How to Unlock the DLC Entrance (Don’t Miss These Two Bosses)
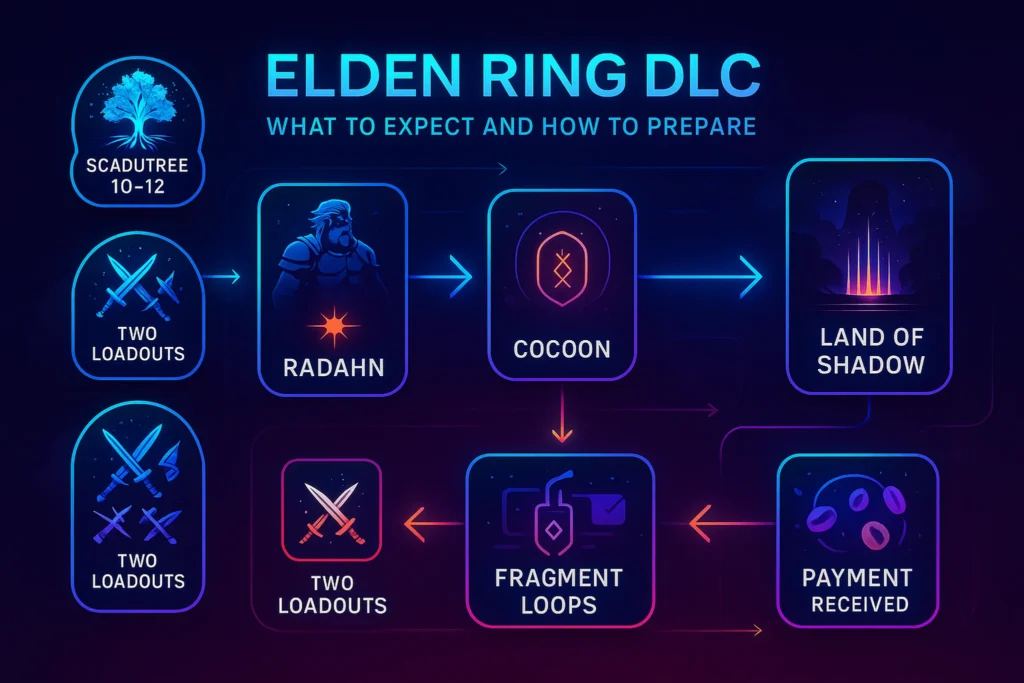
You can’t just walk in. Access is gated behind two main-game victories: defeat Starscourge Radahn and Mohg, Lord of Blood. After that, interact with Miquella’s cocoon in Mohg’s boss arena at Mohgwyn Palace to warp into the new land. Multiple major outlets and official channels corroborate the two-boss requirement and the cocoon entry.
Why it matters: Many players beat Mohg late (or skip him altogether). If you haven’t cleared both, your “DLC won’t start” issue is already solved—go finish those fights, then return to the cocoon.
💡 Add a map marker called “Cocoon (Entry)” in Mohgwyn’s arena once both bosses are down.
🧪 The New Power Curve: Scadutree & Revered Spirit Ash Blessings
Inside the DLC you’ll find Scadutree Fragments and Revered Spirit Ash items. Spend them at Sites of Grace to buff you (damage dealt + damage negation) and your summons/Torrent respectively—but only within the DLC zones. Early levels grant the largest relative boosts, with scaling tapering later; many players see big survivability jumps by pushing the blessing to double-digit levels before tackling later bosses.
🧠 Heads-up: This is why some folks felt “over-leveled but underpowered.” Your rune level isn’t the star of the show here—your blessing level is. (Community testing suggests meaningful per-level gains, especially early on.)
After grasping this system, scan our piece on Top 10 Indie Games of 2025—you’ll notice similar “zone-local” difficulty frameworks popping up in modern design.
🧗 Recommended Level & Gear Baseline (Realistic, Not Gatekeepy)
There’s no official gate, but most seasoned guides converge on a start around Level 150–160 with fully upgraded weapons (+24/+10 somber) and robust Vigor (60ish for melee-leaning builds), then let the Scadutree blessings carry you further. If you’re under that, it’s still doable—just prioritize fragment routes first.
Practical baseline after you read this paragraph:
-
Aim for Level 150+, +24/+10 weapon, 60 Vigor if you trade hits.
-
Bring a couple status build options (Bleed/Frost) and a range answer (bow, perfumer, spells).
-
Upgrade two Spirit Ashes you trust; your Revered blessings amplify them inside DLC.
💡 If you’re dying in two hits, don’t “git gud”—git fragments.
⚔️ New Weapon Categories & What They Actually Change
The DLC introduces several weapon families that reshape playstyles:
-
Great Katana: Deliberate reach + bleed synergies; excels in stance breaks on mid-large enemies.
-
Light Greatsword (e.g., Milady): Greatsword feel with faster tempo—pairs well with guard counters.
-
Backhand Blades & Throwing Blades: Aggressive, dodge-weave play; strong with bleed/cold infusions, rewards animation knowledge.
-
Hand-to-Hand Arts / Beast Claws: Up-close pressure with surprising stagger; “martial arts” flair.
-
Perfume Bottles: Hybrid utility—poke, zone control, elemental procs without deep stat investment.
FromSoftware and community wikis track the eight new weapon categories introduced with the DLC; Polygon and others catalog dozens of fresh uniques if you like to loot-plan.
💬 Backhand Blades vs Great Katana
Backhand shines for proc speed and mobility (great for boss windows). Great Katana offers poise damage and safer spacing in narrow arenas. If you’re unsure, run Great Katana as your “answer” weapon and swap to Backhand for nimble targets.
If you enjoy experimental sandbox systems, our Retro Gaming Comeback piece shows how classic risk-reward combat loops resurface in modern DLC design.
🗺️ Early-Game Route: Where to Go First (Without Spoiling the Magic)
Most Tarnished benefit from an explore-first loop before committing to big boss attempts. Start in Gravesite Plain, scoop early fragments around golden crosses, and clear an accessible dungeon or two. Strong early bosses and regions include Belurat/Stagefront and Castle Ensis; pushing these areas nets solid weapons and unlocks more map. Polygon’s boss and weapon location overviews outline how the regions fan out—use them to plan a loop if you get stuck.
💡 Mark three “fragment runs” on your map. One good run can transform your next boss attempt.
🧑🤝🧑 Co-op & Summons: Social Rules That Make Runs Better
The DLC is generous with Spirit Ash viability thanks to Revered blessings; pair this with co-op to learn new movesets fast. In public co-op, take 60 seconds to align expectations: who pulls aggro, who staggers, who keeps bleed/frost pressure. If you’re the host, lead route choices and respect summon signs (“no fog-gate sprinting” is a kindness). When you switch to PvP (or get invaded), swap talismans upfront—treat it as a separate build. Good etiquette makes the Land of Shadow less hostile, even when it’s trying to kill you.
Prefer drop-in fun with friends? Our Best Co-Op Indie Games on Steam list is a great “palate cleanser” between sweaty bosses.
🎨 Prep Checklist (Print-Ready)
Before the bullets, the idea: eliminate friction you can control—access, gear, routing, and copy-pastable reminders.
-
Clear Radahn + Mohg and set a map pin on Miquella’s cocoon.
-
Hit Level 150–160, upgrade main weapon to +24/+10.
-
Farm Scadutree & Revered early; set blessing targets at 5, 10, 12.
-
Pack a status build (Bleed or Frost) plus a ranged option.
-
Upgrade two Spirit Ashes (boss-specific swaps).
-
Plot three fragment loops across Gravesite Plain → Belurat/Ensis.
-
Co-op etiquette plan: roles, items, backup strats.
-
On PC: update GPU drivers, verify files, and disable overlays for boss sessions.
💡 Rename your main loadouts: “Explore”, “Boss – Bleed”, “Boss – Frost.” The cognitive relief is real.
🧩 Boss Readiness (Mini-Comparisons You Can Use)
After the paragraph: you’ll face speed, range, and combo density problems more than raw HP walls. Pick answers accordingly.
-
Speedy, multi-hit bosses → prioritize iframes + fast-proc weapons (Backhand/Throwing, lightweight talismans).
-
Huge, poised enemies → Great Katana/Light GS stance breaks + guard counters.
-
Aerial/spacing fights → bows/perfume bottles/spells to force grounded windows.
-
Adds or chaos arenas → summons do the arena control while you fish for staggers.
Polygon’s coverage of later-game encounters (like the final DLC boss) confirms status weaknesses that reward flexible loadouts—if you’re not swapping status mid-run, you’re leaving damage on the table.
🧪 “Two Loadouts” Rule (A/B Without Menu Hell)
Don’t theorycraft forever—ship two.
A: Mobility/bleed (Backhand/Curved Sword with bleed ash; medium roll; stamina talismans).
B: Poise break/control (Great Katana or Light GS; guard counter talismans; higher equip load).
Swap at the Site of Grace nearest a wall boss. Over time, you’ll discover where each shines. As you iterate, log a one-line note in your phone (“Dancing Lion hates frost procs by 60% HP”).
Prefer bite-sized games with deliberate systems between DLC sessions? See Top 10 Indie Games of 2025 for short-form bangers.
🧰 Performance & Platform Prep (So Your Attempts Aren’t Wasted)
On PC, give yourself clean conditions: verify your game files before big sessions, update drivers, and consider disabling overlays (recordings, widgets) during boss practice to reduce hitching. On consoles, confirm you have free storage (DLC plus patches) and move the game to the fastest internal storage when possible. If you play on Steam Deck or a laptop, cap framerate to a stable target and prioritize frame-time consistency over raw FPS—Soulslike timing rewards consistency.
💡 Treat boss nights like a mini-event—reboot, hydrate, silence notifications, and go.
🎯 Tools That Make DLC Nights Better
Quality-of-life picks we actually use:
-
High-comfort wired/wireless controller with hair-trigger or back buttons for roll/skill.
-
Fast SSD (if you’re on PC with a slow drive) to reduce reload time between attempts.
-
Open-back headset for spatial awareness without heat build-up.
-
Grip tape or performance thumbsticks if you fight sweaty palms during long sessions.
📬 “Boss Night Dispatch”
📨 Elden Ring DLC — Weekly 2-Loadout & Fragment Routes
Copy-ready loadouts, spoiler-light boss cues, and fast Scadutree loops.
🔐 100% privacy • Unsubscribe anytime
🧱 “Casual vs. Hardcore” Prep (Mini-Comparison)
After the paragraph: you probably lean one way—optimize around your reality.
-
Casual (3–4 hrs/week): Run Explore build (fast mobility + bleed), chase fragments first, and set one weekly Boss Target. Don’t hoard upgrade mats—use them.
-
Hardcore (10+ hrs/week): Build status AND posture kits, test different talisman stacks, and record short clips to spot punish timings. Keep a fragment checklist and push to Blessing 12 quickly.
💡 Use a sticky note: “Try frost at 60% HP”—tiny reminders change fights.
🧭 Early-Boss Field Notes (Spoiler-Light)
You’ll meet a few “skill checks” early. Two patterns repeat:
-
Rhythm breakers—they deliberately desync your dodge timing. Answer with delayed rolls and status procs.
-
Stance puzzles—they beg for guard counters and charged heavies. Answer with Light GS/Great Katana and poise-damage tools.
Polygon’s late-boss guidance also shows specific status resistances/weaknesses. Don’t be afraid to respec for one fight, then respec back.
🧠 Nerd Verdict
Treat the DLC like a new ecosystem: finish the two gate bosses, enter with a realistic level baseline, and then focus on local power (Scadutree & Revered). Ship two loadouts, route a few fragment runs, and keep a calm escalation ladder for co-op and builds. Done right, you’ll feel that satisfying Elden Ring arc—from “this is impossible” to “I can’t believe I just did that.”
❓ FAQ: Nerds Ask, We Answer
💬 Would You Bite?
Tell me your current level, your favorite main-game weapon, and whether you prefer status or poise breaks—
I’ll suggest a two-loadout plan and a 3-stop fragment route tailored to you. 👇