🌍 Why Digitizing Memories Matters
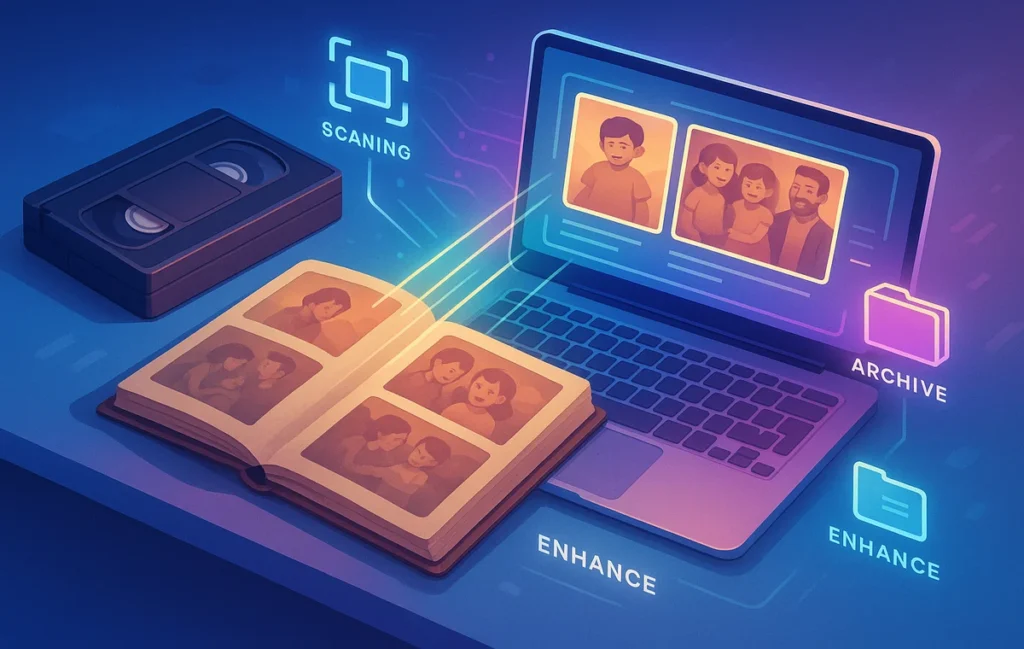
Every family has a box of old photos or a shelf of VHS tapes gathering dust. These aren’t just objects—they’re snapshots of weddings, vacations, birthdays, and everyday life before smartphones existed. The problem? Time is not kind to analog formats. Printed photos fade, tapes degrade, and VHS players are nearly extinct.
Digitizing these memories is more than a technical project—it’s an act of preservation. By scanning photos and transferring tapes into digital formats, you ensure stories survive for the next generation. Digital copies can be backed up in multiple places, restored if lost, and shared instantly across the globe.
At NerdChips, we’ve already explored how to Back Up Your Phone Photos to the Cloud and how to Organize Your Digital Life. This guide goes deeper into rescuing older formats—bringing the analog past into the digital future.
📸 Scanning Printed Photos: From Albums to Cloud
The simplest way to digitize printed photos is through a scanner. Flatbed scanners, such as those from Epson or Canon, allow high-resolution scans that preserve detail and color. The higher the DPI (dots per inch), the better the future-proof quality. For archival purposes, experts recommend at least 600 DPI for prints and 1200 DPI for negatives or slides.
For those without a scanner, mobile scanning apps like Google PhotoScan use AI to remove glare and enhance colors. While not as precise as a dedicated scanner, they’re fast and convenient for large collections. Some even correct for curled edges or faded tones automatically.
Once scanned, organization is key. Create folders by year, event, or family member. Tools like Google Photos or Apple Photos can then apply face recognition and metadata tagging. If you want long-term safety, consider multiple backups as covered in Cloud Storage Showdown.
📼 Transferring VHS and Home Videos: Affordable Options
VHS tapes are trickier because they require both playback hardware and capture tools. If you still own a working VHS player, affordable USB capture adapters connect the player to your computer. Software then records the tape in real-time into formats like MP4.
There are also standalone VHS-to-Digital converters that save directly to SD cards without a PC. While simpler, they sometimes compress video heavily. For the best quality, PC-based capture with software like OBS Studio or bundled transfer apps offers more control over resolution and file size.
Professional services exist too, but they can cost $20–$30 per tape. For large collections, buying your own capture adapter (often under $50) is a cost-effective long-term solution. Remember: VHS tapes degrade quickly, losing magnetic quality after 15–20 years. The sooner they’re digitized, the more you preserve.
🔐 Storing Your Digital Memories Safely
Once your memories are digitized, keeping them safe is just as important as the transfer itself. A single hard drive crash can erase years of scanning. That’s why professionals recommend the 3-2-1 backup rule: three copies, on two different media, with one stored off-site or in the cloud.
Practical setups might include an external hard drive, a NAS (Network Attached Storage), and a cloud provider like Google Drive or Dropbox. If you’re worried about sensitive data, encrypting archives before uploading provides an extra layer of security.
We’ve covered in detail how to Restore Deleted Files from Google Drive and how to Secure Your Digital Wallets Safely. The same principles apply here—redundancy, encryption, and discipline ensure that once your analog treasures are digitized, they won’t be lost again.
🧩 A Simple Workflow Checklist
To help you visualize the process, here’s a straightforward digitization workflow:
-
Gather & Sort: Organize photos and tapes before digitizing.
-
Scan or Capture: Use scanners for photos, capture adapters for VHS.
-
Enhance & Edit: Apply color correction, trim video edges, or remove noise.
-
Organize Digitally: Create labeled folders, use metadata, and apply tags.
-
Back Up Safely: Store across external drives and cloud platforms.
This step-by-step approach ensures you don’t just digitize once and forget—it creates a permanent system for family history.
📼 Ready to Rescue Your Memories?
Affordable capture adapters and photo scanners make digitization easier than ever. Don’t wait until tapes fade or photos discolor—start preserving today.
📊 Restoration & Enhancement: Breathing New Life into Old Memories
Digitization is only the first step. Many scanned photos and VHS transfers show their age—faded colors, scratches, grain, or even missing details. Thankfully, software restoration has advanced dramatically. Tools like Adobe Photoshop and Lightroom allow manual color correction and scratch removal, but AI-powered applications are changing the game.
Services such as Topaz Photo AI and Remini can automatically sharpen blurred images, upscale resolution, and even colorize black-and-white photographs. For video, AI-driven software helps reduce noise, stabilize shaky footage, and enhance resolution from VHS-level quality to near-HD.
One Redditor described the experience of running old VHS footage of a family wedding through an AI enhancer: “It looked like the wedding happened yesterday. Seeing my grandparents so clearly again was surreal.” Restoration doesn’t just fix files—it emotionally reconnects us to moments that felt lost.
🎞️ Formats & Longevity: Choosing the Right Digital Containers
How you save your files matters as much as scanning them. Different formats serve different purposes:
-
TIFF: Large, lossless, and ideal for long-term archiving of photos.
-
JPEG: Smaller, lossy, but easy for sharing online and across devices.
-
PNG: Useful for images with text or transparency, though less common for family photos.
-
MP4 (H.264/H.265): The modern standard for video—efficient compression with good quality.
For VHS transfers, H.265 encoding reduces file size by up to 50% compared to H.264 while maintaining quality, making it perfect for archiving large collections. Just as importantly, these formats are widely supported and likely to remain accessible decades into the future.
Future-proofing also means periodically migrating files. A digital archive isn’t “set and forget.” Just as VHS players disappeared, so will outdated file formats. Regularly moving your collection to current standards ensures no memory gets trapped in obsolete technology.
🗂️ Metadata & Storytelling: Turning Files into Family History
Digital files without context risk becoming anonymous. That’s why metadata matters. Adding simple tags like names, dates, and locations makes photos searchable and meaningful. Tools like Google Photos, Apple Photos, and Adobe Bridge allow you to embed this information directly into files.
But metadata isn’t just technical—it’s storytelling. A photo labeled “Birthday 1992 – Grandma’s Kitchen” carries more legacy than one named “IMG_0032.JPG.” Some families even create digital albums with written narratives, turning archives into living history books.
A NerdChips reader once shared: “We started adding one-sentence stories to each photo. It transformed our archive into a family saga.” This extra effort ensures that memories aren’t just preserved visually, but emotionally.
☁️ Cloud Sharing with Family: Memories Without Borders
Digitization becomes more powerful when memories are shared. Cloud platforms like Google Photos or iCloud Family Sharing allow entire families to access and contribute to a shared archive. Instead of one person being the “memory keeper,” everyone can upload, comment, and relive moments together.
Shared albums also democratize access. A cousin overseas can view and download the same childhood videos as someone back home. Some services even integrate with smart displays, cycling through old photos in daily life.
This social angle turns preservation into connection. It shifts digitization from a solitary project into a collective family experience—one that spans generations and geographies.
🔮 Future-Proofing Memories: What Comes Next
Looking ahead, digitization won’t just preserve memories—it will transform them. AI is already enabling features once thought impossible:
-
Photo Animation: Tools like MyHeritage’s Deep Nostalgia animate old portraits, making ancestors smile or blink.
-
AI Reconstruction: Missing parts of torn photos can be rebuilt convincingly by generative AI.
-
Immersive Memories: Future AR glasses may overlay old photos onto physical locations, letting you “stand inside” a captured moment.
Imagine uploading a childhood video and having AI automatically enhance it to 4K, colorize it, and even generate missing audio. Or walking into your childhood home and, through AR, seeing an overlay of your family gathered at the dinner table.
This is where nostalgia meets cutting-edge technology. As we’ve covered in How to Organize Your Digital Life, digital preservation isn’t static—it evolves. By digitizing now, you set the stage for future technologies to make those memories even richer.
Want More Smart Preservation Tips?
Join our free newsletter and get weekly insights on digital storage, file organization, and nostalgia tech—straight from the NerdChips editorial desk.
100% privacy. No spam. Just practical guides from NerdChips.
🧠 Nerd Verdict
Digitizing old photos and VHS tapes is not just a tech project—it’s a family preservation project. The tools are cheaper and simpler than ever, meaning the only barrier is starting. At NerdChips, we believe this process bridges nostalgia with technology, turning fragile analog keepsakes into permanent digital legacies.
❓ FAQ: Nerds Ask, We Answer
💬 Would You Bite?
What’s the first memory you’d digitize—a wedding VHS, your childhood photos, or your family’s first vacation album?


