You can automate video clipping to Shorts by combining FFmpeg scene detection, AI-generated captions (e.g. Whisper), and a small script that picks high-impact 8–20s segments, then batch-renders them in 9:16 with burned-in subtitles. Once set up, one command can turn a 20-minute video into a full pack of Shorts.
🎬 Intro — “I Have Long Videos… But No Time to Make Shorts”
If you create videos in 2025, you are living in a strange paradox. Platforms reward short, vertical content with reach and impressions, yet most serious ideas are still filmed as long-form talking-head videos, livestreams, or tutorials. You know you “should” be cutting your long videos into Shorts, Reels, and TikToks—but manually scrubbing timelines for the best 15 seconds is soul-killing.
Most auto-clip tools promise magic. They use AI to detect hooks, cut highlights, and drop captions in one click. But once you cross a certain upload volume or channel count, the limitations show up fast: free plans cap exports, watermark everything, or collapse under long videos. Paid plans stack up quickly if you manage multiple channels or client work. Some creators in small YouTube automation communities openly complain about “spending more on auto-clip SaaS than the channel makes.”
That is where an FFmpeg-first workflow becomes interesting. Instead of relying on a black-box cloud editor, you use FFmpeg’s insane speed and precision to handle cutting, cropping, and encoding, while AI models like Whisper handle caption generation locally or through APIs. The result is a pipeline that you own: no per-video fees, no limits on length, no waiting in queues—just your CPU/GPU and storage.
On NerdChips we’ve already explored broader stacks like AI-powered video editing tools and automation for small YouTube channels. This guide zooms in on a very specific play: automate video clipping to Shorts using FFmpeg + AI captions, and nothing else at the core. No timeline GUI. No “export to 5 platforms” marketing fluff. Just a technical, repeatable workflow you can trust.
💡 Nerd Tip: Don’t think of this as “one more tool.” Think of it as building a factory line. Once the line is tuned, every long video you make can automatically spawn a whole batch of Shorts while you sleep.
⚡ Why FFmpeg Is Perfect for Auto-Clipping (Even vs AI Editors)
FFmpeg is basically the command-line Swiss Army knife of video. Under the hood of many fancy editors and automation tools, there is a quiet FFmpeg process doing the real work: decoding, filtering, cutting, encoding. When you learn to talk to FFmpeg directly, you cut out layers of UI overhead and SaaS limitations and gain raw control.
The first reason FFmpeg is perfect for auto-clipping is speed. Properly configured, FFmpeg can slice dozens of clips from a single source faster than a typical GUI editor can even load the timeline. On a mid-range CPU, batch exporting 10–20 Shorts from a 1080p talking-head video is often measured in minutes, not hours. Add hardware acceleration (like NVENC on NVIDIA GPUs), and you can push even further.
The second reason is precision. FFmpeg is built for frame-accurate operations. When your script tells it “cut from 00:04:12.320 to 00:04:27.600,” it does exactly that. This matters when your AI captions are tightly aligned to speech; you cannot afford random cuts that slice sentences in half. The engine’s deterministic nature also means your pipeline behaves consistently across runs—critical for automation.
Then there is scene detection and analysis. FFmpeg can approximate scene cuts by analyzing frame differences. With the right filters, you can detect where visual changes spike, extract timestamps, and use them as candidate clip boundaries. This gives you a rough segmentation of the video without manually scrubbing, especially useful for B-roll heavy or dynamic content.
Most AI editors also use some combination of scene detection and transcript analysis, but they keep it behind a paywall and hide the dials. FFmpeg exposes these dials in the open: thresholds, filters, codecs, scalers, audio options. You decide what matters for your pipeline: speed over quality, or the reverse; vertical vs horizontal; portrait crop vs adaptive; and more.
Finally, FFmpeg is zero-cost and local-first. You install it once, and it is yours, whether you are running a single YouTube channel or a whole agency. Combined with smart AI captioning and the kind of hook optimization we discuss in our guide to using AI to optimize video hooks, it becomes the backbone of an automation system that is both cheap and powerful.
🧠 What You Need Before Starting (Tools & Environment Setup)
Before we dive into commands, we need to assemble the toolkit. The nice part: everything here is either free or already on your machine.
First, install FFmpeg. On Windows, you typically download a static build, add the bin folder to your PATH, and confirm installation with ffmpeg -version in your terminal. On macOS and Linux, package managers like Homebrew or apt make it even simpler. As soon as FFmpeg responds, your cutting engine is online.
Next, pick your AI caption model. For most creators, Whisper has become the default because it balances accuracy and speed. You can run Whisper through a CLI, Python package, or a GUI wrapper. If you care about fully local workflows, consider whisper.cpp, which is optimized for running on CPU and supports quantized models that are lighter on RAM. Creators on older laptops often note that a small or medium quantized model still produces decent captions without turning the machine into a jet engine.
If you are comfortable with local LLM tooling like LM Studio, you can also explore caption refinement or translation steps using a local model. But at minimum, you want one path from raw audio → SRT or JSON captions with timestamps.
Then, define a workflow folder structure. For example:
-
input_long_videos/for raw long-form content -
processed_audio/for extracted audio files -
captions/for AI-generated SRT or JSON -
clips/for final vertical Shorts
This might seem boring, but workflows collapse when files scatter everywhere. Your future self will thank you every time you run python auto_clip.py and everything lands where it should.
Finally, decide the output format. For Shorts, Reels, and TikToks, 9:16 vertical is the norm, usually 1080×1920 with H.264 video and AAC audio. FFmpeg can handle this easily, but you want your pipeline to enforce this consistently. If your original recording is 16:9, you will crop or scale appropriately; we will handle this when we get to clipping and rendering.
💡 Nerd Tip: Treat this setup step as building a “video automation lab.” The clearer the structure and naming, the easier it is to plug in more automation later—like thumbnails, hook text, or AI-based performance predictions.
⚙️ Step 1 – Detect Scenes Automatically with FFmpeg
The pipeline starts by understanding where your video naturally breaks. Scene detection in FFmpeg works by comparing frames and marking points where the difference passes a certain threshold. You do not need perfect accuracy; you just need usable anchors for clips.
Conceptually, you run FFmpeg with a filter chain that analyzes the video stream and emits timestamps when scene changes occur. A common pattern is to use a select filter with gt(scene, X) where X is a threshold between 0 and 1. Lower thresholds detect more changes (good for B-roll heavy edits), while higher thresholds only trigger on big shifts (useful for static talking-heads).
For a talking-head podcast or tutorial, a moderate threshold catches cuts, slide changes, or lighting shifts without generating dozens of false positives. For fast-cut vlogs or montage content, you might lower the threshold slightly and later filter out overly short segments.
The important thing is that the output becomes machine-readable timestamps—ideally one per line with either pure timecodes or time + frame index. From there, you can feed these timestamps into a script that computes segments: start at 00:00:00, cut at the first scene, then chain forward.
Remember, scene detection is not a magic “hook finder.” It just tells you where the video visually shifts. But in combination with caption-based analysis later, those boundaries give your script a grid to place speech and emotion across. That is much better than treating the whole video as an undifferentiated blob.
Creators who have migrated from manual scrubbing to FFmpeg-based scene detection often report a 50–70% reduction in time spent just finding candidate moments, especially on long recorded streams. When combined with a clear workflow, that is the difference between posting Shorts once a week and posting them daily.
🎧 Step 2 – Auto-Generate Captions Using AI (Whisper / Local LLM)
Once you have scene boundaries, you need the words that fill them. This is where AI captioning comes in. The idea is simple: extract the audio from your long video, run it through a speech-to-text model, and produce a time-aligned transcript.
The first move is audio extraction. FFmpeg can strip the audio track from your video quickly into a format like WAV or MP3. Using an uncompressed or lightly compressed format helps AI models get cleaner input, which improves transcription accuracy. Even on slower machines, this step is usually measured in seconds for typical creator-length videos.
Then, feed that audio into Whisper or an equivalent model. Depending on the model size and hardware, a 20-minute video might transcribe in a handful of minutes. Many creators in small automation communities share that a mid-size Whisper model on a decent GPU can process audio at roughly 2–4× real-time, meaning your 20-minute recording can be fully captioned in 5–10 minutes while you do something else.
The crucial part is to export captions in a structured format like SRT or a JSON representation with fields for text, start time, and end time. Instead of thinking of it as “captions,” think of it as a timeline of speech events. Each fragment says: from t_start to t_end, this sentence was spoken.
Now your pipeline has two timelines: one for visual scenes and one for spoken phrases. When you align them, you can reason about “where the good moments live.” For example, you can search caption text for strong phrases that match the kind of hooks we analyze in our breakdown of video editing pro tips for YouTube creators and use those positions as targets.
💡 Nerd Tip: Even if your final Shorts will use native captions from platforms, keeping a local SRT/JSON transcript gives you a powerful search layer. You can later mine your own archive for phrases that performed well and repurpose them into new hooks or scripts.
🎯 Step 3 – Build the Auto-Clip Logic (Filtering for Short-Length Segments)
At this point, you have a map of scene changes and a transcript with timestamps. Now you need a brain—a small script that decides which chunks become Shorts.
A practical way to think about this script is as a series of filters. First, define your target duration range: for example, 8–20 seconds is common for punchy Shorts. Anything shorter may feel too abrupt; anything much longer risks losing swipe-happy viewers. Your script should scan the scene or speech timeline and propose candidate segments that fall within that window.
Next, consider speech density. For talking-head clips, high speech density often correlates with value. If a segment has long pauses, filler, or dead air, you can de-prioritize it. With SRT or JSON captions, you can measure how many characters or words occur inside a candidate window and discard segments below a threshold.
Then comes semantic filtering. Look through caption text for phrases that feel like hooks or key points: “the biggest mistake,” “here’s what nobody tells you,” “the only metric that matters,” and so on. Over time, you can build your own keyword list based on what has performed well on your channel, guided by frameworks from articles like our guide to creating viral video content. When the script finds those patterns near scene boundaries, it flags them as higher priority.
Finally, you can add optional emotional or structural signals. Some creators experiment with basic sentiment analysis on the transcript to find more intense or energetic moments. Others use beat detection on background music to align cuts with rhythm, improving perceived production quality without manual editing.
The output of this step is a clip list: a structured file containing start and end times, maybe a label or rank, and references to the original video. This list is the blueprint that FFmpeg will follow in the next phase to actually cut the video into Shorts.
✂️ Step 4 – Auto-Clip All Segments with FFmpeg (Batch Processing)
Now the fun part: turning your clip list into real videos. This is where FFmpeg shines as a bulk-render machine. Instead of opening each segment in an editor, you let FFmpeg loop through your blueprint and output individual files—each one a ready-to-caption or ready-to-post Short.
For each segment, your script constructs an FFmpeg command that specifies the input file, the start time, the duration or end time, and the desired encoding options. You can set conservative defaults like H.264 video with a moderate bitrate, AAC audio, and the same frame rate as the source. For shorts, audio clarity often matters more than ultra-high visual fidelity, so you can bias your settings slightly in that direction.
You also need to handle resize and crop to 9:16. If your source is 16:9, you can scale and crop centrally, or you can define a region of interest (e.g., where the speaker stands) and crop around that. Some more advanced workflows track the speaker’s face coordinates and keep them centered automatically, but even a static crop can work if you frame your original recordings with this pipeline in mind.
In terms of resource management, FFmpeg lets you control how many processes run at once. On a laptop, you might process clips sequentially to avoid overheating. On a desktop with a discrete GPU, you can run several jobs in parallel, leveraging hardware encoders to maintain speed. It is not unusual for a tuned setup to render 10–15 vertical clips from a 20-minute video in under 10 minutes, especially when re-encoding is shallow.
When this step finishes, your clips/ folder suddenly fills with numbered or timestamp-named MP4 files. Each one is a standalone Short, cut exactly at the times your script selected. You have effectively replaced hours of timeline trimming with a single scripted pass.
💡 Nerd Tip: Bake in sensible naming conventions, like originalname_00h04m12s_00h04m28s.mp4. When you later upload or A/B test hooks, those filenames make it easy to trace back which long-form moment they came from.
💬 Step 5 – Add Captions Automatically (Burn-In or Soft Subtitles)
Captions are not optional anymore. On most short-form platforms, a huge share of views happens with the sound off or low. AI-captioned Shorts routinely perform better than silent ones, and many creators report 10–25% higher watch completion when readable captions are present and timed well.
Since you already have SRT or JSON captions from Step 2, the question becomes how to apply them. You have two main options: burn them into the video (hard subtitles) or keep them as separate files for platforms that accept uploads.
Burned captions have the advantage of looking consistent across platforms and not depending on each platform’s caption system. You can style them with FFmpeg filters: font, color, outline, background boxes. Some creators mimic the high-contrast “white text with black outline” style, while others use yellow or branded colors. FFmpeg’s subtitle and drawtext filters can handle these customizations directly as part of a batch process.
On the other hand, soft subtitles give you more flexibility to change or fix text later. For platforms like YouTube, you can upload an SRT alongside each Short, and the platform handles rendering. That is lighter on your encoding pipeline but less visually controlled.
A hybrid approach is to maintain clean SRT files and generate a burned-caption version only for platforms where you want absolute consistency. Your script might loop through the clip list again, this time applying caption overlays. Because you already know the mapping from long video timestamps to Short timestamps, you can align the correct caption segments automatically without manual tweaking.
Advanced workflows even experiment with karaoke-style highlighting or word-by-word reveals, but that is sugar on top. The core win is that you never manually type captions or drag them around a timeline. AI does the heavy lifting, and FFmpeg makes the layout stick.
🔎 Step 6 – Optional: Auto-Select High-Emotion Moments Using AI
Once your base pipeline works, you can add a level of intelligence on top to choose better moments. This is not strictly necessary, but it can significantly improve the average quality of your Shorts.
One angle is keyword-based scoring. Using your transcripts, you rank segments by how many “hook words” they contain: phrases about mistakes, secrets, frameworks, bold claims, or surprising stats. Over time, analyze which clips actually perform well on your Shorts channel and feed those phrases back into your ranking logic.
Another angle is sentiment or emotion detection. Even lightweight NLP models can approximate whether a sentence sounds excited, urgent, or neutral. Segments with higher emotional intensity often make better hooks. You do not need perfect accuracy; even a rough score that helps you pick the top 30% most energetic segments can move the needle.
Some setups also play with beat detection on background music. If your long videos include consistent background tracks, you can align clip boundaries to musical beats, which makes cuts feel more intentional. It is a subtle detail, but it pushes your automated Shorts closer to the feel of human-edited content.
This is the layer where local or cloud AI models can misbehave. A trader on X joked about his automation stack picking a calm, off-topic sentence as a “top hook” because the model over-indexed on the word “explosive.” The fix is to keep your scoring models grounded in actual performance data. Check which AI-selected clips got higher retention or better click-through on your existing Shorts and adjust your scoring rules accordingly.
💡 Nerd Tip: Think of AI here as a noisy assistant, not a judge. Let it propose candidates, but always keep room in the pipeline to exclude obviously bad picks before publishing.
🧱 Step 7 – Create a Fully Automated Pipeline (One-Command Workflow)
Individually, these steps are powerful. Combined into a single one-command pipeline, they become a real asset. The goal is that you drop a new long video into a folder, run one script, and come back to a batch of captioned Shorts ready to schedule.
Practically, this often means writing a Bash or Python script that chains everything together:
-
Detect scenes with FFmpeg and save timestamps.
-
Extract audio and run Whisper to create captions.
-
Generate a clip list based on clip length, speech density, and keyword scores.
-
Use FFmpeg to cut clips in 9:16, with proper encoding and cropping.
-
Apply captions as burned-in or separate SRTs for each clip.
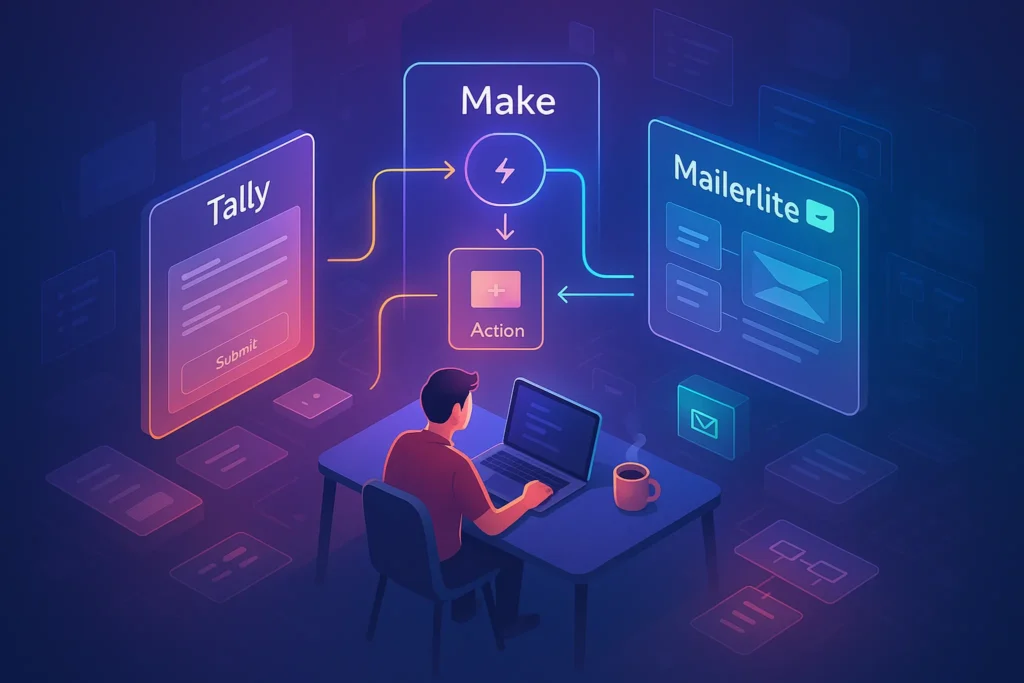
From there, you can integrate with automation platforms like n8n or Make.com if you want to sync outputs to cloud storage or hand them off to social media schedulers. But the core pipeline stays FFmpeg + AI captions, completely under your control.
This is where NerdChips’ mindset of building reusable automations rather than ad-hoc hacks really pays off. The more consistent your process, the easier it is to test new improvements—like adding an AI step that proposes hook text based on the best-performing phrases from your archive, or combining this with the scheduling strategies from our guide on smart automation for small YouTube channels.
Once your pipeline runs end-to-end, hitting Enter feels like flipping on a small factory line. That is the point where Shorts stop being a chore and start being a byproduct of your long-form work.
⚡ Ready to Turn Every Long Video into a Shorts Machine?
Explore automation stacks that combine FFmpeg, Whisper, and smart scripting so your next upload automatically generates a whole batch of Shorts-ready clips.
🎯 Real-World Workflow Example (From 20-Min Video → 15 Shorts)
Let’s walk through a concrete scenario to make this less abstract.
Imagine you have just recorded a 20-minute talking-head video where you break down “5 mistakes creators make when editing videos too slowly.” You drop the finished file into your input_long_videos/ folder and run your auto_clip.sh script.
FFmpeg starts by scanning the video, detecting scene changes where you shifted camera angles or cut in B-roll. It outputs a timeline of timestamps—maybe 30–40 candidate boundaries. Next, the script extracts audio and runs Whisper, producing a timestamped transcript with every sentence you spoke.
Your clip logic script then analyzes the transcript. It looks for phrases built around “biggest mistake,” “fastest way,” “what nobody tells you,” and similar patterns you learned from studying high-CTR hooks and the tactics we explore in our article on AI-powered video editing tools. It also checks speech density and filters for segments between 10 and 20 seconds.
Out of the 20 minutes, the script identifies perhaps 25 strong candidate segments. It scores them based on hooks and emotion and selects the top 15. For each one, it generates clear start and end times, aligned with scene boundaries when possible.
Then FFmpeg goes to work. It cuts those 15 segments into individual 1080×1920 vertical videos, using a central crop that keeps your face and any on-screen text visible. It normalizes audio so your volume is consistent, even if the original recording had small fluctuations. Optionally, it applies a light sharpening or color filter tuned to your channel’s look.
Finally, your script marries each Short with the right caption segment. It burns in readable subtitles with a clear font and outline and drops the results into the clips/ folder. When you open it, you see 15 neatly named MP4 files, each a tight, captioned Short that feels intentionally edited—even though you did not touch a timeline.
At this point, your job is not “edit Shorts”; it is curate and publish. Maybe you reorder a couple of clips, write platform-specific titles, and follow the storytelling principles from our guide to creating viral video content. But the heavy, repetitive work is gone.
🚀 PRO Mode: Add AI Enhancements to Make Shorts TikTok-Ready
Once the pipeline is stable, you can start layering PRO features on top—still keeping FFmpeg as the core and AI as the helper.
One upgrade is auto-thumbnail selection. From each clip, you can scan frames for high-expression faces or key gestures and save them as thumbnail candidates. Simple heuristics like “open mouth + hand visible + eyes towards camera” often correlate with strong thumbnails. A small model or script can rank these frames, and you can pick from the top few.
Another is auto-hook overlays. Using your transcripts and performance data, you can generate short text overlays for the first second of each Short: “Don’t make this editing mistake”, “Your Shorts pipeline is broken if…”, etc. FFmpeg’s drawtext filter or a secondary processing stage can drop these on-screen in big, readable fonts.
You can also experiment with light color grading and audio ducking. A subtle contrast boost and stabilized levels help your Shorts feel competitive with high-production feeds. Some creators even plug in local AI upscaling to improve older or lower-resolution footage before it enters the pipeline, though this is heavier on compute.
The point is not to turn everything into a VFX lab. It is to gradually raise the baseline quality of every automated Short until it is “good enough to post without embarrassment”—and then let your creative energy go into ideas, not repetition.
💡 Nerd Tip: Add improvements to your pipeline like you’d add features to a product—one at a time, with a quick test. If a tweak does not clearly improve watch or click metrics, remove it. Your future self needs a reliable system more than a complicated one.
🟩 Eric’s Note
I don’t trust any “magic button” that claims to make perfect Shorts. What I do trust is a boring, repeatable pipeline that saves hours every week and lets you spend that time on ideas, not exports. If this article nudges you one step closer to that kind of system, it has done its job.
📬 Want More Automation-Ready Video Workflows?
Join the free NerdChips newsletter and get weekly deep dives on FFmpeg tricks, AI caption stacks, and end-to-end automation for YouTube and Shorts-first channels.
🔐 100% privacy. No spam. Just practical systems you can actually run on your own machine.
🧠 Nerd Verdict: Build the Factory, Then Feed It Videos
The biggest shift in 2025 is not “Shorts vs long-form.” It is manual vs automated. If every new video demands an extra evening of clipping and captioning, you will eventually burn out or post less than you should. But if you invest in one solid FFmpeg + AI captions pipeline, every long video becomes raw material for a Shorts factory that runs on demand.
This workflow will not replace creativity, but it does remove the grind between idea and distribution. Long tutorials, interviews, and breakdowns turn into dozens of discovery hooks without extra brain cycles. Combined with good storytelling, strong hooks, and the editing instincts you refine using pro video editing tips for YouTube creators, your automation stack becomes a force multiplier—not a shortcut that cheapens your work.
If you are serious about growing a channel or a network of channels, this is one of those systems that quietly compounds over months. You spend a weekend building it once. Then you let it work for you every time you hit Record.
❓ Nerds Ask, We Answer
💬 Would You Bite?
If your last five long videos had been automatically sliced into 10–15 Shorts each, how many more discovery chances would your channel have right now?
What is the smallest version of this pipeline you can build this week—just enough to turn one long-form video into three automated, captioned Shorts? 👇
Crafted by NerdChips for creators and teams who want their best ideas to travel the world—one automated Short at a time.