🎬 Intro: The Hidden Hero of Pro Video
B-roll is the invisible scaffolding that makes your A-roll feel cinematic. It covers cuts, adds context, and carries emotion when words fall short. Yet most creators still treat B-roll as an afterthought, scrambling mid-edit to find something—anything—that fits. The result is lost hours, repetitive footage, and missed upload windows.
This guide shows you how to build a B-roll system—not a one-off folder—so you can capture smart, organize once, and reuse forever. We’ll blend practical workflows with a battle-tested toolkit: cameras and capture habits, metadata and DAM (digital asset management), and templates that let you move from rough cut to publish without hunting through a thousand filenames called “final_final2.mov.” Along the way we’ll plug into your broader stack with resources like Video Marketing Toolkit, Video Editing Pro Tips for YouTube Creators, and How to Repurpose Long-Form Video into Short Clips for downstream speed.
💡 Nerd Tip: Treat B-roll like a library product, not a one-time asset. Libraries appreciate in value with every tagged clip you add.
🎯 Why B-Roll Matters in Video Marketing
Great B-roll buys you time and attention—two currencies that decide whether your video climbs or sinks. On the craft side, B-roll lets you punch in on details, showcase product benefits, and create rhythm. On the performance side, it improves audience retention, which feeds watch time and recommendations. Editors see this in analytics: cutting away from a static talking head every 6–10 seconds typically reduces micro-dropoffs and keeps viewers through transitions (intro → body, demo → CTA). Even simple overlays—hands-on shots, screen captures, product close-ups—signal novelty to the brain and reset attention.
In marketing workflows, B-roll is the asset that scales. One well-lit pour shot or macro texture can live in an explainer, a product page video, a 15-second ad, and a Shorts montage. Instead of reshooting every week, you can pull from an evergreen shelf. Teams that formalize a B-roll library routinely save 6–10 editing hours per long-form video and ship more variants for A/B tests (opening sequences, CTA timing, thumbnail motion). Tie this to structured experiments from A/B Testing Your Video Content and you convert craft into measurable uplift.
💡 Nerd Tip: Aim for 1.5–2.0× coverage—for every minute of A-roll, bank 90–120 seconds of relevant B-roll. Coverage beats perfection.
🧭 Step 1: Capture Without Chaos
Capturing B-roll should feel like meal prep, not cooking from scratch every night. Start by building shot menus around recurring themes in your channel: hands typing, overhead desk, product hero, lifestyle context, screen flows. Run these as batch sessions—one afternoon of macro textures, another of office lifestyle, another of screens. Batching removes the mental overhead of switching lenses and lighting and keeps your color profile consistent across a set.
For screen workflows, record clean plates: cursor-free UI pans, scroll sequences, and modal openings. Keep a plain background version of every app workflow you frequently demo. If your format includes physical products, build a lightbox day: spin table, slow pans at 24–60 fps, detail macros. Even if you don’t know where each clip will land, you’re investing in a bankable look.
Stock libraries are worth the spend when the cost of capture exceeds the creative value. Sources like quality stock catalogs can fill gaps—city exteriors, aerials, seasonal b-roll—so your in-house captures stay focused on brand-specific visuals. And yes, AI-assisted B-roll has a role: tools that convert text prompts to short, stylized motion backgrounds can replace generic abstract shots or add connective tissue behind titles. Keep AI use contextual; use it to fill negative space, not to fake product reality.
Finally, standardize capture specs. Shoot log or flat where possible for grading latitude, lock shutter angle (180° rule) to prevent motion weirdness, and keep audio off unless it’s diegetic (you’ll replace it anyway). If you’re mixed-gear (phone + mirrorless), align frame rates and color temps at the slate to minimize correction work later.
💡 Nerd Tip: Film “transitional atoms”: 2–3 second pans, tilts, racks, and whip-cuts recorded specifically to bridge chapters. They save edits when your narrative jumps.
🗂️ Step 2: Organize for Fast Access
The difference between a pro library and a random folder is metadata. File names matter, but tags, markers, and thumbnails are what let future-you find “that perfect over-the-shoulder typing shot at dusk” in under ten seconds.
Start with a folder schema that mirrors your mental model: /BROLL/People/Hands/, /BROLL/Tech/Keyboards/, /BROLL/Office/Lifestyle/, /BROLL/Screens/AppName/Flows/. Inside each, adopt a BNS (B-roll Naming Standard) like BNS_YYYYMMDD_Category_Subject_Cam_Focal_ShotType_Take.ext (e.g., BNS_20251003_Tech_Keyboard_A7SIII_50mm_Macro_T02.mov). You’ll rarely read every field, but the structure survives copy moves and syncs.
Next, add tags at ingest. In Premiere Pro, Final Cut, or Resolve, tag clips with: subject (keyboard, mug), action (typing, pour), mood (calm, dynamic), color vibe (cool, warm), and usage rights (owned, licensed, AI-generated). If your NLE doesn’t travel well across machines, use a DAM layer such as Frame.io or Iconik for cloud-synced tagging and time-based comments.
For heavy libraries, create proxies on ingest. Editing from a laptop against cloud originals becomes painless when proxies live locally or stream via smart cloud storage. If your team works remotely, pair a cloud volume (e.g., team drive or object storage mapped through a sync tool) with a “cold vs. hot” policy: hot footage (last 90 days) stays local; cold footage lives cloud-only with proxies on demand.
Beyond tags, create smart bins: auto-collections for “close-up + warm + product,” “overhead + calm,” “UI + scroll.” Smart bins turn your library into a queryable database inside the NLE. And don’t skip poster frames—set a thumbnail on each clip that shows its essence. Nothing speeds decisions like visual skimming.
💡 Nerd Tip: Add a Rights tag to every clip on day one (Owned / Licensed / UGC / AI). You’ll thank yourself when a brand deal demands proof of rights in five minutes.
♻️ Step 3: Reuse Without Wasting Time
Reuse is not repetition—it’s consistency. Build a personal B-roll pack of signature shots: the macro of your brand’s notebook, the coffee pour in your studio mug, the overhead of your keyboard with brand colors, the pan across your tool shelf. These become recognizable motifs that glue videos together and subtly reinforce brand identity. When fans recognize your opening desk slide or a familiar rack focus, you’ve done visual branding right.
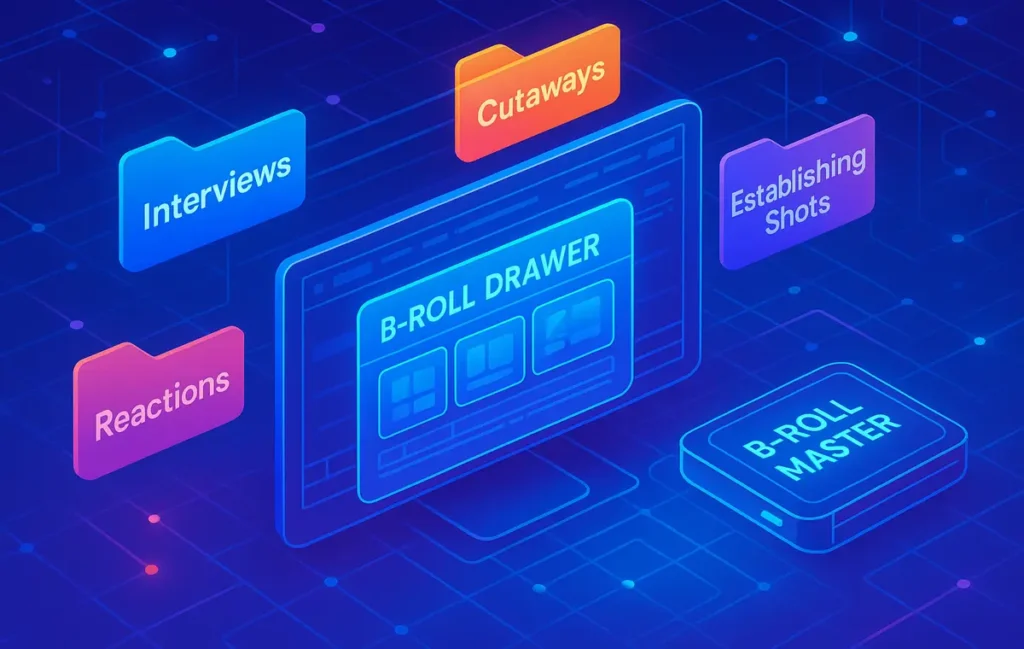
Wire your NLE with reusable sequences: intro bed with animated lower third, transitional wipes with a motion blur preset, and a modular end card with space for product cutaways. Then make a B-roll drawer sequence: a timeline nest filled with your top 100 evergreen clips organized by tag groups. When you edit, open the drawer and drag segments directly—no hunting across bins.
For screens, maintain evergreen flows: a 10–15 second shot of your channel’s analytics, a generic sign-up page sequence, a clean scrolling article. Keep two colorways (light/dark) to match the rest of the edit. For product verticals, prepare seasonal refreshes: swap your plant or desk mat every quarter so the library evolves without changing the core lighting recipe.
Finally, build a motion-overlay kit—animated shapes, subtle grain, light leaks, and swipe accents. Overlaid lightly, they let similar B-roll read as fresh and can tie stock footage to your house look. Document your house LUTs and exposure notes so you or collaborators can match grade quickly.
💡 Nerd Tip: Track “clip fatigue.” If a hero shot appears in 3 uploads in a month, hide it for the next 60 days. Scarcity keeps your visuals feeling fresh.
🧰 Tools to Try in 2025 (What They’re Best At)
NLEs & Editors (tying your library together).
Premiere Pro remains the most universal in team environments, with solid Productions for multi-editor projects and tight integrations for review/approval. Final Cut Pro is absurdly fast on Apple Silicon and shines for solo creators who love magnetic timelines and background renders. DaVinci Resolve offers the cleanest media management + color story in one app; for B-roll systems, Resolve’s Smart Bins and color-consistent pipelines are a gift.
Capture & AI assistance.
Descript is powerful when your videos are talking-head heavy; record, transcribe, and grab screen flows while building searchable libraries. Runway-style generative video can fill abstract transitions and motion backgrounds. Use it to augment, not to misrepresent real products.
DAM & Team Reviews.
Frame.io nails time-coded comments, versions, and quick tag passes at ingest. Iconik is a flexible DAM when you want granular metadata and automated collections across a multi-terabyte library. For small teams, even a Dropbox/Drive + tagging discipline can work—if you commit to naming standards and shared guidelines.
Stock Libraries.
Quality stock catalogs are invaluable for establishing shots you can’t capture weekly. If your channel is location-specific, build a private stock pack: spend one day a quarter filming your city’s landmarks in different weather—your own evergreen stock.
Storage & Transfer.
Think tiered: fast local NVMe for current projects, a RAID or NAS for nearline, and cloud for archival. Add a reliable transfer service for collaborators; large B-roll sets move predictably when you standardize a path (ingest → proxies → edit → conform).
💡 Nerd Tip: If your NLE supports it, export XML + sidecar metadata with your library. You’ll be able to rehome your system if you ever switch editors.
⚡ Build Your B-Roll System Today
Get our ready-to-use tagging dictionary, naming standard, and a template “B-roll Drawer” sequence. Organize once—reuse forever.
🧪 Implementation Playbook: From Zero to Library in 14 Days
Days 1–2: Blueprint your taxonomy.
List your five recurring content pillars and turn each into shot menus. Decide your folder schema, naming standard, and tag dictionary (subject, action, mood, rights). Document it in a one-page “Library README” everyone can follow.
Days 3–6: Batch capture sprint.
Shoot 2–3 sessions focused on your top pillars. Keep lighting consistent and build transitional atoms. Screen-record clean flows for your standard apps and website. Slate each block with a quick white card that includes date and lens to speed later matching.
Day 7: Ingest & proxies.
Dump to your media drive, generate proxies, and apply batch renames to the BNS pattern. Spin up smart bins in your NLE/DAM and set poster frames.
Days 8–10: Tag sprint.
Run a 10-minute per clip tagging rule for your top 150 clips. Prioritize subject, action, mood, and rights. If you’re pressed for time, tag only the 60 “most reusable” clips to create your B-roll drawer.
Days 11–13: Template and overlay kits.
Build intro/outro templates and your motion overlay kit. Create your B-roll drawer sequence and save it in a shared templates folder. Add a short how-to Loom-style walkthrough for future collaborators.
Day 14: Publish with the system.
Edit your next video with the drawer open. Measure the time you spend searching vs. previous edits. Drop learnings into the README for iteration.
💡 Nerd Tip: The 10-minute Weekly Tagging Ritual—every Friday, tag 12 new clips. In a quarter you’ll bank ~140 meticulously labeled pieces of B-roll.
📈 Benchmarks & ROI: What “Good” Looks Like
When teams actually run a B-roll system, the numbers change fast. Editors commonly report 20–35% faster rough cuts because the “find a cutaway” step becomes drag-and-drop. On retention graphs, creators see +8–15% improvement at the 30–90 second marks when they move from static talking head to paced B-roll cadence (a cutaway every 6–10 seconds until the story locks in). For shorts and ads, having pre-tagged product hero shots yields a 2–3× increase in variant velocity—you can ship five creative versions in the time it used to take to render two.
On the cost side, stock substitution vs. reshoot math is simple: if a location day would cost you $300 in time and transit, licensing a $30–$60 establishing clip wins as long as it’s not core to your brand. The real ROI emerges over quarters: your evergreen pack becomes compounding capital—footage that keeps paying you back with every reuse.
💡 Nerd Tip: Track “time-to-first-picture”—minutes from project open to the first 30 seconds of watchable edit. It’s the most honest metric for system health.
🔐 Rights, Safety & Brand Consistency
As your library grows, so do the stakes. Mark every clip with a rights status: owned (you shot it), licensed (stock), UGC (explicit permission + model release), or AI (clearly labeled and never deployed to mislead). Keep a “Receipts” folder with invoices, releases, and license snapshots. When brands or platforms request proof, you’ll answer in minutes instead of days.
Guard your brand consistency the same way you guard audio quality. Document your house LUTs, font and lower thirds, transition styles, and the “do nots” (no rainbow RGB flicker, no AI-generated humans, no off-brand watermarks). Consistency builds recognition; recognition builds trust; trust drives conversion.
💡 Nerd Tip: Put your brand rules in a 2-minute video for collaborators. People remember motion better than PDFs.
🤝 Team Workflow: Async Reviews & Hand-offs
B-roll systems shine when multiple people touch the project. Editors can assemble A-roll while a producer tags yesterday’s captures. Reviewers leave time-coded notes directly on clips (“trim 3 frames,” “use warm variant”), and assistants can pull alt selects from smart bins for variant cuts without derailing the main timeline.
Protect hand-offs with checklists at each gate: ingest (renamed + proxies), tagging (subject/action/mood/rights), sequence (drawer + templates), and delivery (export presets + loudness target). When hand-offs are consistent, velocity scales; your Tuesday upload doesn’t care who did which piece, because the system did the heavy lifting.
💡 Nerd Tip: Create a “Graveyard” bin for almost-good clips. Revisit monthly; half will be gold with a different grade or crop.
🔄 Multiplatform Reuse: Turn One Shoot into Many
Your B-roll library is the backbone of repurposing. That hero macro? It can open a YouTube long-form, animate under text in a LinkedIn clip, and loop behind an Instagram story CTA. Use your drawer to build a platform-native rhythm: tighter crops and faster cuts for Shorts; longer, calmer sequences for tutorials; branded textures for web landing pages. The more you think in motifs, the easier it is to port visuals without reshooting.
When you’re ready to go deeper, plug this system into How to Repurpose Long-Form Video into Short Clips and watch your content velocity jump without sacrificing quality. If you need gear ideas for a starter kit or an upgrade, browse Video Equipment on a Budget. For polish and post tricks that pair perfectly with a solid B-roll bench, see Video Editing Pro Tips for YouTube Creators. All of it ties back to the Video Marketing Toolkit you can adapt to your niche.
💡 Nerd Tip: Build a “Platform pack” folder: overlays, fonts, and safe areas per platform so you don’t reinvent framing every time.
Want More Video Systems Like This?
Join our newsletter for workflow templates, gear picks on a budget, and data-driven editing tactics—curated by NerdChips for serious creators.
100% privacy. No noise. Just practical playbooks that make your next video faster.
🧠 Nerd Verdict
A B-roll system is leverage. It compresses capture time, accelerates edits, and improves retention—without asking you to work longer. The flywheel is simple: batch → tag → reuse → refresh. Over a quarter, you’ll feel the compounding effect: more videos shipped, better pacing, and a recognizable visual brand that audiences trust. NerdChips’ take is straightforward—once you adopt a system, you’ll never go back to the scramble.
❓ FAQ: Nerds Ask, We Answer
💬 Would You Bite?
If you had to pick one change this week, would you start a 10-minute Friday tagging ritual, or schedule a two-hour batch capture to seed your first B-roll drawer?
Crafted by NerdChips for creators and teams who want their best ideas to travel the world.