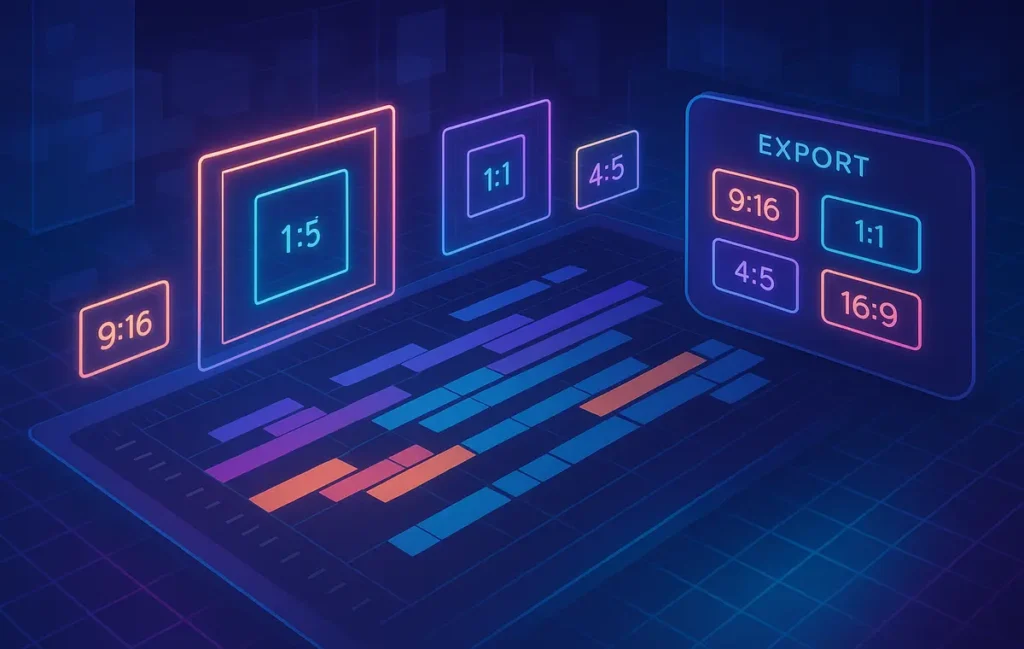
The fastest way to export video in multiple aspect ratios without re-editing is to build one center-safe master timeline and connect it to a preset pack of export profiles (9:16, 1:1, 4:5, 16:9). Instead of duplicating timelines, you batch-export from a single file, using auto-reframe rules and a clear safety grid.
🎯 Why Are You Still Exporting the Same Video Three Times?
If you’re publishing on YouTube, Instagram, TikTok, and Facebook in 2025 and you’re still rebuilding your edit for every platform, you’re quietly burning hours every week. Most creators cut a horizontal timeline, then duplicate it into a vertical version, then try to fudge a square crop later—usually at 1 a.m. when the upload is already late.
The hidden cost isn’t just time. Every time you duplicate a timeline, you invite new mistakes: text goes off-screen, lower-thirds get cut, and important faces drift out of frame in vertical crops. The more you “fix,” the more chaotic your project becomes.
The real solution isn’t “work faster” or “learn more shortcuts.” It’s a different mental model: one master timeline, designed with center-safe framing, connected to a preset pack that does the heavy lifting for multiple aspect ratios automatically.
💡 Nerd Tip: Read this guide with one specific recurring video in mind—like your weekly show or talking-head explainer. Imagining one real project will make each step click 10x faster.
⚡ Quick Summary Box: The Preset Pack Workflow (For Fast Readers)
Here’s the entire workflow at a glance before we go deep:
-
You build one horizontal master timeline and treat it as the “source of truth.”
-
All important action and text live inside a center-safe zone that will survive vertical crops.
-
You design a preset pack: export profiles for 9:16, 1:1, 4:5, and 16:9.
-
Auto-reframe rules and basic motion tracking keep the subject centered per ratio.
-
You hit batch export and let your NLE render every platform format without touching the edit again.
We’ll now turn this from an idea into a repeatable system you can use on every project.
🚨 The Core Problem: Why Editors Waste Hours on Multi-Platform Exports
Most creators don’t have a “workflow problem”; they have a repetition problem. They’re doing the same decisions three different times in three different timelines. That’s why exporting video in multiple aspect ratios without re-editing feels impossible—your current structure forces you to redo everything.
A typical day looks like this:
You cut a 16:9 sequence for YouTube. It looks great. Then you remember TikTok and Reels, so you duplicate the sequence into a 9:16 version. Suddenly, every lower-third is in the wrong place, your captions are too wide, and zoom-ins need to be rebuilt. If you also publish to feeds in 1:1 or 4:5, that’s another manual crop pass. By the time you’re done, this one piece of content has eaten your entire afternoon.
Every extra timeline multiplies small pains:
-
Reframing chaos: Faces are too high or too low, hands get cropped at weird points, and B-roll becomes unusable in vertical.
-
Text and overlay issues: Captions, emojis, progress bars, and logo bugs get cut off because they were designed for horizontal.
-
Safe margin blind spots: Without a clear “do not cross” area, you never quite know what will get chopped off on phones.
The headache shows up in every editor, from Premiere to DaVinci to CapCut Desktop. Beginners especially feel this. When you’re just learning the basics using tools from guides like Best Video Editing Software for Beginners, managing three timelines is like juggling chainsaws.
Some analytics teams estimate creators lose 30–90 minutes per video just to this multi-aspect chaos. Over a month of consistent publishing, that’s days of lost creative time—time that could have gone into better storytelling, stronger hooks, or experimenting with AI tools you discover in lists like Best AI Video Editing Tools Reviewed.
One editor on X summed it up perfectly: “My video didn’t go viral; my timeline did.” The project became a mess of copies and partial fixes instead of a clean system.
🧠 The Mindset Shift: From “Many Timelines” to One Master File
The fix starts with a shift in how you think about your project. Instead of seeing multiple platforms as multiple versions of the same video, you treat them as multiple windows into a single master file.
That master file is usually a horizontal 16:9 timeline. Not because horizontal is “better,” but because it gives you the widest canvas to frame your shots and place your graphics. From that canvas, you carve vertical, square, and 4:5 outputs—without touching the edit.
Here’s what this mindset looks like in practice:
You have one master timeline that never gets duplicated, never gets re-cut, and never gets relaid out. All your storytelling, B-roll placement, music sync, jump cuts, and sound design live there. You only do creative decisions once. Then, your export system—the preset pack—takes over.
Inside that master file, everything important stays in a center-safe layout. You don’t push talking heads to the far left, you don’t hang crucial captions on the edges, and you avoid relying on ultra-wide compositions that will die in vertical. This doesn’t mean your framing is boring; it means it’s planned.
From here, exporting to multiple aspect ratios becomes a technical operation, not a creative rewrite. Your NLE uses auto-reframe or simple position shifts defined in presets. You press export once, go refill your coffee, and come back to four ready-to-upload files.
If you already experimented with workflow improvements from posts like Pro Tips for Faster Video Editing Workflows, this preset mindset is the missing layer that finally makes your exports feel as optimized as your editing.
💡 Nerd Tip: Treat the master timeline like source code—you never manually hack it to fix platform-specific issues. All “platform hacks” live in presets.
🧱 Step-by-Step: Multi-Aspect Setup (Deep Mode)
🎬 Step 1 — Create a Master Timeline with a Center-Safe Layout
Start by creating a 16:9 timeline in your NLE at your target resolution (for most creators, that’s 1920×1080 or 3840×2160). This becomes your master canvas. Before dropping any footage, add a temporary reference layer: a safety grid.
This grid should visually represent the vertical and square crops you’ll need later. Imagine drawing a tall rectangle (9:16) in the center of your 16:9 frame, plus a square (1:1) and a slightly taller rectangle (4:5). Many editors simulate this with transparent color bars or simple shape layers. The point isn’t perfection; it’s having a visual fence that says, “If something is important, keep it in here.”
If you shoot a lot of talking-head content on your phone or camera, this grid will instantly reveal how much you’ve been relying on unsafe edges. That’s why pairing this workflow with good capture habits, like those in guides similar to How to Edit Videos Like a Pro on a Budget, matters so much: better inputs make multi-aspect outputs easier.
Place your subject so that their eyes sit roughly in the top third of the vertical crop, not the horizontal frame. Think in terms of a center column of action. Your subject can shift left or right a little in 16:9, but they should always remain within a vertical-safe band.
Once your grid is in place, start editing as usual. Jump cuts, B-roll, overlays, and animations—all good. Just ask yourself a simple question whenever you add a visual element: “If I cropped this to 9:16, would it still make sense?” If the answer is no, reposition now instead of fixing later.
🧩 Step 2 — Prepare Text and Overlays for Multi-Ratio Survival
Text elements are where most vertical crops go to die. Captions are too wide, titles hug the bottom edge, and CTA banners collide with platform UI like subscribe buttons and player controls.
To avoid this, design your overlays as if they live in a mobile-first world:
-
Use narrower text boxes that sit comfortably inside your vertical-safe column.
-
Avoid ultra-wide headline layouts that stretch from edge to edge in 16:9.
-
Stack elements vertically instead of stretching them horizontally.
In your NLE, group relevant elements—like name tags, social handles, and title cards—into modular overlay layers. These groups are easier to globally reposition in presets later, especially if your app supports linkages or parent-child relationships.
It also helps to assign distinct colors or subtle background shapes to overlays that must always remain fully visible. For example, a semi-transparent rectangle behind subtitles can be sized to match the vertical-safe area. Once you see that rectangle clipped in a draft vertical preview, you immediately know something’s off.
As you refine this structure over a few videos, you effectively build a reusable overlay system. That system will later work hand-in-hand with your preset pack, saving you from the “why is my caption cut off again?” spiral.
💡 Nerd Tip: If you use AI caption tools from lists like AI-Powered Video Editing Tools, keep their output lines short and centered. The less they hug the edges, the more they’ll survive cropping.
📦 Step 3 — Build Your Preset Pack (Premiere / DaVinci / CapCut Desktop)
Now comes the fun part: turning your master timeline into a multi-aspect export machine.
You’re going to create a small library of export presets, one for each ratio you care about most:
-
9:16 — TikTok, Reels, YouTube Shorts
-
1:1 — Instagram feed, some legacy placements
-
4:5 — Facebook feed, Instagram main feed posts
-
16:9 — YouTube and embedded players
Each preset should define:
-
Output resolution and frame rate
-
Aspect ratio and scaling behavior
-
How the original 16:9 image is resized and repositioned
-
Any platform-specific padding or letterboxing choices
This is where the preset approach beats timeline duplication. Instead of manually cropping each shot, you encode your decisions into presets once. After the initial setup, your role becomes “choose the right preset,” not “fix the crop again.”
Here’s a conceptual structure you can follow:
| Preset Name | Aspect Ratio | Resolution | Primary Use |
|---|---|---|---|
| Master_YouTube_16x9 | 16:9 | 1920×1080 | Main channel upload |
| Shorts_TT_9x16 | 9:16 | 1080×1920 | TikTok, Reels, Shorts |
| Feed_Square_1x1 | 1:1 | 1080×1080 | IG feed, promos |
| Feed_Tall_4x5 | 4:5 | 1080×1350 | IG/FB tall feed posts |
The key is consistency. Name your presets clearly. Use the same resolutions across projects. The more standardized this becomes, the less mental energy you spend on technical decisions and the more you can focus on storytelling and monetization.
If you’re on a tighter budget setup and mixing different apps, combining this preset mindset with tips from How to Edit Videos Like a Pro on a Budget will help you get professional outputs even on modest machines.
🎯 Step 4 — Auto-Reframe Rules That Actually Help
Most modern NLEs now offer some form of auto-reframe or smart cropping. Used blindly, these tools can ruin your compositions. Used with a well-designed master timeline, they become powerful assistants.
Think of auto-reframe as a set of rules, not magic:
-
Center weighting: You tell the tool to prioritize what’s near the center of the frame. Since your master timeline already keeps key action in the vertical-safe zone, auto-reframe has an easier job.
-
Face detection and motion tracking: Enable these where available so the crop subtly follows your subject’s head instead of randomly drifting.
-
Speed settings: Slower, smoother reframes often look more professional. If every crop aggressively snaps left and right, it screams “automatic.”
Some creators report that once they aligned their master timeline to a clear safety grid, auto-reframe tools went from “unusable” to “80–90% correct by default.” That last 10–20% can be handled via manual tweaks on particularly tricky shots, but it’s now the exception, not the rule.
💡 Nerd Tip: Auto tools are strongest when your layout is predictable. The more chaos you cram into the edges of your frame, the more likely AI reframing will make strange decisions.
🚀 Step 5 — Batch Export (Zero Re-Edits, Just Presets)
At this point, you’ve done the hard thinking. Your master timeline is centered and safe; your overlays are built to survive vertical and square crops; your preset pack defines how each platform version should look. Now you flip the switch.
Instead of exporting video multiple aspect ratios with manual re-editing, you simply queue multiple exports of the same timeline using different presets. Your NLE might call this a render queue, a batch list, or a delivery page. Functionally, it’s the same: one file, many outputs.
A typical batch could be:
-
ProjectName_16x9_Master.mp4 -
ProjectName_9x16_TT_Reels_Shorts.mp4 -
ProjectName_1x1_IG_Feed.mp4 -
ProjectName_4x5_Tall_Feed.mp4
While your system renders, you can draft captions, design thumbnails, or plan your next piece. If you’ve already explored efficient tools in posts like Best AI Video Editing Tools Reviewed, this is a perfect time to let AI help with descriptions and title ideas while your machine does the mechanical work.
The first time you do this, it will feel almost suspiciously easy. But this is exactly the point of a preset-driven workflow: your future self is no longer paying the interest on past, chaotic decisions.
⚡ Ready to Build Smarter Preset Workflows?
Once your master timeline is clean, the right tools can handle the boring part. Pair this preset system with AI-friendly editors to turn one edit into a full cross-platform campaign.
🧬 Template Section: Your Downloadable Preset Pack (In Text Form)
You don’t need a fancy download to start. You just need a clear structure you can rebuild in your own tools.
✅ Master Timeline Requirements Checklist
-
Timeline resolution: 1920×1080 or 3840×2160, 16:9
-
Visual safety grid: temporary guides for 9:16, 1:1, 4:5
-
Subject’s eyes: always inside the future 9:16 center slice
-
Captions: centered, short lines, never hugging extreme edges
-
Key overlays (CTAs, logos): grouped into modular layers
-
No crucial information in the outer 10–15% of the horizontal frame
📐 Reframe Safety Grid (Conceptual)
Imagine three nested boxes:
-
Inner tallest box: your future 9:16 crop.
-
Middle box: your 4:5 crop.
-
Square box: your 1:1 crop.
Anything inside the tallest box is absolute priority. Anything between that and the square box should be “nice but not essential.” Anything outside the square box should be pure background or B-roll texture.
🧾 Export Batch Script (Workflow in Plain Language)
-
Open master project and verify center-safe layout.
-
Make sure all overlays sit inside the safety grid.
-
Add master timeline to export queue with 16:9 preset.
-
Add the same timeline again with 9:16 preset.
-
Add the same timeline with 1:1 preset.
-
Add the same timeline with 4:5 preset.
-
Start batch export and let it render.
-
Upload to each platform using the file best suited to that placement.
🌐 Cross-Platform Ratio Matrix (Think Like a Distributor)
-
16:9 → YouTube long form, education, webinars
-
9:16 → Shorts, Reels, TikTok discovery content
-
1:1 → Feed posts, carousels, static-heavy content
-
4:5 → Scrolling feeds where vertical real estate matters but full 9:16 isn’t supported
💡 Nerd Tip: Designing with this matrix in mind makes your content library look more intentional and helps NerdChips-style brands feel consistent across every surface your audience sees.
🛠 Tool-Specific Mini Guides (Premiere, DaVinci, CapCut Desktop)
🎞 Adobe Premiere Pro — Sequences, Presets, Auto Reframe
In Premiere, your first building block is the sequence. Create a 16:9 sequence at your chosen resolution, then add a transparent reference layer with your safety grid. You can use simple shape layers or existing safe margin guides, as long as they remind you where vertical and square crops will land.
Once the timeline is set, cut your video normally. When you’re ready to export, open the export window and save a custom preset for each ratio. For 9:16, you’ll invert the dimensions (1080×1920), choose “Scale to Fill” or “Scale to Fit” depending on your preference, and enable any smart reframing behaviors you like. Save this as a named preset and repeat for 1:1 and 4:5.
Premiere’s Auto Reframe can be applied at sequence level to generate vertical versions, but in this preset workflow, you often get better results by using it as a helper, not a separate sequence generator. The idea is: your sequence remains the master, and the preset handles how that master is cropped and scaled at render time.
If you’re still learning your way around the interface, pairing this with resources like Best Video Editing Software for Beginners can soften the learning curve while you gain confidence.
🎬 DaVinci Resolve — Timeline Scaling and Deliver Page Presets
In DaVinci Resolve, the magic happens in two places: timeline settings and the Deliver page.
Start with a 16:9 timeline and add your usual edits. In Project Settings → Image Scaling, define how the system should scale images by default when changing outputs. Setting this up once ensures you don’t have to rethink it every time you export a new ratio.
On the Deliver page, you’ll design render presets for your different aspect ratios. Resolve allows you to choose a custom resolution per job, so you can keep your timeline as 16:9 while outputting 9:16, 1:1, or 4:5. The key is to test each preset once, check that the important content is framed correctly, and then save those settings under clear names.
For particularly important shots, you can keyframe the “Position” values on the Edit page to keep the subject centered across aspect ratios. But thanks to your safety grid and master layout, you’ll only need this on a minority of clips—usually wide shots or complex B-roll composites.
🎥 CapCut Desktop — Preset Save Tricks and Dynamic Crops
CapCut Desktop has quietly grown into a surprisingly powerful editor for creators who want speed without a heavy learning curve. It’s especially friendly if you came from mobile-first editing.
You’ll still create a 16:9 master timeline, but you can use CapCut’s project templates and overlays to simulate your safety grid. Keep your talking head and key captions inside the central band you know will survive a vertical crop.
CapCut lets you set different canvas sizes and save project settings, but for our preset pack workflow, think in terms of: one master project, multiple export settings. Duplicate the export behavior by saving presets for each aspect ratio and bit rate. For vertical formats, you can use CapCut’s smart cropping or manually define how the frame should be repositioned.
This is where a guide like Pro Tips for Faster Video Editing Workflows really syncs with CapCut: once you have templates and presets combined, a lot of your work becomes drag, drop, adjust, export.
💡 Nerd Tip: If you’re switching between tools—say, DaVinci for color and CapCut for speed—keep your preset names and resolutions identical across apps. This is how small teams operate like studios.
🩹 Micro-Troubleshooting: Fixing the Most Common Multi-Ratio Issues
Even with a great preset pack, a few problems will keep popping up. The goal isn’t to eliminate every edge case, but to recognize patterns early and build gentle guardrails.
Text getting cut off at the top or bottom usually means your safety grid didn’t extend far enough into the vertical crop. Move subtitles slightly higher than you think is necessary in 16:9 and keep CTA banners away from the very bottom, where platform UI often overlaps. After a few projects, you’ll build your own mental “no-go zones.”
Subjects drifting out-of-frame in 9:16 is often a side effect of relying on ultra-wide compositions. When reviewing your master timeline, pause on wide shots and ask, “If I punch in, is the subject still sharp enough?” If yes, consider pre-framing these shots a bit tighter so the auto-reframe tool has less guesswork to do.
Blurry exports tend to come from double-scaling: for instance, exporting a 720p clip to 1080×1920 while your original footage was already heavily cropped. Stick to a single upscale at export time and keep your original footage as high-resolution as your gear allows. If you’re editing on a modest laptop, the strategies in How to Edit Videos Like a Pro on a Budget can help balance quality and performance.
Compression mismatch between platforms is inevitable—each platform has its own pipeline. Aim slightly higher with your export bitrate than the minimum recommendations, but not so high that file sizes become unwieldy. Once you’ve tested a handful of videos, lock in a bitrate that consistently looks good on phones, where most of your 9:16 content will be consumed.
💡 Nerd Tip: Keep a tiny “troubleshooting log” per project. Every time something goes wrong, add a one-line note. In a few weeks, you’ll see patterns you can solve at template level instead of fighting fires per video.
🟢 Eric’s Note
I gravitate to workflows that make content feel light again—where the tool disappears and you’re just telling stories. If this preset system lets you publish more without dreading your timeline, then it’s doing its job.
Want More Workflow Frameworks Like This?
Join the free NerdChips newsletter and get weekly breakdowns of creator workflows, AI helpers, and video marketing systems—so you publish more without burning out on your timeline.
100% privacy. No spam. Just battle-tested content systems for modern creators.
🧠 Nerd Verdict: Why Presets Beat Re-Edits Every Time
Most creators think they have an editing speed problem. In reality, they have a structure problem. As long as your project is built on duplicate timelines and last-minute crop fixes, no shortcut or plugin will make you truly fast.
The preset pack workflow flips that script. One careful, center-safe master design becomes the engine that powers every platform version you need. Instead of opening old projects with a knot in your stomach, you start trusting your setup: apply the right preset, queue the renders, move on.
Over dozens or hundreds of videos, this difference is huge. A creator who spends an extra 45 minutes per video on manual multi-aspect edits loses weeks every year. A creator who builds a preset system once and improves it in small iterations wins those weeks back for strategizing, testing new formats, or deep-diving into optimization guides like Pro Tips for Faster Video Editing Workflows.
In the long run, this isn’t just about efficiency. It’s about creative headroom. When the boring parts are automated, you have more mental space for better hooks, sharper storytelling, and smarter offers. That’s where NerdChips-style brands actually grow.
❓ FAQ: Nerds Ask, We Answer
💬 Would You Bite?
If you could export every video in four formats with one click, how many more pieces would you actually publish each week—and what would that consistency do for your channel a year from now? 👇
Crafted by NerdChips for creators and teams who want their best ideas to travel the world.