🎥 Intro:
You don’t need a $3,000 rig to deliver a silky, stable stream. You need the right encoder settings, lightweight scenes, clean audio, and a network that behaves under pressure. The secret is designing your pipeline from capture to encode to upload so the heavy lifting happens where your hardware is strongest. In 2025, that often means leaning on modern GPU encoders, right-sizing your canvas and output, and building scenes that look fantastic without choking your RAM or CPU. If you’re new to broadcasting, you can also layer these tips with a step-by-step walkthrough in our Twitch streaming guide; this article goes deeper on optimization for mid-range machines, not beginner basics.
As a working definition, “mid-range” here means a 6-core Ryzen 5 or Intel i5 paired with a mainstream GPU like an RTX 2060/3060-class card—or even modern integrated graphics if you prioritize efficiency over eye-candy. If your gaming budget lives closer to the value tier, the build ideas in our sub-$800 setup map cleanly to the settings in this guide. Lighting and audio matter as much as pixels; we’ll reference practical upgrades from smart lighting for streamers and a no-nonsense microphone shortlist so you invest where the audience actually feels it. As always, we’ll keep the tone pragmatic and brand-honest; this is NerdChips, not a parts catalog.
💡 Nerd Tip: Open OBS while you read. After every section, make one change and run a 60-second local recording to validate stability before you touch your live profile.
🧰 What Counts as “Mid-Range Gear” in 2025?
A mid-range streaming PC in 2025 is defined less by raw teraflops and more by where the bottleneck moves under load. For most creators, the GPU has headroom when the CPU is juggling game logic, browser tabs, chat overlays, and audio filters. That’s why hardware encoders like NVENC and AV1 shine: they offload the encode from the CPU and free your frames. With a Ryzen 5/i5 and a 2060/3060-class GPU, you can comfortably target 720p60 or 1080p30, and push to 1080p60 only when the game is light and scenes are lean. Integrated graphics can absolutely stream—especially with AV1 on newer iGPUs—but your tuning window is narrower, so every scene asset must earn its place.
RAM discipline is underrated. Moving from 8GB to 16GB often eliminates mid-stream stutters when you tab, open a browser source, or switch to a scene with media. The effect isn’t theoretical; countless user reports show usage spikes during transitions that force Windows to page memory to disk. That’s a guaranteed hitch your viewers will notice. If you run Chrome-heavy workflows—music control, VOD dashboards, cloud chat widgets—16GB is the new baseline. Storage also contributes to smoothness: OBS recording to a slow, near-full HDD invites frame drops; an SSD with at least 20% free space stabilizes writes, especially with MKV containers.
On cameras, a modern USB webcam with decent low-light performance paired with a soft key light looks better than a mirrorless with bad lighting. The physics are simple: sensors love photons. A mirrorless plus capture card is wonderful if you can afford it, but a $60 LED panel placed at 45° and diffused will produce an immediate, share-worthy upgrade. If you ever decide to step up to a dedicated camera, don’t blow the budget on premium capture hardware; mid-tier UVC-compatible cards have matured and hold sync reliably when the rest of your pipeline is sane.
💡 Nerd Tip: Before buying anything, lock your lighting. Poor light makes expensive cameras look cheap; good light makes cheap cameras look expensive.
🪄 The 3-Layer Optimization Model
The clearest way to tune a mid-range setup is to optimize in layers that don’t fight each other. Think of your stack as three cooperating systems: encoding, scenes, and network. If you lock each one independently, their interactions stay predictable during high-motion gameplay or rapid scene changes.
Layer 1: Encoding & OBS. Choose the encoder that takes pressure off your weakest component. On a 6-core CPU, x264 can look great at “veryfast” or “faster,” but it will compete with your game for cycles. NVENC (H.264) on RTX cards gives you “free” quality from the GPU’s dedicated encoder and typically lowers CPU usage by double-digit percentages. AV1 is more efficient at the same bitrate, which means cleaner edges and finer detail, but you must confirm your platform and viewers support it. In practice, mid-range rigs thrive on GPU encoding, leaving the CPU to handle game logic and filters.
Layer 2: Scene Load & Assets. Scenes are silent CPU and RAM taxes. Animated overlays, browser sources, and high-resolution media eat memory and wake the CPU every frame. A lean scene with pre-baked animations (converted to optimized WebM), static PNG assets, and consolidations into fewer browser sources stabilizes performance. Avoid stacking multiple browser widgets that refresh independently; merge them into a single HTML dock where possible or render static versions.
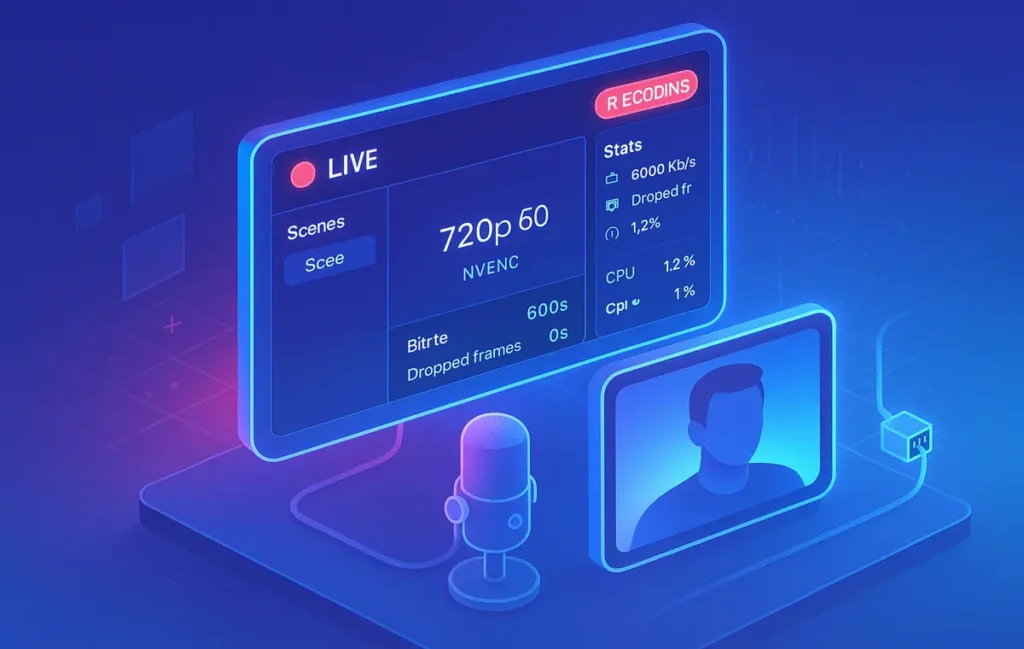
Layer 3: Network Stability. Your upload path is the last mile. Bitrate targets must reflect real-world headroom, not your ISP’s marketing sheet. If your speed test reads 12 Mbps up, do not stream at 9 Mbps; leave room for overhead, spikes, and background tasks. Stability beats peak. For most mid-range systems, 3,000–6,000 kbps for 720p60 or 1080p30 offers the best blend of motion clarity and safety on common platforms. YouTube tolerates higher bitrates; Twitch norms are more conservative. The point is not to chase maximum numbers but to hold a stable line free of drops.
💡 Nerd Tip: Change one layer at a time and keep notes. If you tweak encoder, scenes, and bitrate in the same session, you won’t know who fixed—or broke—what.
🧩 Best OBS Settings for Mid-Range PCs (Tested)
Start with your base canvas at your monitor resolution and set output (scaled) to match your target stream resolution. Scaling from 1080p to 720p consumes some GPU, but with NVENC this load is modest and the stability gain can be significant. A lot of mid-range rigs run best at 720p60 for high-motion games; for slower titles or “just chatting,” 1080p30 keeps text crisp with lower motion demands. If your card has modern NVENC or AV1, set the hardware encoder and choose a quality-oriented preset; these presets balance rate control without maxing the GPU.
Rate control should be CBR for most platforms, with a bitrate that reflects your worst-case evening bandwidth. If your connection sometimes sags, a slightly lower, steadier bitrate will outperform an ambitious, fluctuating target. The profile, preset, and B-frames fields confuse many creators; here’s the plain-English read. The profile governs how complex the H.264 or AV1 features can be; “high” is a safe default for H.264 streams, while AV1 exposes efficiency at similar bitrates with modern decoders. Preset is a quality-vs-speed trade; the “quality” or “p5/p6” tiers on NVENC/AV1 often hit the sweet spot for mid-range GPUs. B-frames improve compression at the cost of latency and decoder work; two is a stable default for H.264 streaming, and some AV1 pipelines can push higher. If your VOD shows micro-stutter after scene switches, reduce B-frames before you blame the network.
Audio has to be deliberate. A single, clean mic chain with a gentle high-pass filter, subtle compression, and a limiter at −1 dBFS keeps your voice present without pumping. Run game audio a few dB below voice so chat never fights to hear you. If you route music, use a separate application capture with ducking to maintain intelligibility during hype moments. The fastest perceived quality win in any mid-range setup is voice clarity; your GPU can’t fix muddy mids.
💡 Nerd Tip: Always record locally while you stream. The OBS Stats panel tells you if drops are from render lag (GPU/scene), encode overload (CPU/GPU), or network. Fix the right problem first.
🎛️ Scene Design: Beautiful Without the Bloat
Scenes should communicate identity and information with the least moving parts possible. Replace GIF overlays with optimized WebM. Consolidate multiple social tickers into one composited element. Pre-render animated stingers to fixed frame rates that match your output, and keep durations tight. Browser sources are deceptively heavy; each one runs its own mini-engine. If you use chat, alerts, and now-playing widgets, combine them in one web page and expose only the region you need in OBS.
Your camera chain benefits massively from good lighting. A soft LED key light at 45° with a reflector or second fill light eliminates noise that your encoder would otherwise waste bits on. If your webcam looks grainy, raise light intensity before you consider a camera upgrade. Many streamers report that a $60 light bar and a $20 diffuser transformed their “potato” webcam into something subscribers complimented. When you’re ready for a camera jump, mid-tier capture cards have matured; verify UVC support and HDCP handling, and you’ll avoid sync headaches that used to plague budget gear.
Text overlays need accessible sizes at 720p. A rule of thumb is to test on a phone in portrait; if your event feed or lower third is unreadable on mobile, it’s too small. Keep fonts simple and weights bold enough to resist motion blur. Transparent drop shadows are your friend at lower bitrates. Above all, remember that viewers came for you and your gameplay or topic; overlays are accents, not the show.
💡 Nerd Tip: Keep one “Performance Scene” with only your game capture, voice, and a tiny cam box. If FPS tanks mid-stream, switch to it and recover instantly.
🌐 Network Tuning That Holds Under Pressure
The smoothest stream dies if your upload path falters. Ethernet beats Wi-Fi every day of the week, not just on speed tests but on jitter—the tiny timing variations that make video look uneven. If running a cable is impossible, mesh systems with a dedicated backhaul are the only Wi-Fi setups we’d consider for streaming rooms. Even then, set realistic bitrates and keep your environment quiet; smart TVs, cloud backups, and game updates will happily borrow your upstream.
Your bitrate should leave at least one-third headroom above typical real-time usage. If evenings drop your upload from 15 Mbps to 9 Mbps, stream around 5–6 Mbps and let the encoder work smarter instead of harder. Keyframe intervals of two seconds remain a common platform expectation, and audio at 160 kbps stereo lands a nice balance of presence without extra strain. If your ISP allows, request upstream QoS on your streaming machine’s MAC address; giving OBS traffic a priority tag reduces spikes during household usage.
Streaming platforms treat ingestion differently. Some auto-adjust for you when your connection wobbles; others prefer you hold a consistent line and will punish volatility with dropped frames. The safe play is to test at your target hour for ten minutes to the platform’s test server or a private channel while watching OBS’s network stats. You are looking for a steady “dropped frames due to network” of zero; a handful over ten minutes is okay, but persistent percentages demand a bitrate step down.
💡 Nerd Tip: Never trust a single speed test. Run three, at different times. Set your bitrate to the lowest sustained result minus safety margin, not the highest spike.
🧪 Smart Gear Upgrades That Actually Move the Needle
The cheapest path to perceived quality is audio. A $60–$100 USB mic with a decent cardioid capsule will beat any built-in webcam mic by an embarrassing margin. If you’re picking a model, skim our microphone guide for podcasters and video creators for options that don’t need a mixer or an audio interface. Add a pop filter, place it 6–8 inches from your mouth, and you’ve solved half of what viewers complain about.
Lighting is the next multiplier. One soft key light on a boom arm, positioned above and to the side, will let you lower camera gain and ISO, reducing noise that encoders hate. That’s why we built a practical explainer on smart lighting for streamers—not just brand names, but placement that flatters and frees bits for motion. When the budget permits, a second fill or a compact practical light in the background gives depth without CPU cost.
If you need to bring a console or a second PC into the mix, resist the urge to overspend on capture. Many mid-price UVC capture cards behave beautifully at 1080p60 when paired with sane scenes. What matters is driver stability and heat management; mount the card where airflow exists and don’t stack it under a laptop exhaust. For a broader look at creator-friendly add-ons—arms, hubs, foot pedals—our gadget picks for content creators curate gear that keeps bottlenecks away from your CPU and upload.
💡 Nerd Tip: Upgrade order for most mids: mic → key light → GPU encoder switch (if you’re still on x264) → capture (only if your content needs it).
🧰 Free Tools That Keep You Smooth
You don’t need a paid suite to keep streams stable. OBS’s Stats panel is a gold mine: watch “render delay,” “encoding lag,” and “network” separately to diagnose which layer failed. A lightweight network jitter monitor helps explain why a perfect speed test still produces drops; you’re chasing variance, not just throughput. Heat creates phantom problems—thermal throttling masquerades as random stutter—so a background tray app that warns when your CPU or GPU cross thermal limits can save your show.
RTMP test services and “record locally while streaming” workflows let you validate settings without risking a live audience. The simple practice of running a 60-second local record after any major change will catch 90% of regressions. Keep a written changelog: date, what changed, what improved, what regressed. Future-you will thank you when a perfect setup mysteriously breaks after a driver update.
💡 Nerd Tip: After Windows updates, always re-open OBS and run a quick test. Power plans and GPU drivers sometimes flip toggles you didn’t know existed.
⚡ Ready to Build Smarter Workflows?
Explore AI workflow builders and creator-friendly automations that offload busywork, so you can focus on streaming. Ship more with less friction.
🧯 Fixing the Most Common Mid-Range Stream Problems
Dropped frames have three usual culprits: encoder overload, GPU render lag, or network congestion. If OBS flags encoding lag, shift from x264 to NVENC/AV1 or relax your preset one notch. If render lag climbs during scene changes, your overlays are too heavy; prune browser sources, reduce animation complexity, or switch to your “Performance Scene.” When the network counter climbs, step your bitrate down and verify nothing else on your LAN is bursting upstream.
Audio-video desync often traces back to capture chains and filters. If your mic runs through USB with filters and your camera is HDMI via capture, one can drift relative to the other. Use OBS’s sync offset feature only after you’ve eliminated CPU spikes; offsets glued to a spiky system won’t hold. Stutter when tabbing into games points to GPU scheduling; enable game capture over display capture where possible, cap your in-game FPS, and keep your output at a consistent frame rate to avoid timing fights.
Webcam grain is a lighting problem nine times out of ten. Lift the key light, bounce it off a wall or diffuser, and lower camera gain. If you must stream in a dark space, accept that 720p60 will compress better than a noisy 1080p at the same bitrate. The goal is not a spec trophy but a clean, readable picture that flatters motion and faces.
💡 Nerd Tip: When in doubt, halve complexity. One fewer browser source, one less animated overlay, one notch lower bitrate—stability returns shockingly fast.
☁️ When to Use Cloud Streaming as a Backup
Cloud gaming and cloud PCs can rescue an under-spec’ed rig, especially for travel or temporary setups. If your local machine can’t both play and encode, offload the game to a service and capture the output like a remote HDMI source. The tradeoff is latency and image consistency; you’re at the mercy of two networks now—yours and the provider’s. For chatting, indie titles, and retro streams, the experience can be indistinguishable from local. For competitive shooters, latency is a harder sell unless your region has excellent edge nodes.
Treat cloud as a fallback, not a first line. Keep your local OBS setup identical, swap in the cloud feed when needed, and test audio routing ahead of time. If the cloud path becomes your primary, revisit bitrates; some services introduce micro-variations in frame pacing that look fine at 30 fps but jitter at 60. Your goal remains the same: predictable delivery with minimal moving parts.
💡 Nerd Tip: Put your cloud scene right next to your Performance Scene in OBS. If the game PC chokes, two hotkeys move you to safety.
✅ Pre-Stream Stability Checklist (Print This)
| Step | Why It Matters | How to Validate in 30 Seconds |
|---|---|---|
| Close Chrome & background updaters | Prevents random CPU/GPU spikes | Task Manager → CPU/GPU under 20% idle |
| Switch to Ethernet | Kills Wi-Fi jitter & packet loss | OBS Stats → 0% network drops in test |
| Cap in-game FPS | Leaves headroom for the encoder | Frame time graph stable; fewer spikes |
| Set 720p60 or 1080p30 | Matches bitrate & motion needs | 60-sec local record looks clean |
| Lock bitrate to safe value | Prevents drops during peak hours | Run 1-min private stream; watch OBS network |
| Audio routing sanity check | Fixes “no game audio” disasters | Meter moves for mic & game; monitor on |
| Scene stress test | Finds heavy overlays before live | Cycle all scenes; watch render lag |
| Thermals under control | Avoids sudden throttling | GPU/CPU <80–85°C; fans behave |
💡 Nerd Tip: Save this as a sticky in your streaming profile. When something feels off, the culprit is almost always on this list.
🧩 Putting It All Together (Your 60-Minute Stability Sprint)
Start by selecting your output: 720p60 for motion-heavy streams, 1080p30 for slower content. Switch OBS to NVENC or AV1 if available, pick a quality-oriented preset, and set CBR at a bitrate that survived your worst evening test with room to spare. Open your heaviest scene and remove any overlay that doesn’t directly add brand or information; convert remaining animations to optimized WebM and consolidate browser sources. Cap in-game FPS to a value your GPU can uphold while the encoder runs, and test a 60-second local recording while cycling scenes.
Next, fix audio so your voice sits on top of the mix. Use a single mic with a gentle high-pass, compressor, and limiter. If you’re running barebones audio, consider upgrading with a pick from our creator mic guide; the upgrade-per-dollar is unmatched. Finally, secure your network: switch to Ethernet, reduce background uploads, and set your bitrate conservatively. If your room is dim, apply a fast win from our smart lighting explainer and watch your webcam clean up instantly. If you want a broader gear roadmap that still respects budgets, the curation in top creator gadgets keeps you aligned with stability, not specs for specs’ sake.
For game-first streams, integrate tactics from stream to Twitch like a pro to tighten engagement loops—chat prompts, scene stingers, timing—without adding heavy sources. And if your PC itself is due for attention, the logic from our $800 build maps directly to the encoder choices you’ve just made.
💡 Nerd Tip: Treat your stream profile as code. Version it: Profile-A (1080p30 quality), Profile-B (720p60 performance). Switch intentionally based on the game.
📬 Want More Smart Streaming Tweaks?
Join our free newsletter for weekly, field-tested tips on OBS, audio chains, scene design, and creator workflows—curated by NerdChips.
🔐 100% privacy. No noise. Just value-packed creator ops from NerdChips.
🧠 Nerd Verdict
Polish starts with restraint. The nicest streams on mid-range gear are built on encoders that respect your CPU, scenes that do more with less, and a bitrate that your network can defend on a busy evening. Chasing “max settings” makes for great screenshots and terrible live shows. If you invest in audio first, fix lighting second, and let GPU encoders do their job, your stream will feel premium long before your rig gets an expensive refresh. NerdChips’ north star has always been practical quality—decisions your viewers can hear and see tonight.
💡 Nerd Tip: Rehearse your recovery path. Two hotkeys—one to the Performance Scene, one to a “Be Right Back” card—are worth more than any single upgrade when a live problem hits.
❓ FAQ: Nerds Ask, We Answer
💬 Would You Bite?
What will you switch first for your next stream—encoder, scene weight, or bitrate—and what one-minute test will you run to prove it worked?
Crafted by NerdChips for creators and teams who want their best ideas to travel the world.